The biggest challenge in the film photography world is not developing C41 film, mixing your own developers, or even getting the perfect darkroom print with custom dodge and burn tools. All those things can be challenging in their own way, but by far, the single biggest challenge in the entire world of film photography is getting a good scan of a single Polaroid.
So we here at LearnFilm.Photography set out to discover the greatest method that would reliably (and quickly) scan perfect Polaroid images. We needed a method that would solve the three biggest issues with getting the perfect scan:
- Keeping the Polaroid flat
- Removing any glare from the ridiculously reflective plastic sheet
- Maintaining the details around the Polaroid border.
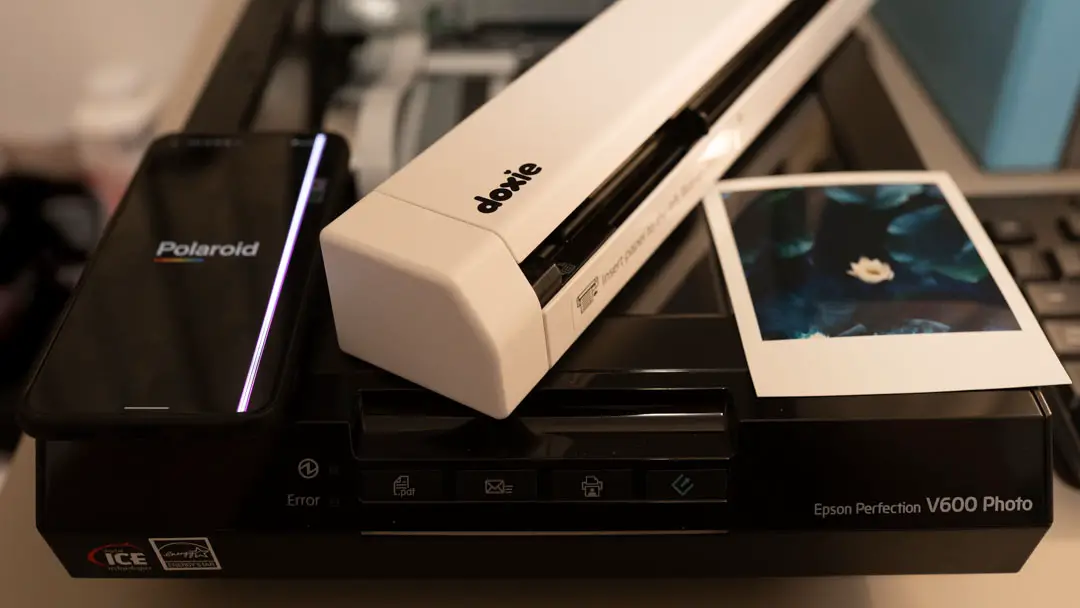
To do that, we tested four different methods of scanning that have been outlined across a number of blogs, including the Polaroid website itself. We tested a Doxie GO SE portable sheet scanner, an Epson V600 flatbed film scanner, the Polaroid scanning app, and a DSLR scanning setup.
Here’s what we found:
The highest-quality Polaroid and Fuji Instax scans came from DSLR scanning underneath a desk to remove any glare. However, the most reliable method of scanning Polaroids was using the Epson V600 flatbed scanner with a piece of Museum glass to remove Newton rings — even if the image quality isn’t as good.
Let’s start this review with the methods that didn’t work as well, and then I’ll show you my ridiculous method for scanning Polaroids with a DSLR.
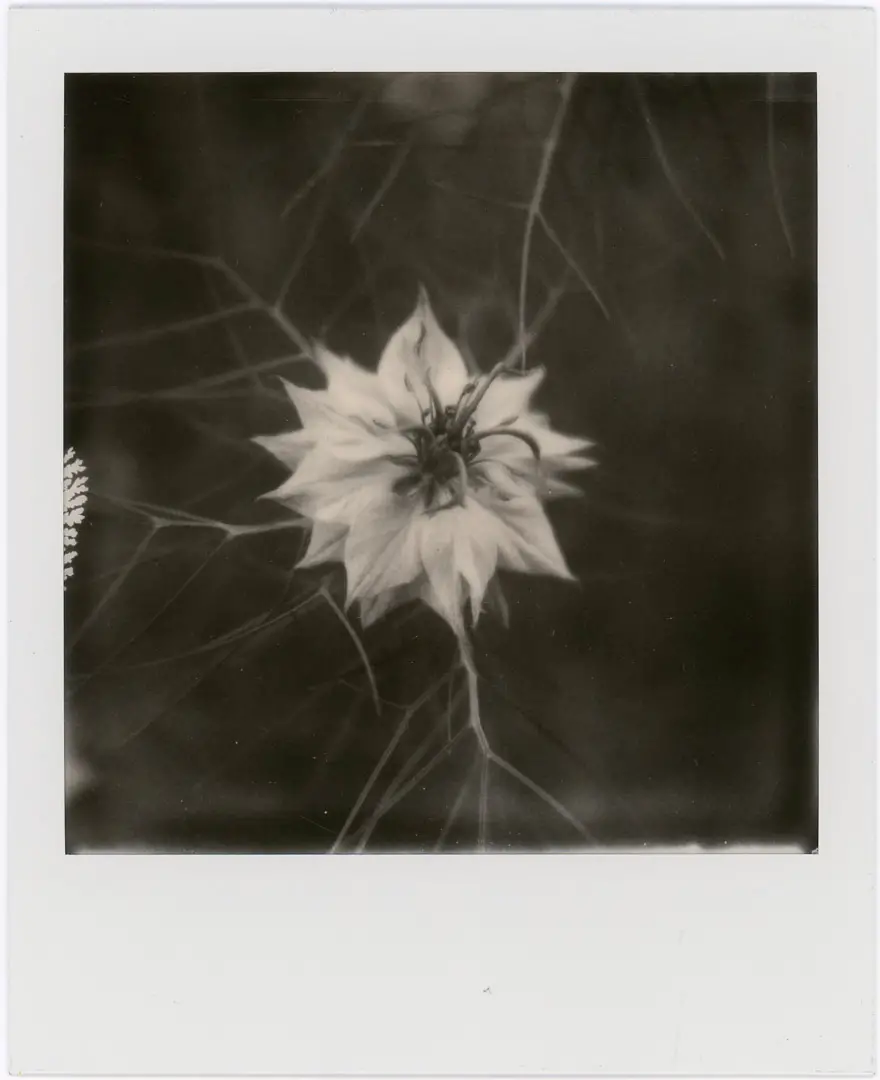
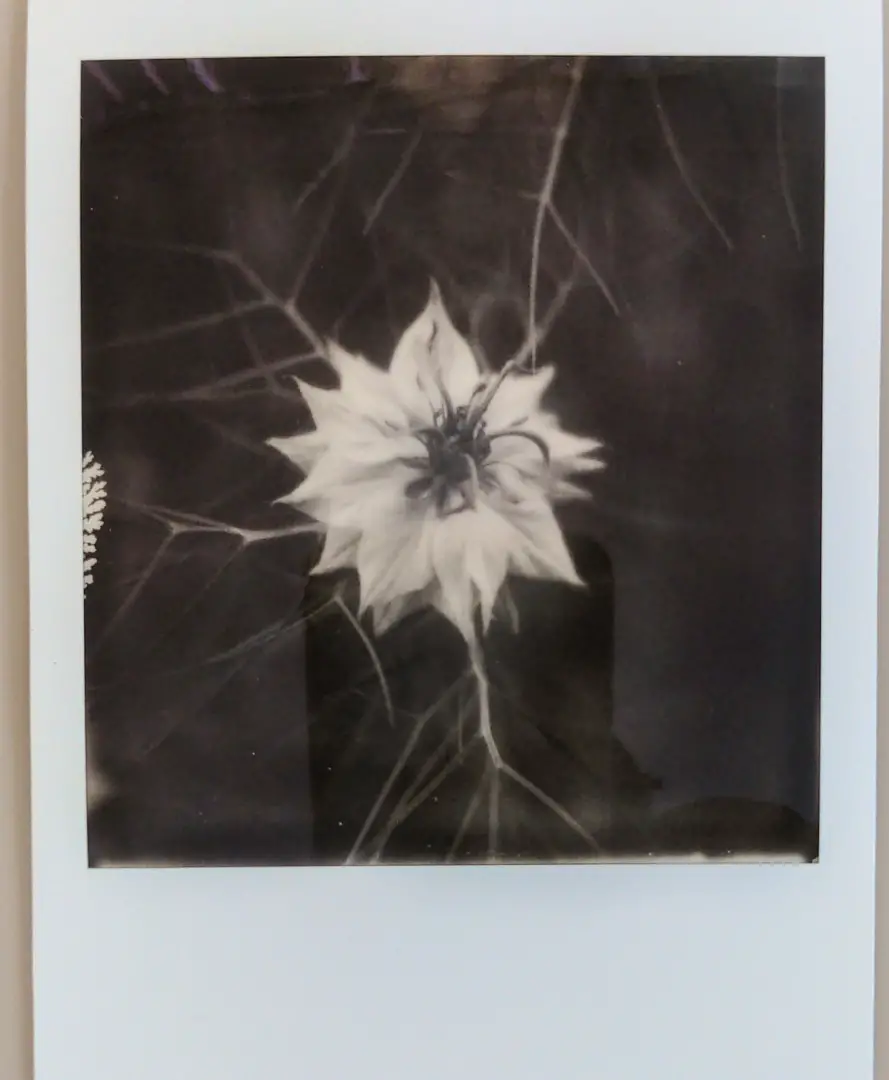
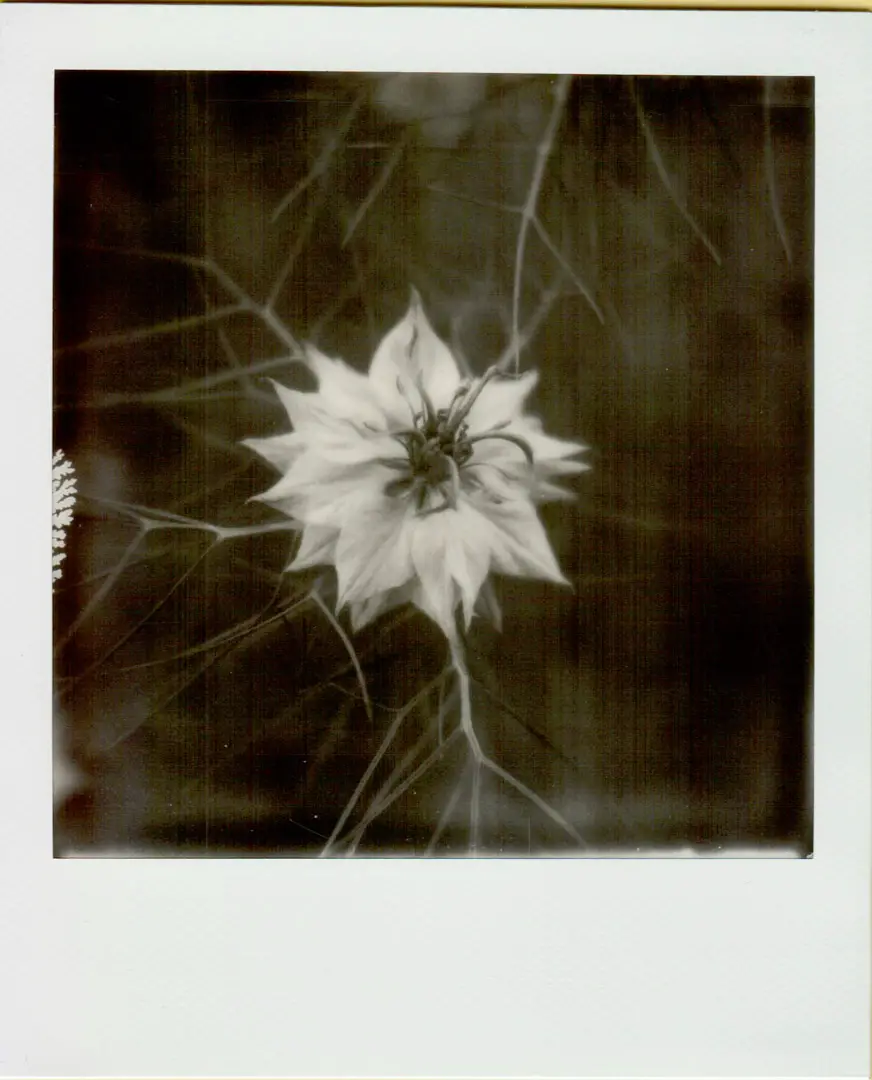
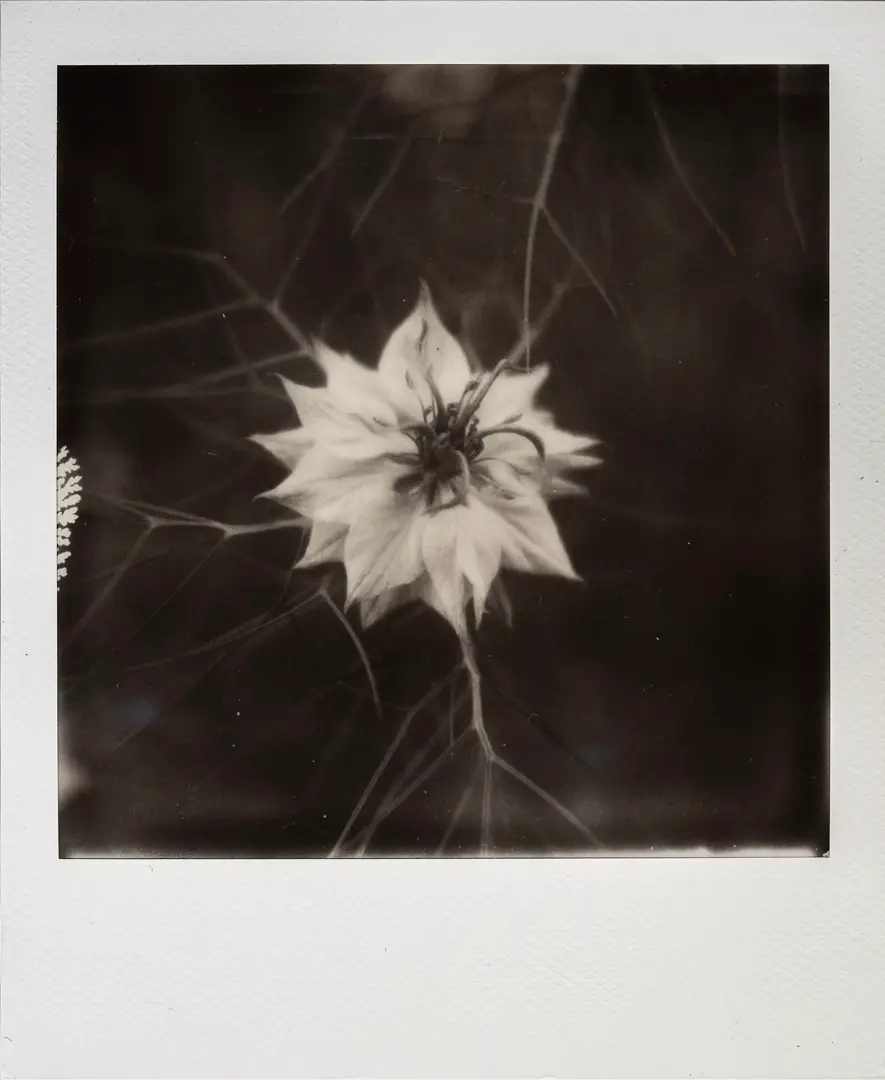
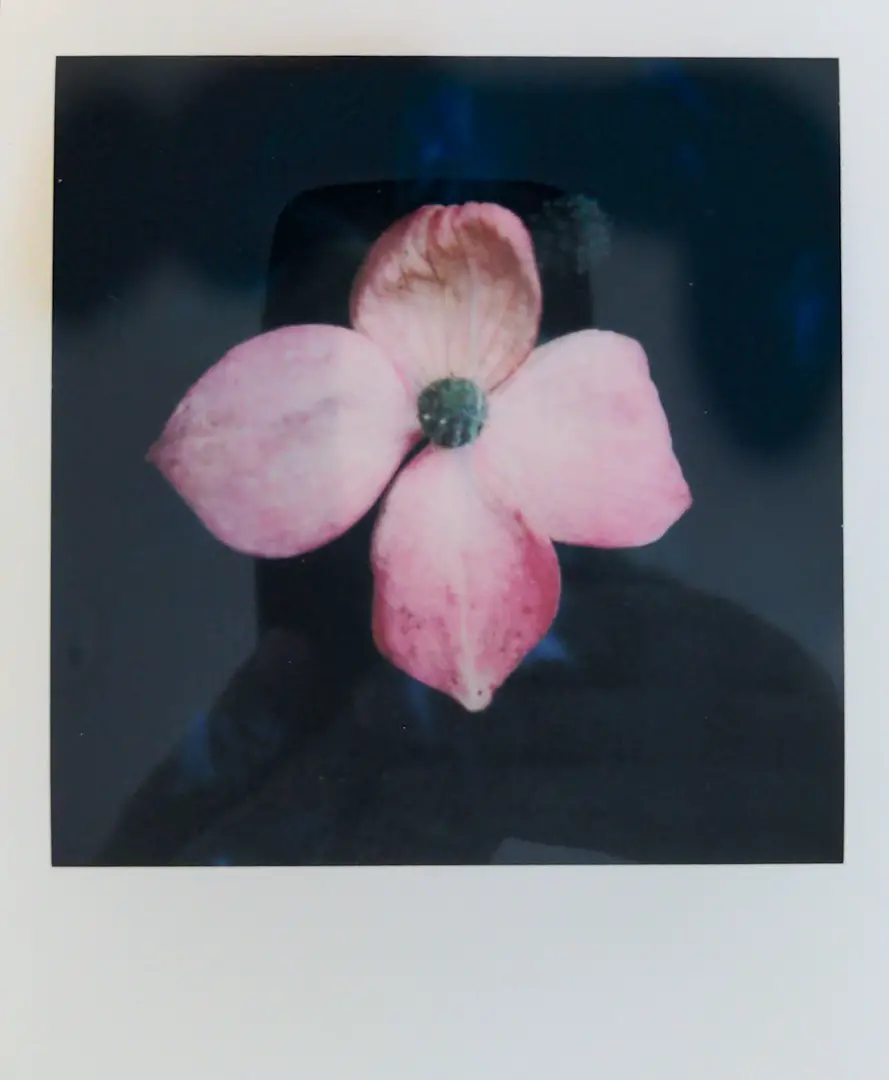
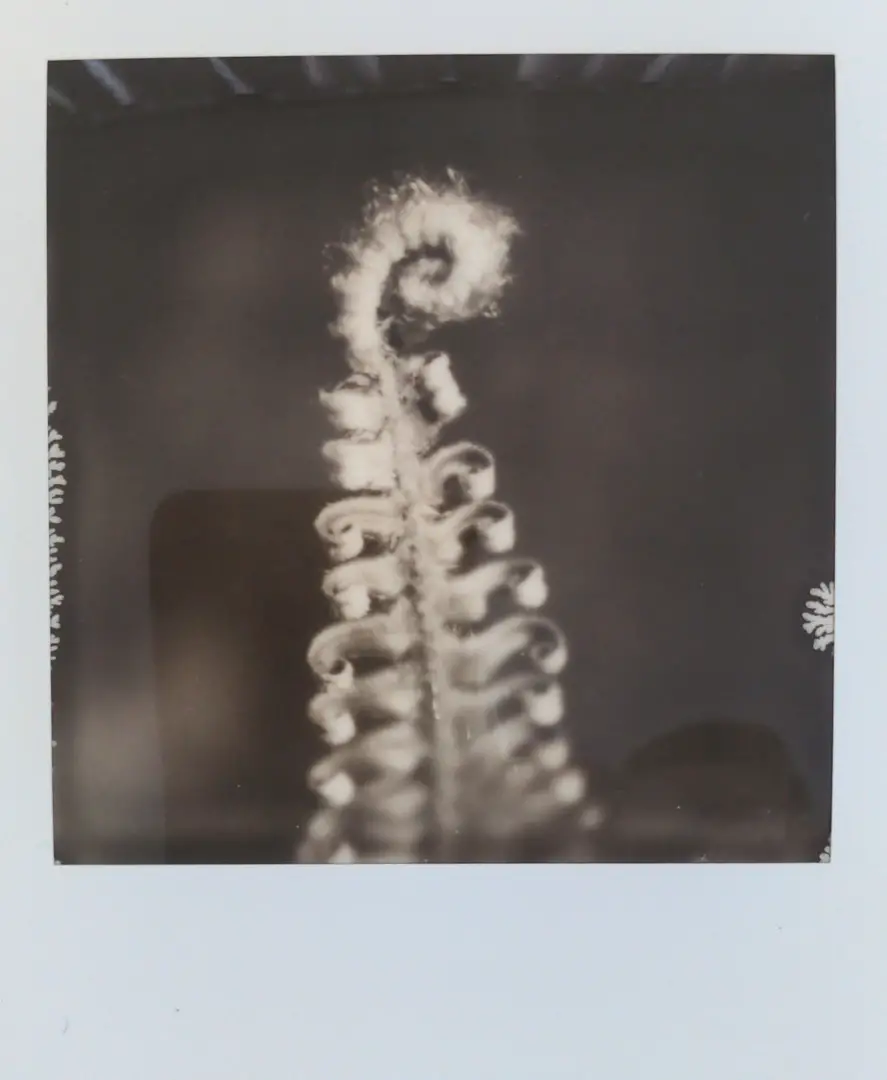
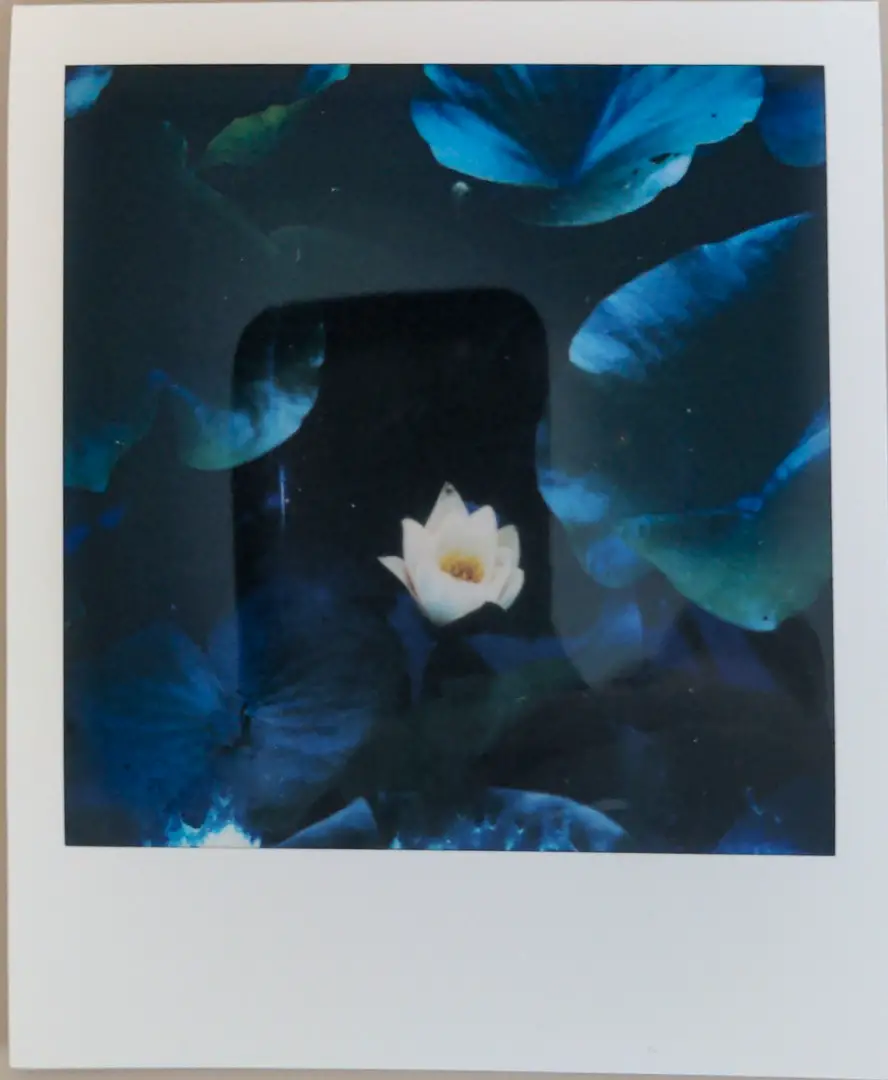
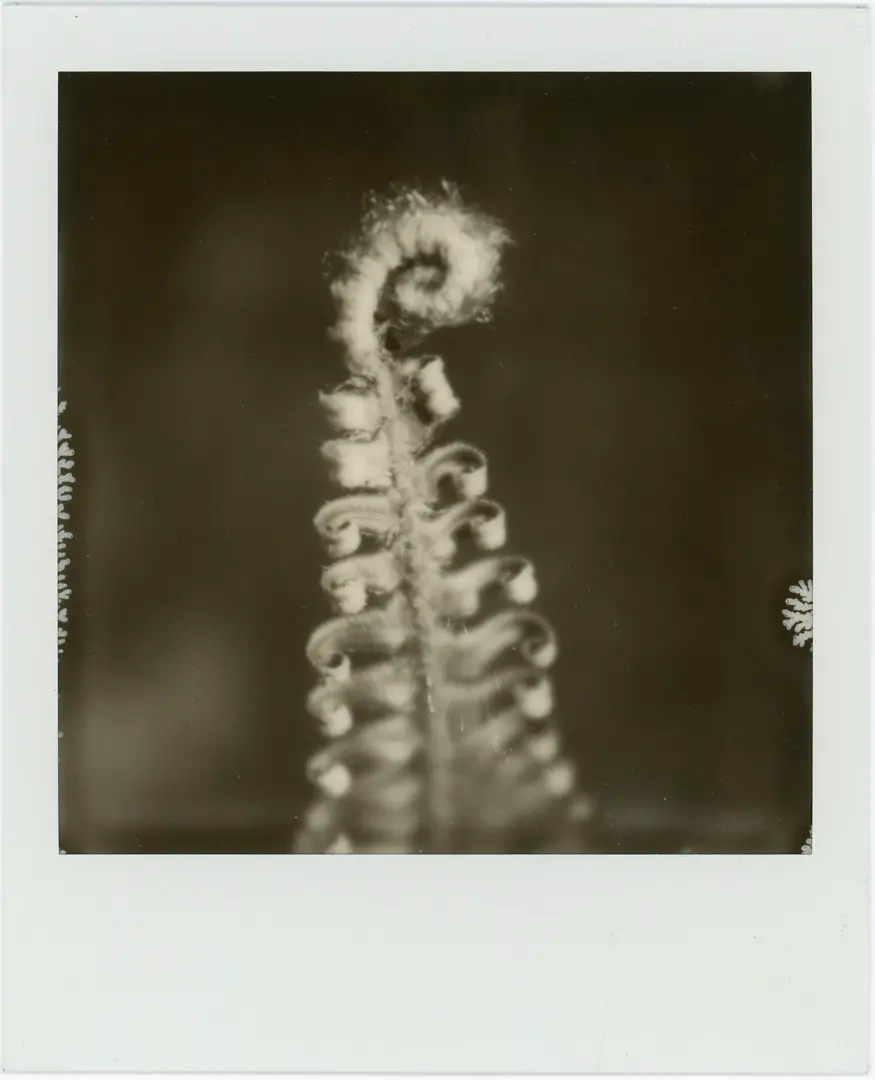
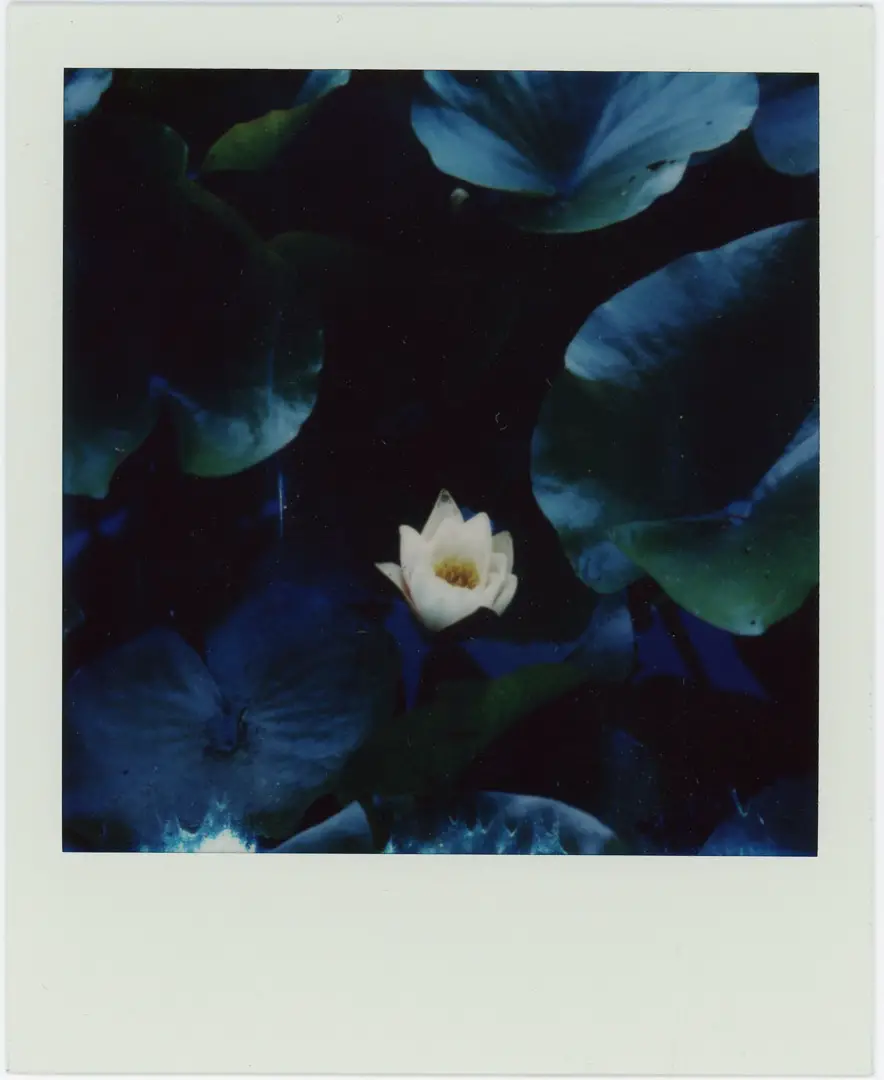
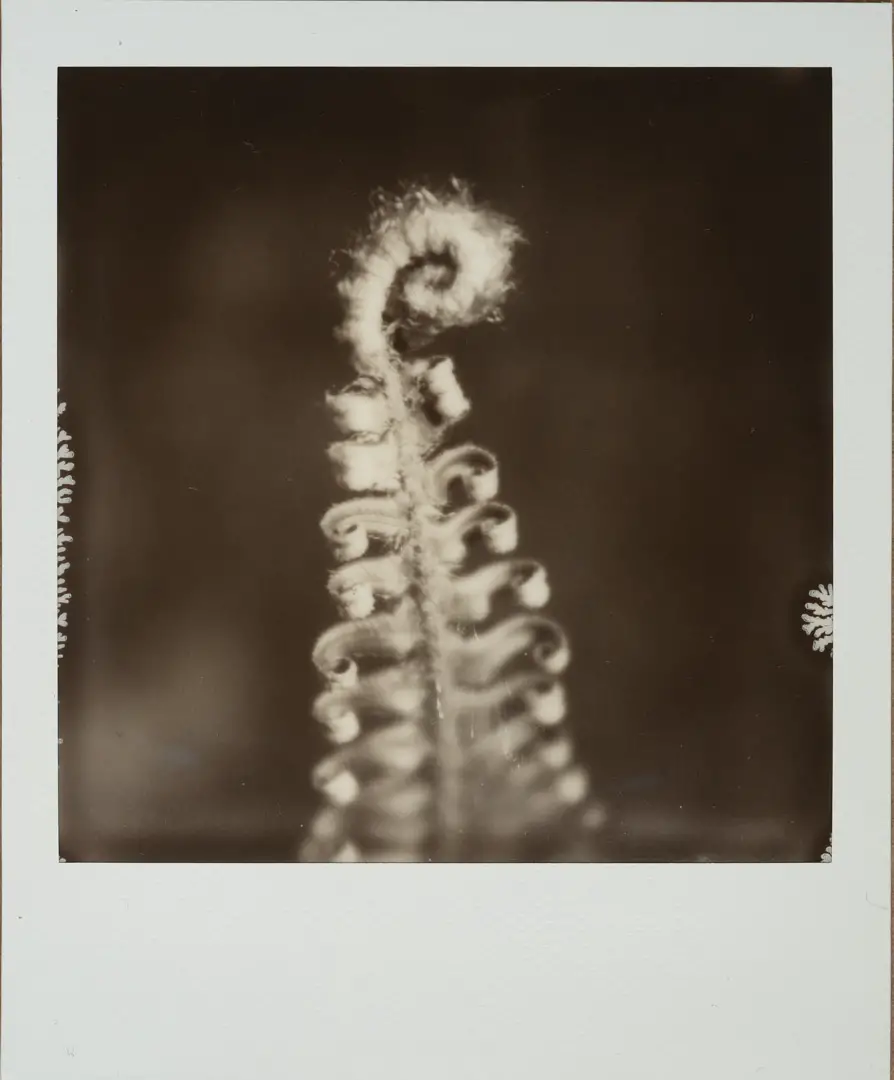
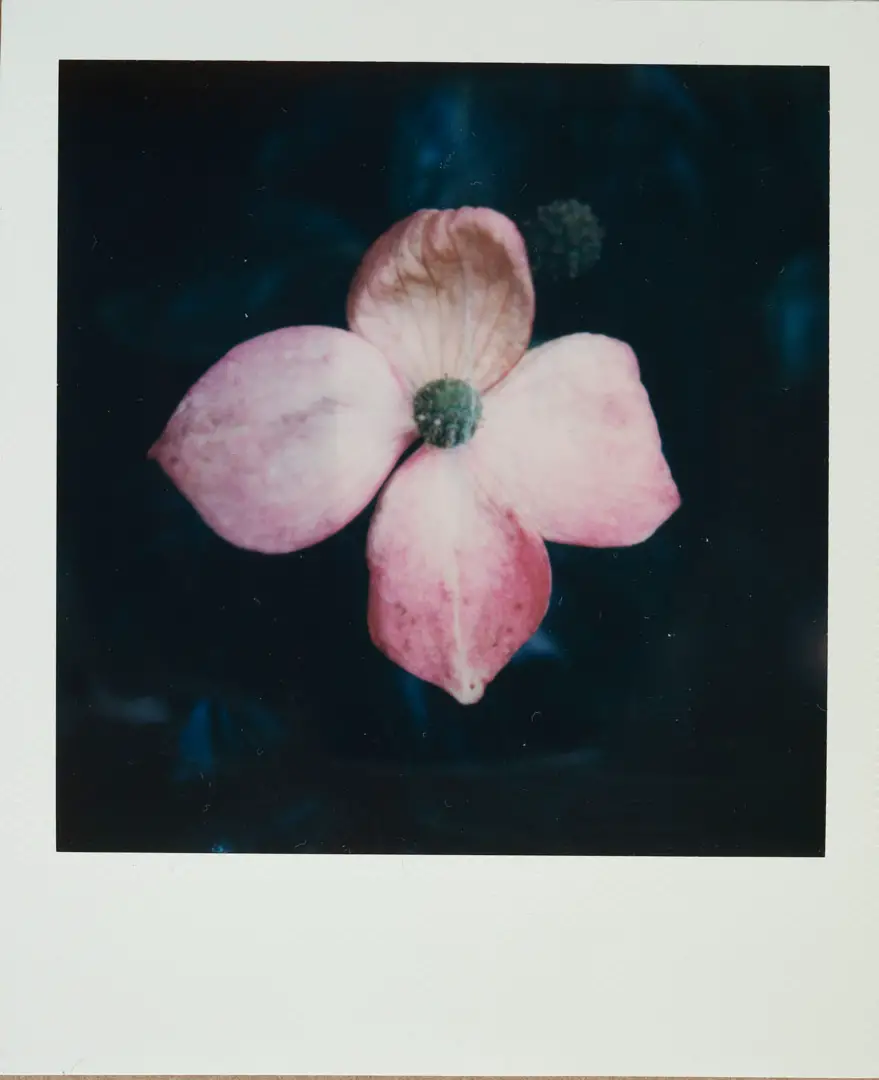
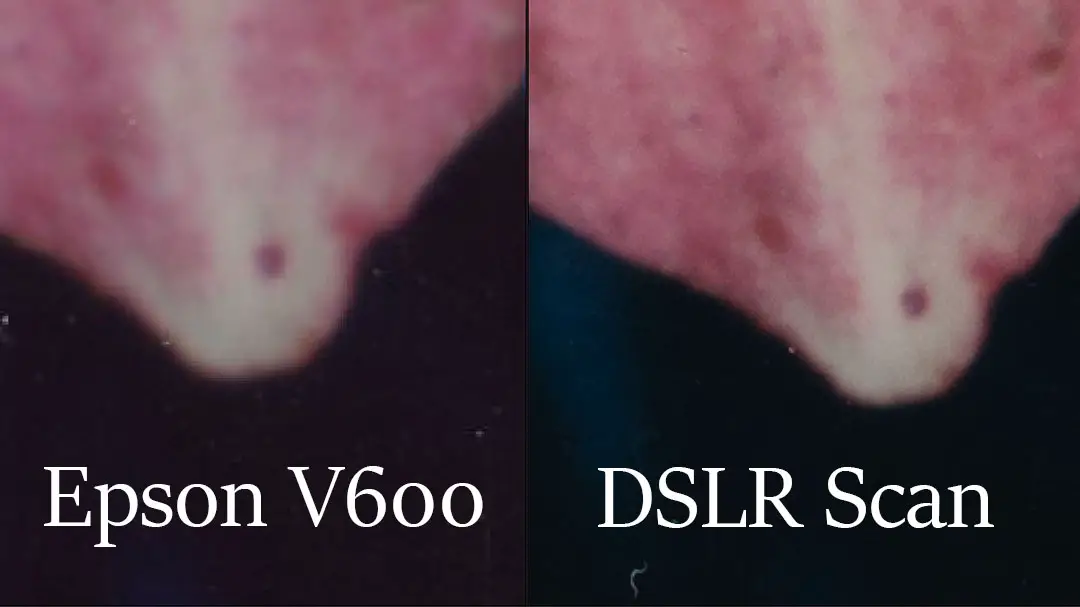
Here are the results of the scanning test. Compare these four images side by side to see the complete difference between these scanning methods. When you zoom in, the DSLR scans are significantly sharper than any other method of scanning Polaroids.
Even the Epson V600 flatbed scanner was not able to keep up with the resolution and sharpness of the Sony A7III with Sigma macro lens.
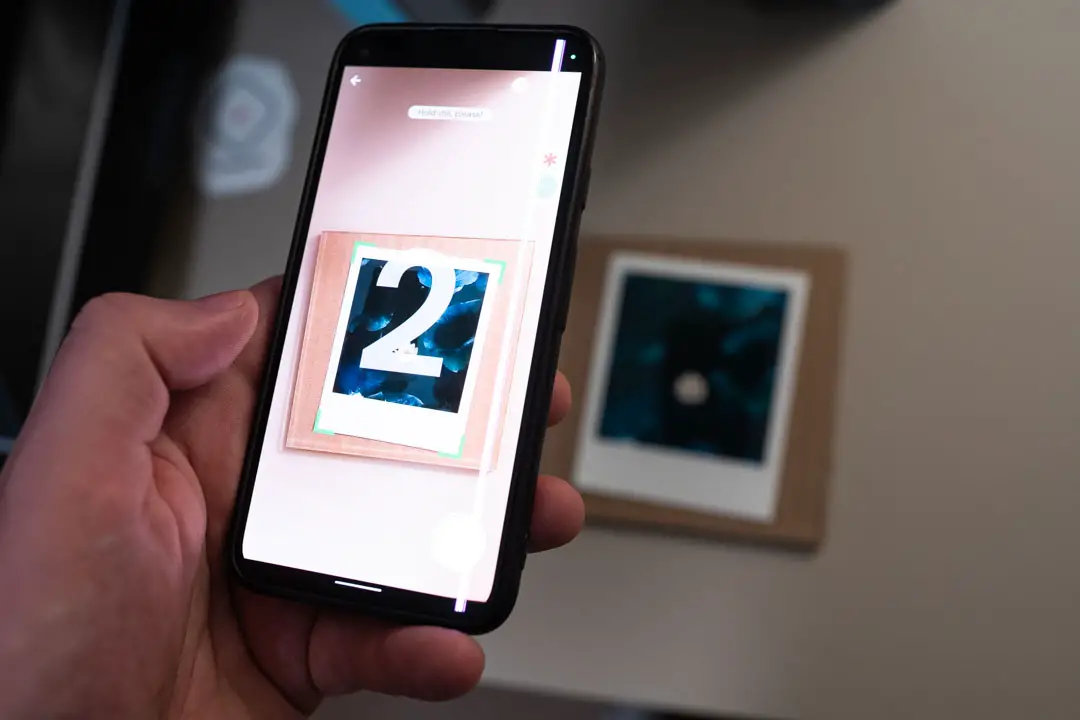
Scanning with the Polaroid App
The Polaroid app is by far the easiest and cheapest method for scanning Polaroids. There’s no need to purchase anything, (although having a piece of A&R or Museum glass will help), and the app automatically crops and fixes the perspective on your images.
The problem with the Polaroid scanning app is that it’s nearly impossible to get a scan that doesn’t have a big reflection on it from your phone. In daylight, there’s almost no physical way to get a Polaroid scan with a phone and not have a gigantic reflection on it.
The image quality of a phone was the worst of all tested methods. The images were not as sharp as the Polaroids themselves, the aspect ratio was altered by the automatic changes in perspective, and the borders didn’t retain any details.
The Polaroid App gets 2 out of 5 stars: it’s free and does most of the work for you. I personally believe if you use a piece of anti-reflective glass, like A&R glass or Museum glass, you’ll be able to create scans that are perfect for sharing with friends and family or Instagram without any hassle.
Another great potential way to fix the issues with reflections would be to use a piece of black construction paper with a hole cut out in the middle. Having that black surface on top should completely cut any glare on the edges and give you a good scan quickly. However, the image quality will never be as good as the other options
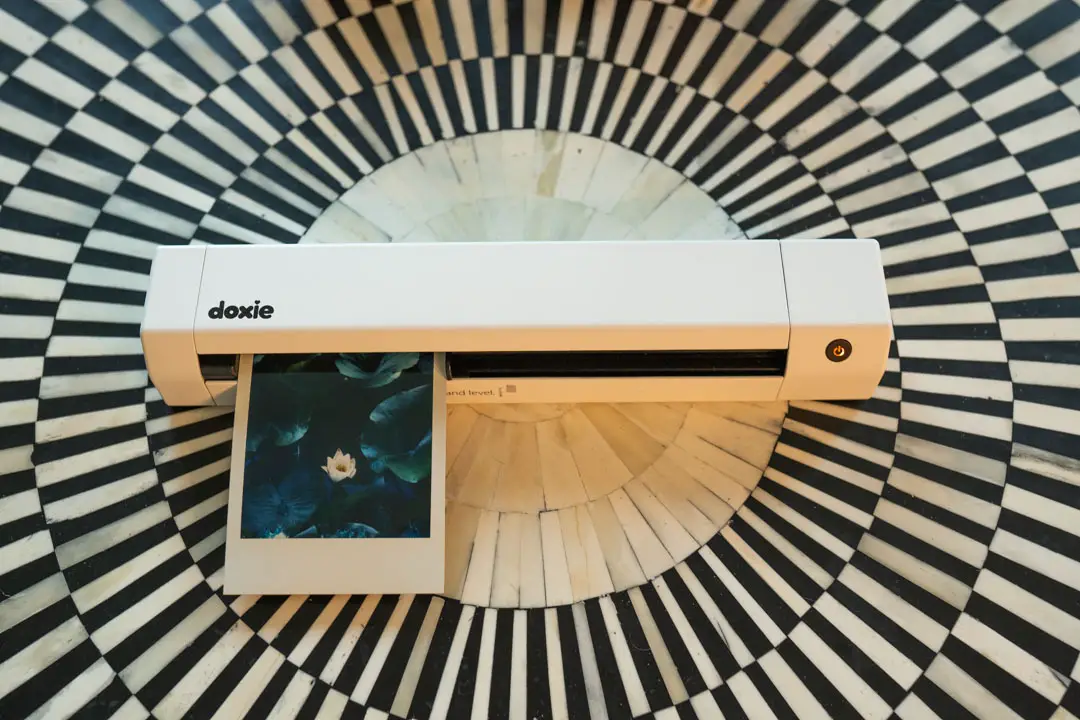


Scanning with a Doxie Go SE portable scanner
The Doxie Go SE scanner is another convenient option for Polaroid shooters. The Doxie makes scanning Polaroids very quick and efficient, and was the best at capturing details on the image borders.
The Doxie sheet-fed scanner also requires the Polaroids to be scanned perfectly straight, which is mostly possible using the guides. If it isn’t completely straight, you’ll notice yellow areas around the edges of the image that will need to be cropped out in post production.
However, the Doxie scanner doesn’t give users any control over the look, and tends to create images with obtrusive lines and image noise in the out of focus areas of the image.
This effect is not fixable in Lightroom or Photoshop, as the lines can be so close together that they are nearly impossible to remove using the clone stamp or other tools. Blurring them can help reduce (but not remove) the look of the lines, since it only seems to happen in the out of focus areas.
For the speed of scanning, and the awesome look of the borders with the Doxis scanner, I will give it a 2 out of 5 stars. It’s not perfect, and the image quality is only so-so when the lines aren’t there, and the files are not that editable in post production.
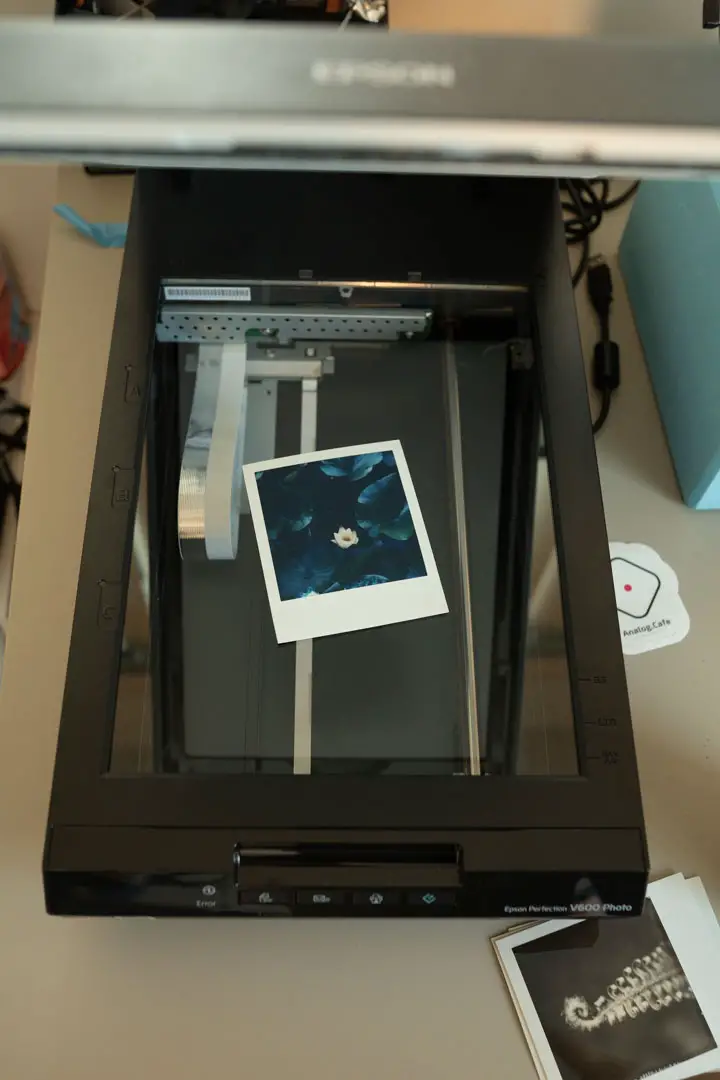

Is it possible to get good Polaroid scans with an Epson V600?
The most reliable method for creating a high-quality scan of a Polaroid is using the Epson V600 (or V550) film scanner. This is the cheapest flatbed film scanner on the market, and it creates images with remarkably good image quality. It’s also possible to scan multiple Polaroids at once, making the V600 or V550 scanner a great option if you have a large number of scans to create.
The Epson V550 or V600 flatbed scanner (find this incredible scanner on Amazon here, or Adorama here) does a great job of keeping the Polaroids or Fuji Instax films flat, which means that you’ll be able to create images that are sharp from corner to corner without much fuss. The biggest downside is that the Epson flatbed scanner isn’t as sharp as a DSLR scan, and doesn’t have enough dynamic range to produce a single image that also captures the texture in the frame.
However, in some cases, you may start to see Newton Rings with the Epson scanner, which are rings that are created because the clear plastic in front of the Polaroid is too close to the glass on the scanning bed. It is possible to fix the Newton Rings problem using a piece of anti-reflective glass, like A&R glass, or Museum Glass in front of the Polaroid or Fuji Instax photo.
The A&R glass or Museum Glass can be purchased for a reasonable price at any high-end framing store, which will always have some awkward cuts that aren’t quite large enough to cover an image. A 5”x5” piece will be large enough to cover a full Polaroid, or Instax Wide image with some breathing room on the sides.
The glass should be thinner than 5mm to ensure it doesn’t move the Polaroid outside the scanner’s field of focus.
Once you use a piece of museum glass, the Epson V600 and V550 scanners become an amazing and quick option for scanning Polaroids at the cheapest price if you don’t already have a DSLR camera and a good lens for scanning film. I give the Epson V550 or V600 scanner 4 out of 5 stars for scanning Polaroids and Instax film.
Find the Epson V600 scanner on Amazon or Adorama using these links. As a member of both the Amazon and Adorama affiliate programs, I do earn a small commission on each approved purchase originating from these links. These links help support the blog in a tremendous way at no extra cost to you.
Learn more about the LearnFilm.Photography affiliate policy here, where we detail every step we take to ensure we are only recommending the best possible products.

How to get the best-quality Polaroid and Instax film scans with a DSLR Camera
Getting good scans with a DSLR camera takes work, but once you cross all the t’s and dot the i’s, you will be able to create the highest-quality scans possible.
The biggest problems are keeping the film flat, and making sure there are no reflections whatsoever. The best tool at your disposal is a 5×5” piece of anti-reflective A&R glass, or Museum Glass to keep the Polaroid or Instax frame perfectly flat. It won’t completely cut out the reflections, but it will cut out excessive glare from other problems.
The hardest part is removing any extra glare or reflections from the camera itself. When it happens, the scan will have a dark spot in the shape of a camera, with bright edges around the image itself. Sometimes it can be fixed, but it can require hours in Photoshop.
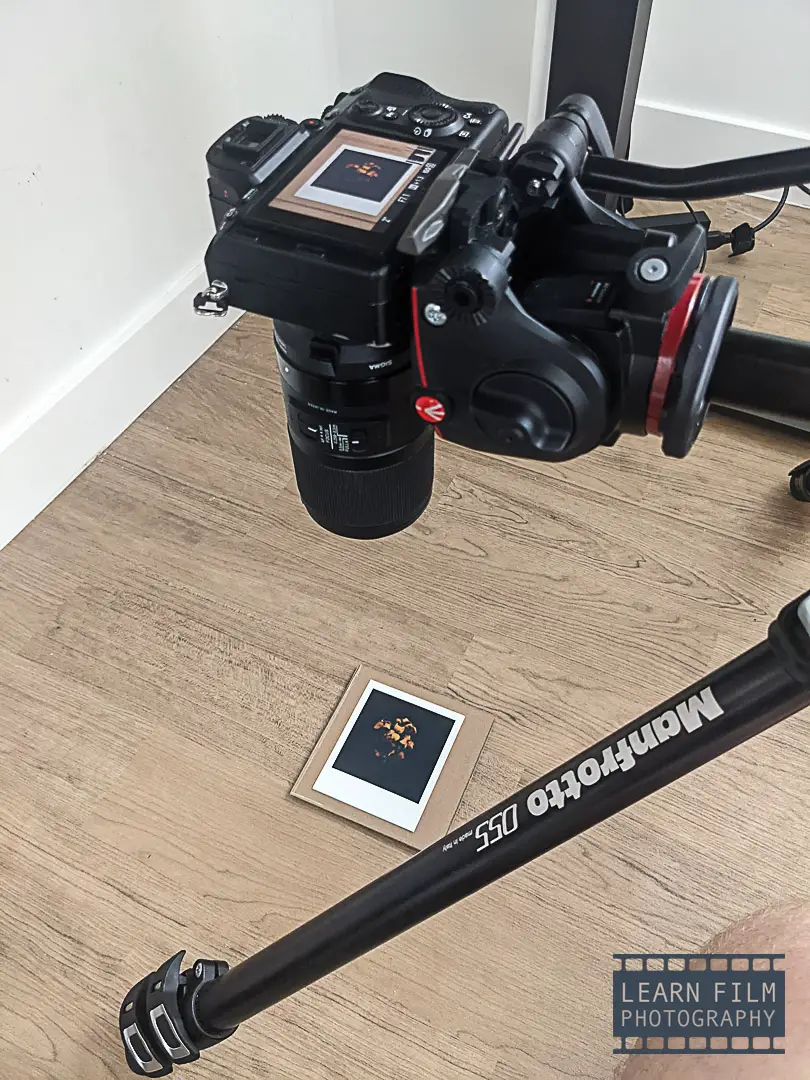
The best way I’ve found to remove this glare is to make the scans in subdued light underneath my desk. The Polaroid website recommends using 3 lights to even out any remaining glare, but cutting out the sources of glare by scanning underneath a big table or desk is just so much easier. If space is tight, using a remote shutter release will be a cheap addition that provides a massive quality of life improvement.
For equipment, I use a Manfrotto tripod with a horizontal arm and a 3-way video head (ball heads are not accurate enough to get the camera perfectly level with the film) to hold the camera. A Sigma Art 70mm f/2.8 Macro lens, and a Sony A7III camera. Using a copy stand or Enlarger stand will be easier than the tripod route, however.
Even though the Sony is not the highest resolution camera on the market, this combination makes images that are quite a bit sharper than the Epson V600. The micro-contrast between elements on the Polaroid or Fuji Instax film are much more visible when zooming in on the DSLR scans than on a flatbed scanner.
The DSLR Scanning method also gets 4 out of 5 stars. It takes a lot more setup to get it working, and there’s always the chance of something going wrong (especially on darker images). But this method produces far and away the highest-quality images, complete with borders, film grain, and other important details.
You can learn more about my DSLR Polaroid and Instax scanning technique here.
Final thoughts — what’s the best scanning solution for you?
The best system depends on your budget. It’s perfectly possible to get good scans using the free Polaroid app if you make a couple tweaks. Add on a piece of A&R glass, or Museum Glass, and potentially something to block out the light overhead and you’ll create great quality scans without much effort.
If you have a bit higher of a budget, I’d skip the Doxie film scanner and go straight for the Epson V600 or Epson V550 (both scanners are the same — the V600 just has digital ICE for prints instead of just for negatives). The flatbed scanning route will take a bit longer than the Doxie, but the resulting images have weird lines in the out of focus areas that ruin the quality of the image.
But if you already have a digital camera, even one that’s not the most recent on the market, you’ll get sharper scans that also show detail on the film edges. It’s a bit of extra work, but that effort goes a long way towards creating professional scans.
That’s it for this review. Let me know if you have any questions about this setup, or your own setup — I always love helping out the community, and this blog gives me a fantastic chance to do so using my own lived experiences.
If you liked this review, you can get more content just like this by subscribing to my YouTube channel, or following LearnFilm.Photography on social media. And if you want to support the blog, picking up a print from our print shop, or using the affiliate links in the text goes a long ways and is always appreciated.

By Daren
Daren is a journalist and wedding photographer based in Vancouver, B.C. He’s been taking personal and professional photos on film since 2017 and began developing and printing his own photos after wanting more control than what local labs could offer. Discover his newest publications at Soft Grain Books, or check out the print shop.