Over the years I’ve been developing film, I must have run into every problem in the book at least once.
This list contains the most common problems film photographers face when developing film. If you run into a problem that you can’t find a solution for, feel free to ask us in the comments below or make a post about it on the Official Learn Film Photography Facebook group!

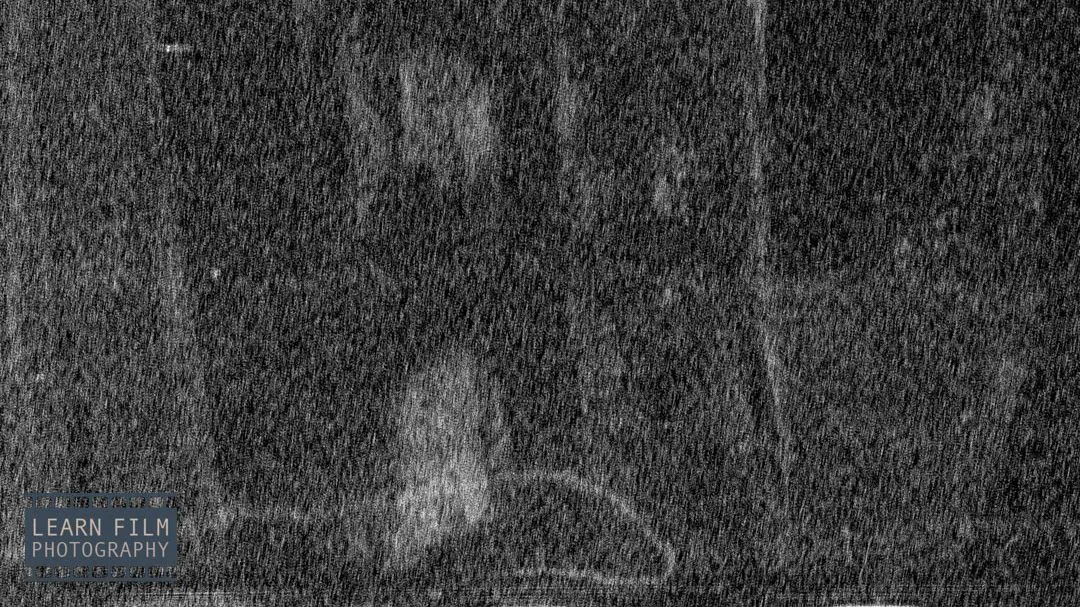
No images on the film, but showing frame numbers?
Blank rolls with the numbers showing means development was good, but the camera didn’t expose the film. The numbering on the frames is a latent image placed on the outside frame by the film manufacturer. That means that these lines will only show up if proper development took place.
Blank frames on the roll or an entirely blank roll of film is most likely caused by a stuck shutter, or the roll didn’t move through the camera.
If your camera uses a leaf shutter (like Bronica ETR series, Hasselblads, Rolleiflex, and Yashica cameras) make sure to test the lens at a variety of different speeds to ensure the shutter is firing correctly. If you can change the lenses and neither work properly, then the issue is most likely to do with the camera.
If you’re shooting 35mm, shutter problems are less likely the cause here. Or at least, you’ll be able to feel that something is wrong inside the camera. The most common reason for blank negatives on 35mm cameras is that the film was loaded incorrectly.
The easiest way to check is watch the rewind knob as you advance the film. If the rewind knob is moving, the film is correctly on the spool.
To be sure you are loading film correctly, always advance 35mm film by one or two frames before closing the camera back.
No images or frame numbers on the film
The film was fixed before it was developed, or the developer was completely exhausted. The frame numbers are latent images added to the film by the manufacturer. So if these numbers don’t show on your film, then you know for certain that the problem comes from development, and not from your camera.
How to fix this problem: The best way to solve this problem is to add labels to your bottles. I personally use paper tape on my glass bottles with notes written in sharpie when the solution was mixed, and how many rolls it has developed.
If you’re using an older bottle of developer, try conducting a film leader test to see if the developer is still active. Place the leader (the thin strip at the beginning of a roll of 35mm film) in the developer solution, and watch to see if it turns black over the next 3-5 minutes. If it stays orange or grey, the developer is dead.
These leaders are also useful for testing if your fixer is still working.

Blue light leaking onto the film
Blue light leaks mean the light is coming from the front of the camera. These type of light leaks are less common, but when they happen, it can be very hard to diagnose the exact issue.
The easiest way is to take the camera into a dark room, like the bathroom, and shine a light around the front of the camera. If you’re able to see where the light is coming from, try to patch it up as best as possible. Otherwise, it may be better to take the camera to a technician to have it serviced.
Red light leaking onto the film
The camera has some light leaks from the back of the camera and will need a light seal replacement. The reason the light leaks are red is that they’re coming through the base on the back of the film instead of through the emulsion first. The film emulsion is designed with three layers that each capture different wavelengths of light. But if it goes through the orange back first, then the light will skew to the reds — just like when using red scale films.
Luckily, fixing light leaks from the back of the camera is a cheap fix. With a bit of patience, it can be done at home. But if you want it done perfectly and also have some time, take the camera to a local technician and have a CLA done on the camera for good measure.

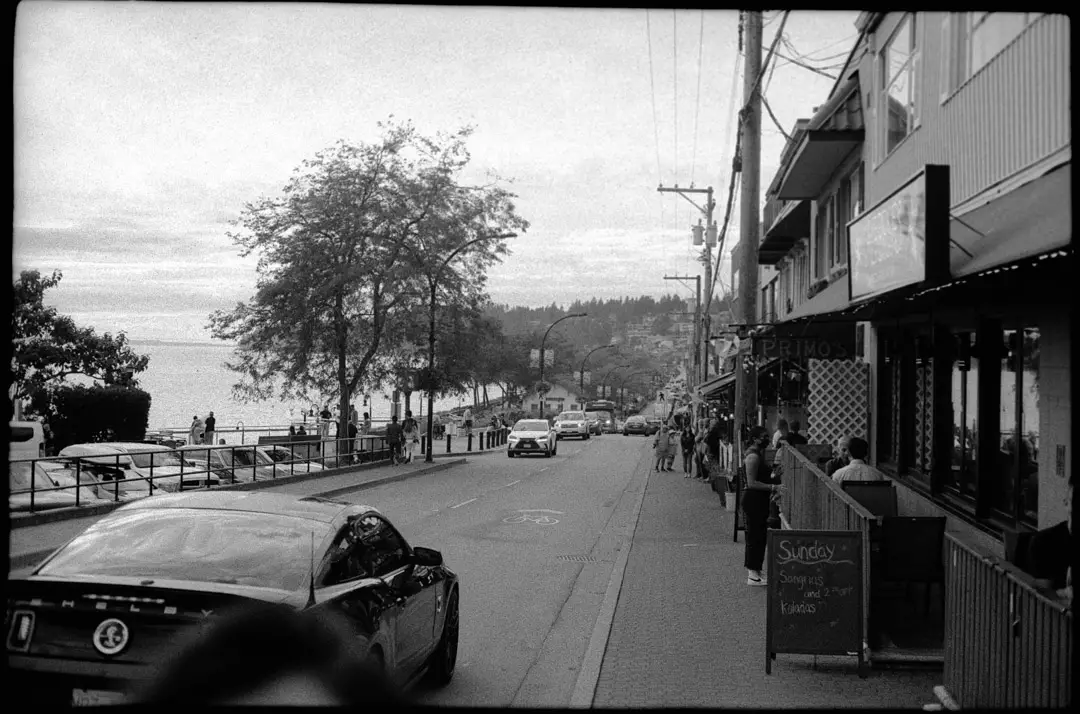
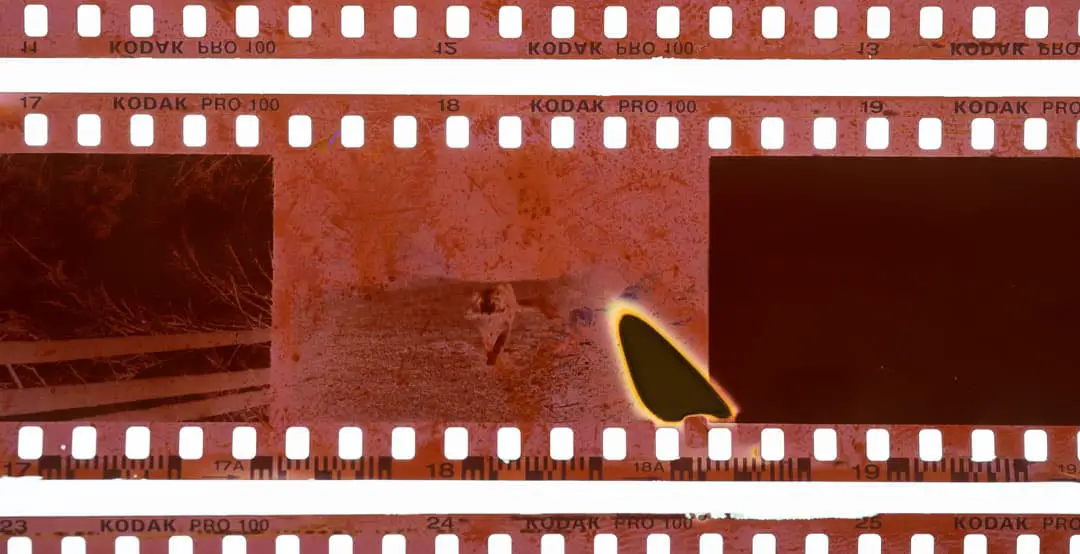
Off colored sections on film (reflections from the scanning process)
There are a lot of variables to consider when scanning film with a digital camera. It’s not the easiest process overall, but when you know the kinds of problems that can happen, it’s easy to avoid them in the long run. In this case, I scanned a single roll in the afternoon on my lunch break, and ended up with some weird results.
The problem: A large section of the sky in this image has a very off-colored yellow section. Reflections like this will take on different colors depending on the light source. For example, if you’re scanning at night, the reflection might take on a blue cast from the inverted warm light sources around you.
The solution: Reflections caused by light reflecting off the film scan. So the easiest way to remove them is to turn off any nearby light sources that may interfere with the scan itself. It’s often best to scan film in the darkest conditions possible while using a good light source.


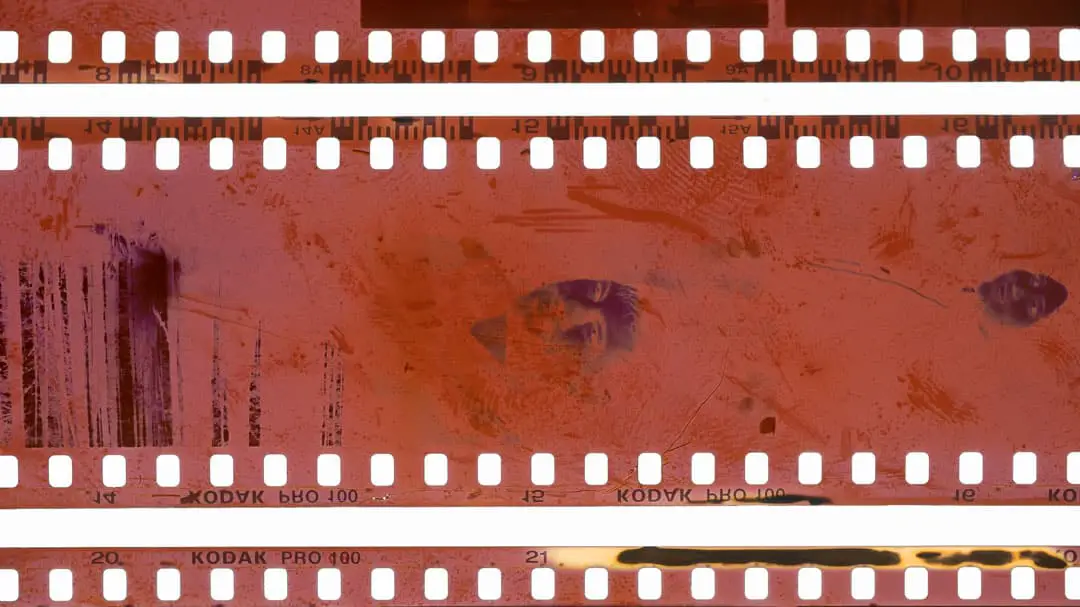
Color film appears more red or blue than normal
When it comes to temperature control, color film is much more susceptible to variations in temperature than black and white film. If the C41 developer temperature is too hot, the film will come out bluer than normal. If the developer temperature is colder than 39°C, the film will become more red.
The images above are from a developer test that I conducted and ruined because I got a little too hasty when developing these test strips. In this case, the image on the left was developed in the Arista C41 color film developing kit just after mixing the developer around 45°C (110°F), when the developer is rated for use at 39°C (102°F).
Color film is very sensitive to temperature changes during the development cycle. Learn more about controlling C41 temperature here.

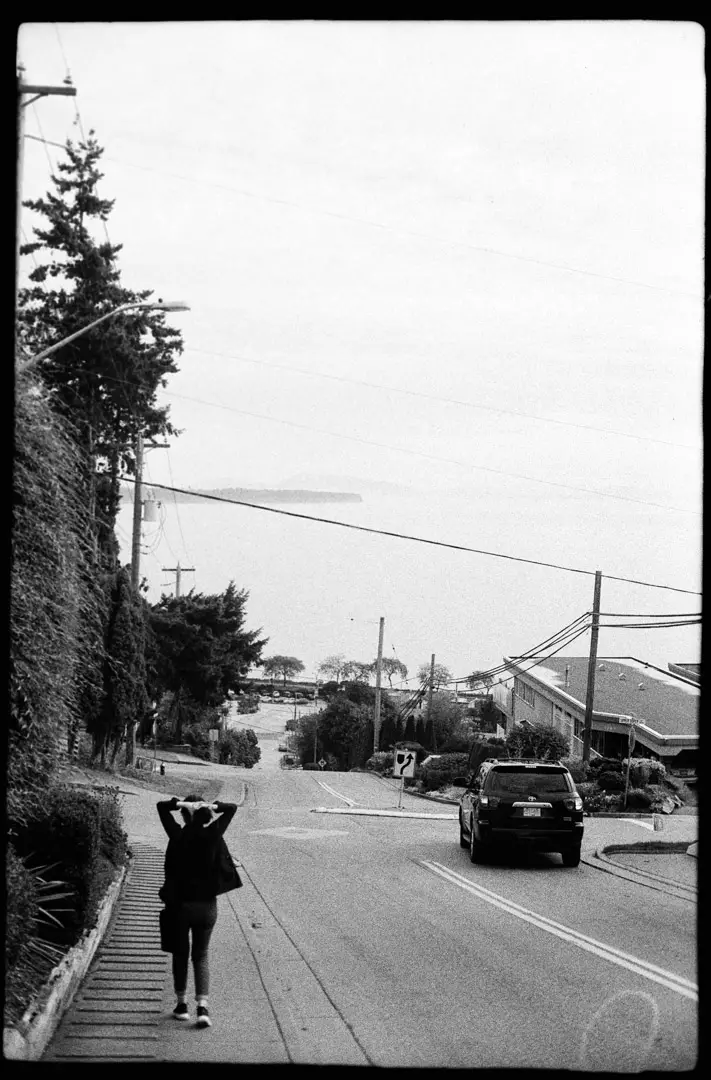
Is the image out of focus? Or was it the scan?
There are two places during the film photography process where your images can lose sharpness. The first way is if you miss focus, the second is if you missed focus when scanning or printing the film.
The way to tell which part of the process was correct is whether or not you can see film grain in the resulting image. An unsharp negative will still show grain in the resulting image, but a blurry photo without any grain is likely caused by an out-of-focus scan. This happens to the best of us — especially when rushing to get through a couple of rolls with a DSLR scan before bedtime (true story).
In the case of an unsharp scan, simply pull it out and re-scan. But if the image is blurry and you’re seeing film grain, you’ll have to reshoot the image another day.
Blue or white spots all over the film
This time, the light leaks are coming from the front of the camera. This one is much harder to diagnose, and will often need the help of a technician to get it right.
If the camera has a cloth shutter, there could be some small holes in the shutter curtain allowing light through. To check if this is the case, take the camera into a dark room, like the bathroom. Take off the lens, and open the back of the camera. Then carefully raise the mirror and shine your mobile phone light through the back of the camera. If you see little spots of light, you’ll know these holes are the likely culprit.
If there are holes in the curtain, it’s fairly easy to fix using some liquid electrical tape, which you can find on Amazon. Follow the drying instructions carefully, and use as light of an application as possible to ensure the liquid tape doesn’t catch on anything.

Solid thin white line across the negative
The problem: a solid white line across the negative. When you see this, it means the roll of film was scratched. Usually, this means that there’s an obstruction inside the camera, like a grain of sand that got caught in the wrong place, or something jutting out on the backing plate where it shouldn’t be.
The solution for this problem is to take a rocket blower and a microfiber cloth to clean out the inside of your camera. Most times, keeping everything clean will solve your problem.
Scratch lines can also be caused by running your fingers, or a print/negative squeegee down the negative to remove water after taking them out of the developing tank. Wet negatives are much more susceptible to scratches than dry negatives.
The best solution for getting water off is to use Photo Flo or Ilfotol wetting agents and hang the negatives to dry in a drying cabinet, or a steamy bathroom after letting hot water run for 5-10 minutes.
Water spots appearing on film
The problem: water is pooling on the film when it’s drying, leaving minerals behind when it evaporates off the film. When this happens, the water spots can be a pain to clean off of the negatives after they’ve been scanned, and they can be especially noticeable on 35mm film.
The solution: stopping water spots usually requires a few different steps. Using a Paterson film squeegee and Ilfotol wetting agent will significantly reduce the number of water spots that appear on the film. But it’s also advisable to hang the film in a steamy bathroom so that the water on the film warms up, allowing it to evaporate faster and more evenly across the film.
Learn the easy way to reduce the number of water spots in this 5-minute article.

Half the frame is dark
This is a problem called Shutter Capping. Shutter capping happens when one of the film shutters is moving faster than the other, causing the image to be darker on one side.
The main reason for shutter capping is that there have been some lubricants on the shutter mechanisms that have either gummed up over time, slowing down one of the curtains, or have dried out, causing one curtain to move faster than intended.
Shutter capping is typically much worse when you’re using the faster shutter speeds. So if you need a temporary fix, it may be better to stop down the aperture rather than increase the shutter speed.
Fixing shutter capping isn’t too difficult on simple cameras, but the repair often requires disassembly of the camera. If that’s not possible for you to do, the best bet is always to take the camera to a technician to have them do the repair for you. Otherwise, buy a parts camera off eBay to take a stab at it before ruining your own camera.
Dark spots or lines lining up with the sprocket holes on 35mm film

Back in the day, I saw a YouTuber simply turn the developing tank end on end, instead of doing gentle inversions the way I was taught. And I figured this would be worth trying out instead of being so meticulous. That method almost ruined an important set of negatives, but I learned a few things in the process.
The black lines lining up with the sprocket holes are known as surge marks. They’re patches of uneven density along the edges of the film near the sprocket hole perforations on 35mm film. These surge marks are created from harsh agitation in the first minute of development.
It’s important to be gentle in the way you’re agitating the film. Use the swirling stick, or with consistent, but light inversions by rotating the tank as you turn it end over end. I wrote an entire article on how agitation methods will change the look of your film, including affecting sharpness, here.

Lines on the negative in an uneven pattern on 35mm film
If you see dark lines on the negative (light lines on the positive image) that line up on the edges of the sprocket holes, or are in an uneven pattern it is from stretching the film in the camera. Usually, these lines will appear nearer to the end of the roll, when you try to get out just one final frame.
In this case, the film was improperly loaded and had creased inside the camera. There was a constant pressure between the frames that caused this tension to arise. In this case, you can tell they are stretch marks because they do not line up in the middle of the sprocket holes. Usually, one edge will have a stronger line than the other, but the middle will not be filled the way it is with surge marks.
When this happens, it is possible to fix it in photoshop, but it will take a lot of work to correct.
To make sure this doesn’t happen in the future: if you’re advancing your film with a manual camera, do not try to pull a 37th or 38th frame by pulling on the film advance harder. If you feel pressure on the film advance, do not force it to the next frame.
The fixer went bad, leaving oil and gunk on the negatives
You need to replace your fixer completely every 10-20 rolls. Even if you store the fixer in a tightly sealed bottle with water all the way to the top (the method for getting the longest life out of your development chemicals), the fixer will still go bad over time as silver piles up in solution.
The problem is that I continually topped up the fixer with some use, but I didn’t mix a fresh batch for almost a year. Over time, a sludge built up in the bottom of the bottle.
The solution to this problem: clean out your bottles thoroughly when your solution starts to go bad. Do a film leader test to see if the film turns clear before 5 minutes. If it takes longer than 5 minutes, then dispose of the fixer properly, clean the bottle thoroughly to remove any gunk in the bottom, and mix a fresh batch of fixer solution.
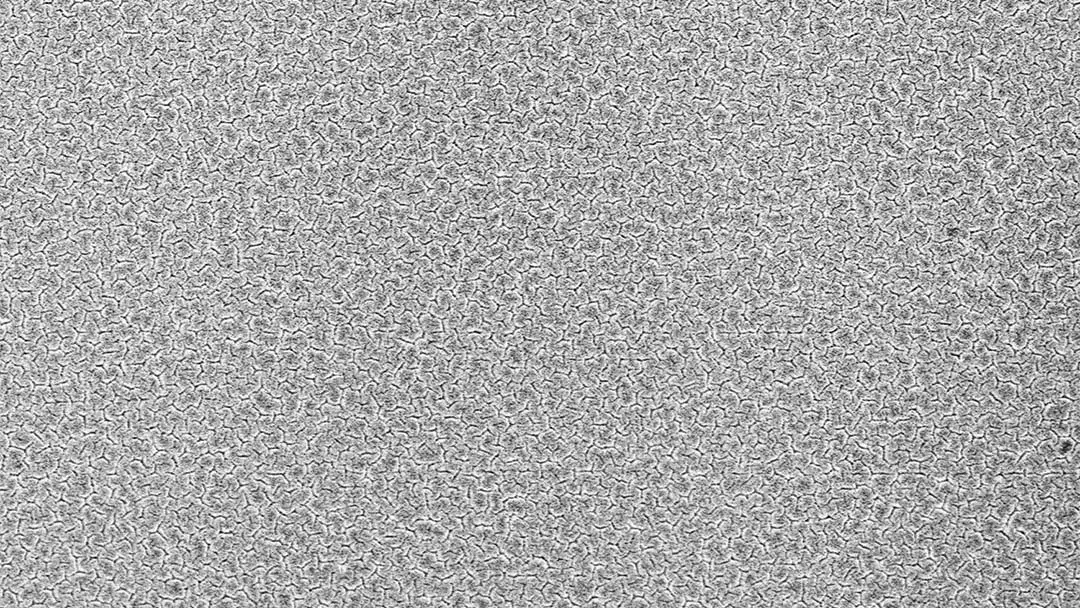
Reticulation patterns on a film
The problem: reticulation occurs when wild temperature swings cause the emulsion to break apart, leaving a pattern across the film.
Film in the 21st century is not prone to reticulation, but older film stocks may require strict temperature control to avoid it. Shawn at Attic Darkroom developed film using the hottest water from his tap, followed by the coldest water, and found no discernible reticulation on his film.
There is one caveat: reticulation is much more common when using a mono bath developer like Cinestill DF96. If using a mono bath developer, keep the solution at room temperature. When pushing the film in a mono bath, bring your film up to the right temperature in a water bath, and keep it in the water bath during development to reduce the chance of getting reticulation.
Foam or bubbles in your film developer
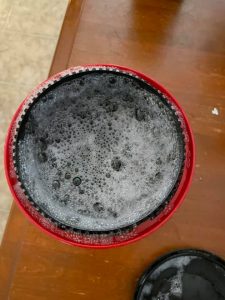
It is quite a shock to open your developing tank and see it full of bubbles. In normal circumstances, the film developer shouldn’t produce many — if any — bubbles.
Seeing bubbles could be a bad sign of a chemical reaction taking place in the tank (in which case, the developer may become exhausted or unusable). But in most cases, the bubbles are caused by a left-behind wetting agent, like FotoFlo or Ilfotol.
Wetting agents contain a super-concentrated soap solution to help the film dry without leaving behind any water. Even a small amount of wetting agent left in the tank can create many bubbles during the next round of development.
If the bubbles are bad, they could potentially leave undeveloped spots on the film.
Always rinse your developing tank after developing film. You’ll want to load the tanks when they are dry, so it is best to ensure they get a good rinse after every film developing session.
Thanks to Connor Finlayson for supplying these photographs


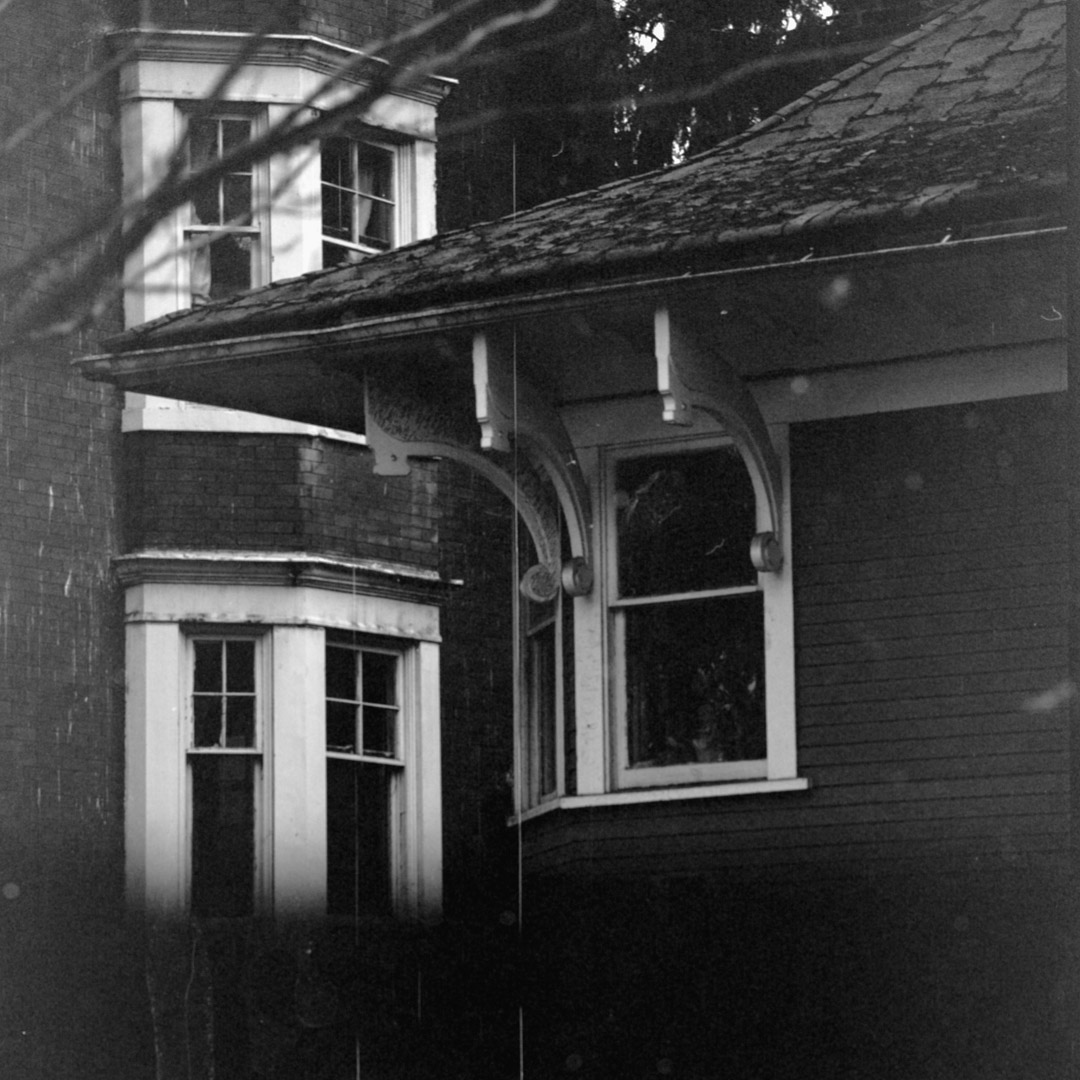
A hair or dust mark appears in the same place on every image
The problem: Have you ever seen dark spots like this on your negatives? There are many opportunities for hair and dust to get on your negatives. When this happens, you will find spots like this that have to be removed in Lightroom or Photoshop (although some photographers like the authentic appearance of dust on their images).
If the dust or hairs are black on your scanned or printed image they likely came from inside the camera and left a shadow on the negative. In this case, the only way to remove the dust is to clone it out in Lightroom or Photoshop.
In the images above, fibers from the cloth shutter were blocking a small part of the image, leaving behind these black strands on the negatives. The easiest way to see if fiber from the shutter is blocking your image frame is to use the bulb mode, and hold the shutter open. If you notice a fiber, then carefully cut it as close to the shutter as possible with a pair of fine scissors.
Negatives have a foggy or milky layer over the images
If you take the negatives out of the developing tank and see that there’s a slow-growing fog that’s taking over your negatives, it means that they were under-fixed. But don’t panic, these negatives aren’t ruined. The best way to fix under-fixed negatives getting milky or foggy is to simply re-insert the film in a new batch of fixer.
Fixer solutions clear all of the undeveloped silver in a negative so that they’re no longer sensitive to light. So the film will be okay, so long as it isn’t reintroduced to the developer before fixing.
If the fog or milky appearance happens over 20 or 30 years, though, it may not be so easy to solve by dunking in fixer again. It’s worth a shot, but chances are some of the fog will stay on the film.
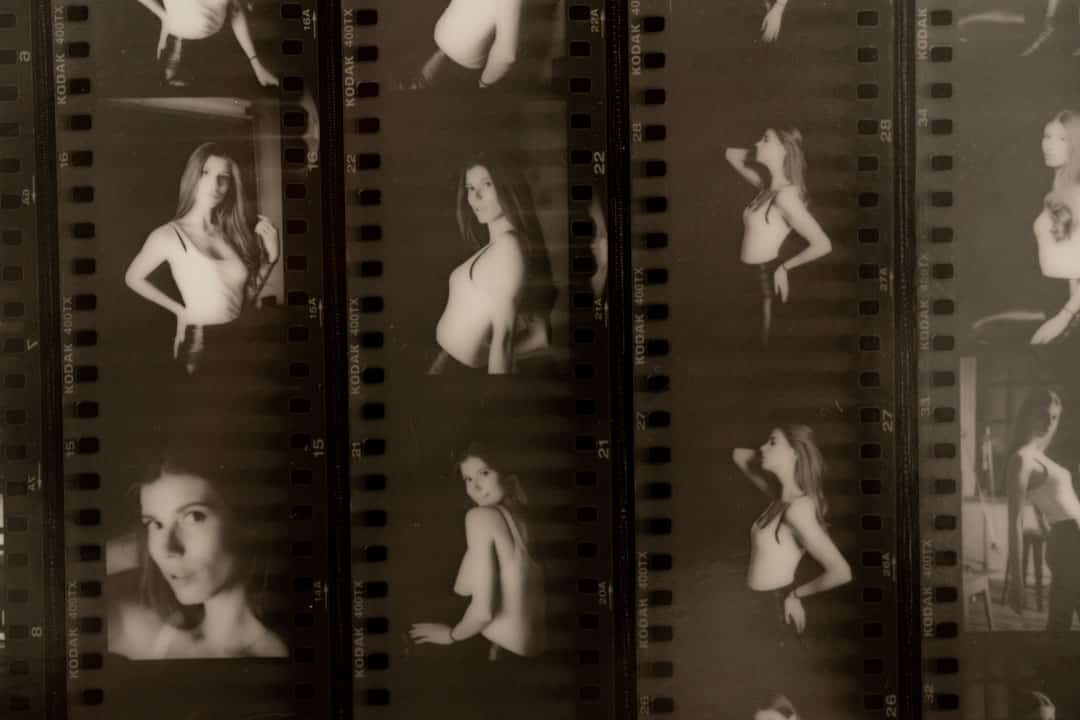
Overexposed negatives
The negatives were left in the developer too long, or were over-exposed in-camera creating overly dense negatives. Although it’s not often talked about, overexposure can ruin the sharpness of an image.
What’s happening is that so many of the grains get exposed, that it’s hard to differentiate the shadows from the highlights in an image. Color and chromogenic B&W films tend to handle overexposure better than traditional B&W films.

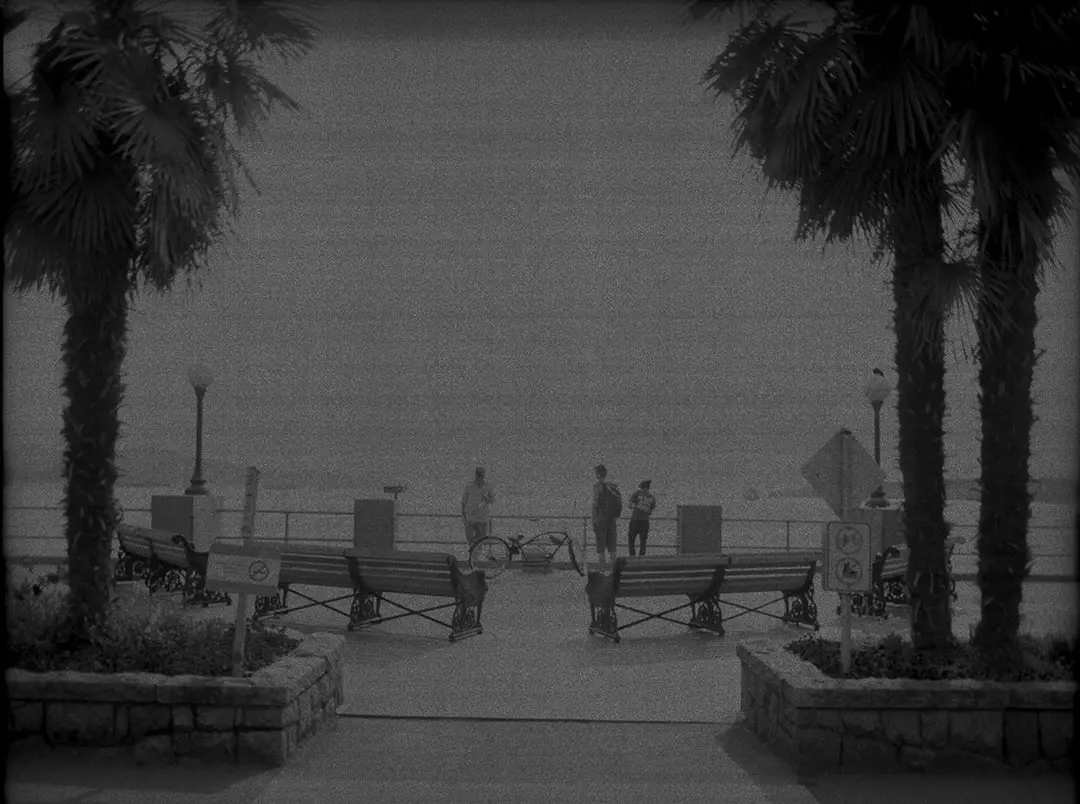
Overly grainy negatives
If you’re seeing a set of negatives where the grains are overly large, visible, or pronounced, it’s entirely possible that the film was overexposed.
The images above were way overexposed because I didn’t know that the aperture on my camera wasn’t working. I’d set the aperture on the lens to f/8 or f/11, but only realised when I made it home, that it wouldn’t go past f/4. So these images were overexposed by 2-4 stops and developed normally in Cawanol Professional developer. The developer is based on caffenol, and usually exhibits grain similar in size to Rodinal. But this is still much more grain than should be expected.
These photos were not overexposed as much as the previous example (where there wasn’t much of an image to see at all). But they’re overexposed enough that the highlights are blocking out and the grains are extremely apparent. I tried to fix some of these images by using HDR DSLR scanning, but that was only enough to bring back some of the details, but not to reduce the appearance of grain in the images above.
If you’re seeing overly grainy images, you may be overexposing your film by more than the recommended amount. Take a look at your settings, and test to ensure your camera is working properly.
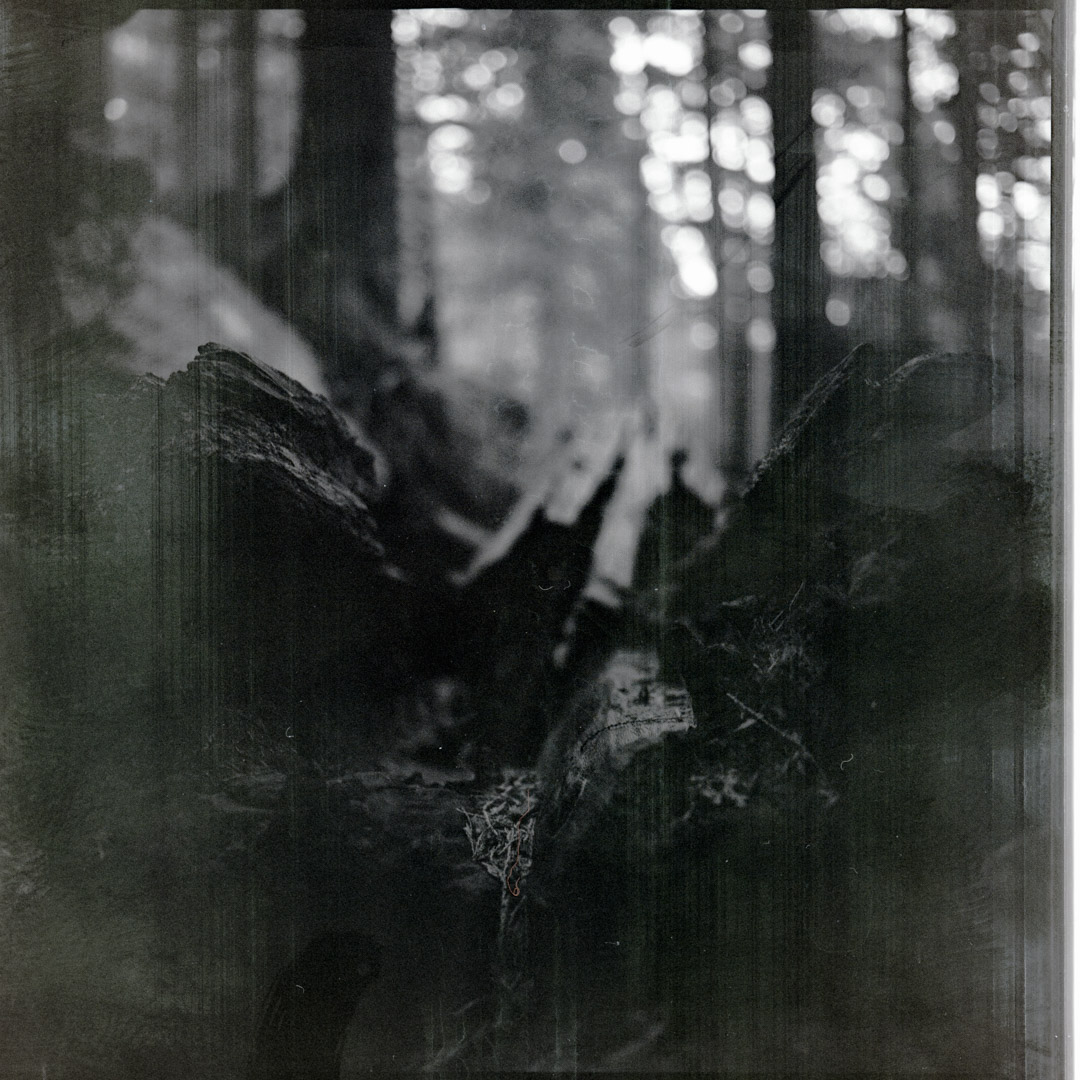
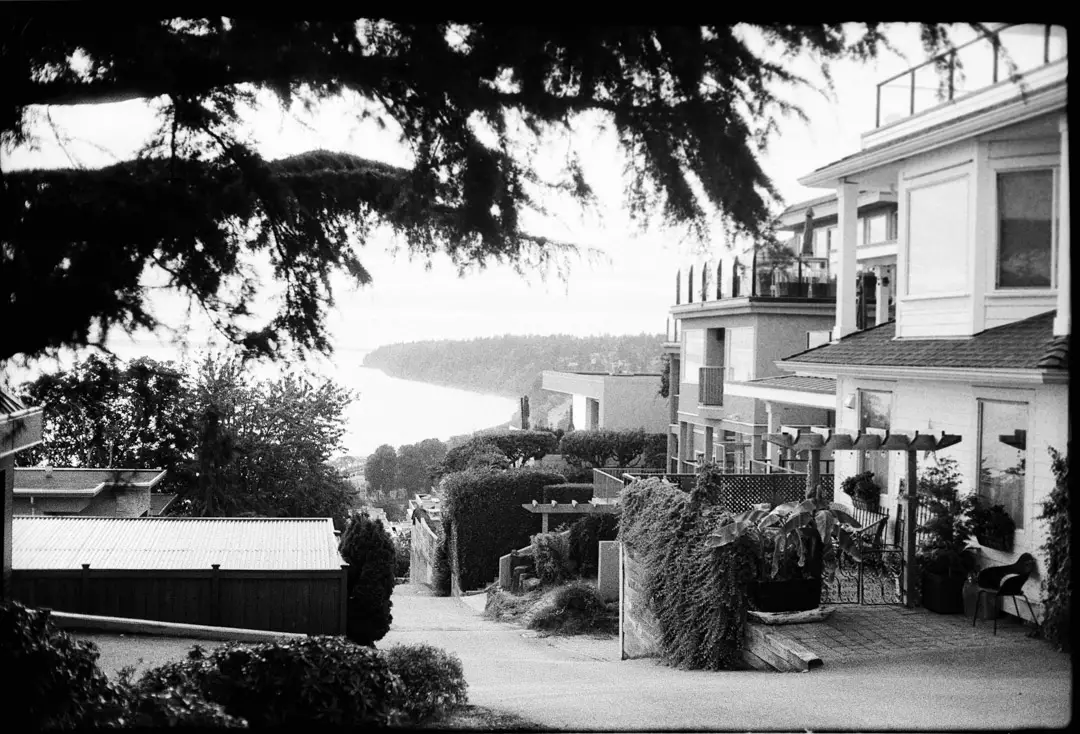
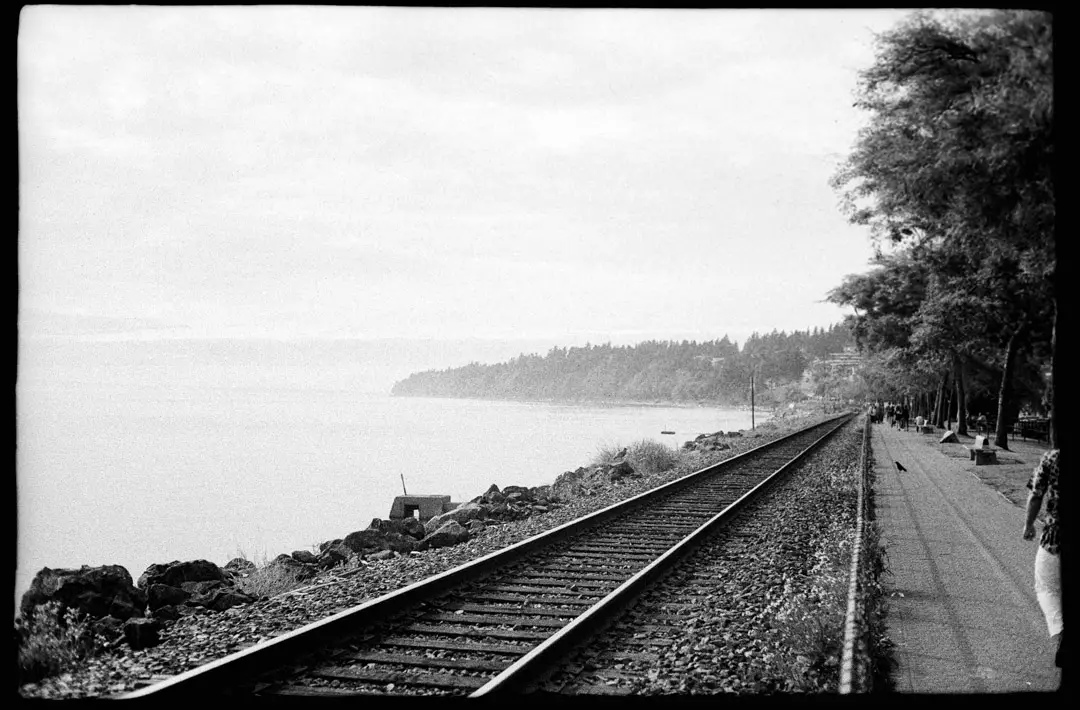
Underexposed negatives

If you’re seeing negatives that have very little detail in the darker parts of the image, or appear overwhelmingly grainy, chances are it was underexposed. The first sign that your film was underexposed is that the negatives will appear more clear than normal.
Usually underexposure happens because the photographer didn’t meter their film correctly. But it can also happen if you’re shooting color film at night and forget to set the proper exposure adjustments for tungsten light.
Thin negatives are usually recoverable to a point. Even if film is severely under-exposed, it’ll often produce an image. However, that image will always appear grainier than normal, and may not have any details left over in the darker places.
Learn more about how film grains work, and why under and overexposed film tends to look grainier than properly-exposed film in this detailed article about how film works.
Fingerprints on the film
If you’re using a wet Paterson reel, this has probably happened to you. You’re loading the reel, and somewhere along the line, the film gets caught and doesn’t budge no matter how much you curse. The only solution here is to open the reel and try again. If the process repeats enough times, eventually, you’re going to get your grimy fingerprints on the emulsion, and it’s going to get on the film.
If that’s what happened, then you know the solution. Buy metal reels, as everyone with a superiority complex on the Internet has apparently done, or make sure those Paterson reels are bone dry next time you load up a roll. If you’re running into problems with your Paterson reels, take a look at this article where I go over the easiest ways to load them.
If you didn’t have reel problems, then chances are you’ll need to change the way you hand film when loading it onto the reels. In every case other than this one, I handle film delicately by the edges are never run into problems. But another solution is to use a pair of rubber, nitrile, or museum-grade cotton gloves. Cheaper, non-museum grade cotton gloves will just leave fibers all over the place, and then you’re going to have a bigger problem on your negatives.
Crescent shapes appearing on the film
If you’re seeing light or dark crescent-shaped marks on the film after development, it’s most likely because the film got creased either in the camera or when you were loading it onto the reels. This can happen to anyone loading film onto wet Paterson reels. If you have those, once again, make sure they’re dry before loading a roll into them.
Negatives have started to smell like vinegar
If you open your film drawer, and the negatives have started to smell vinegary, that’s the first sign that they’re breaking down!
At an average temperature and humidity, film will last for approximately 40 years before they start to break down. But they break down faster in hot and humid climates, as well as when they’re stored in air-tight containers. The best method for storing film at home is in a cardboard box in a cool, dry basement. And if one of the negatives starts to have that vinegar smell, then immediately separate it from the bunch, so that it doesn’t hasten the beginning stages of breakdown for the other negatives.
Learn more about film storage, and which films are the most archival on this article.
Excess dust and water spots left on film
Out-of-focus specs on your film are usually caused by water and dust making their way onto the film.
Dust can be fixed by using a rocket blower to clean film while scanning. Also be sure to wipe down your scanning surface every time you scan film — the Epson V550 and V600 are absolute dust magnets that can leave negatives looking like they haven’t been touched since the ’50s.
Water spots, on the other hand, are a more difficult problem to fix.
Water spots occur when water collects and dries unevenly on the film. The best way to get rid of them is to get all of the water off of your roll after taking it out of the tank. But doing so with a squeegee or with your fingers can scratch the film — especially when it is still wet.
Some photographers swear by Photoflo, or Ilfotol, which are wetting agents that are supposed to make film dry more evenly. But whether or not it works for sure is a big debate.
I’ve had the best luck by completing a final rinse in 1+400 Ilfotol in distilled water, and then shaking the film in the reel to remove water. Once I take the film out of the reel, I will shake the film back and fourth to hopefully dislodge a couple more drops before hanging it to dry in the bathroom.
The final step is to run the water in the shower on the hottest temperature possible to make the room steamy. Letting it hang to dry in that environment helps the film flatten out, and seems to help it dry faster — just like your dishwasher does.
When the patches are minor, I typically prefer to fix the dust and water spots in Adobe Photoshop.
Ilford 120 film showing white patches, specks, or mottling

This is a new problem that has been happening only to some small batches of Ilford medium format film. Usually the problem occurs with low-ISO films, like Ilford Pan F, FP4, and potentially other films like Delta 100.
You can tell that this is the problem you’re facing is you see a number of sharp specs, blotches, or white spaces appearing on the photo. You may not see this issue on the negative itself, but it will appear very clearly on the scanned image.
Ilford released a statement in 2020, where they said the problem is mostly occurring because of humidity, temperature, and film age.
If you experience this problem, which I have a photo of thanks to Barry Growden on Facebook, send the feedback to Ilford Photo using this form, and they will replace the film. There have also been some reports that Ilford will even send a couple of extra rolls for you to try out as a gesture of goodwill.
Personally, I think this is an excellent program on Ilford’s behalf. Because it’s one thing to ruin film yourself, but it’s another completely to receive the film already damaged.
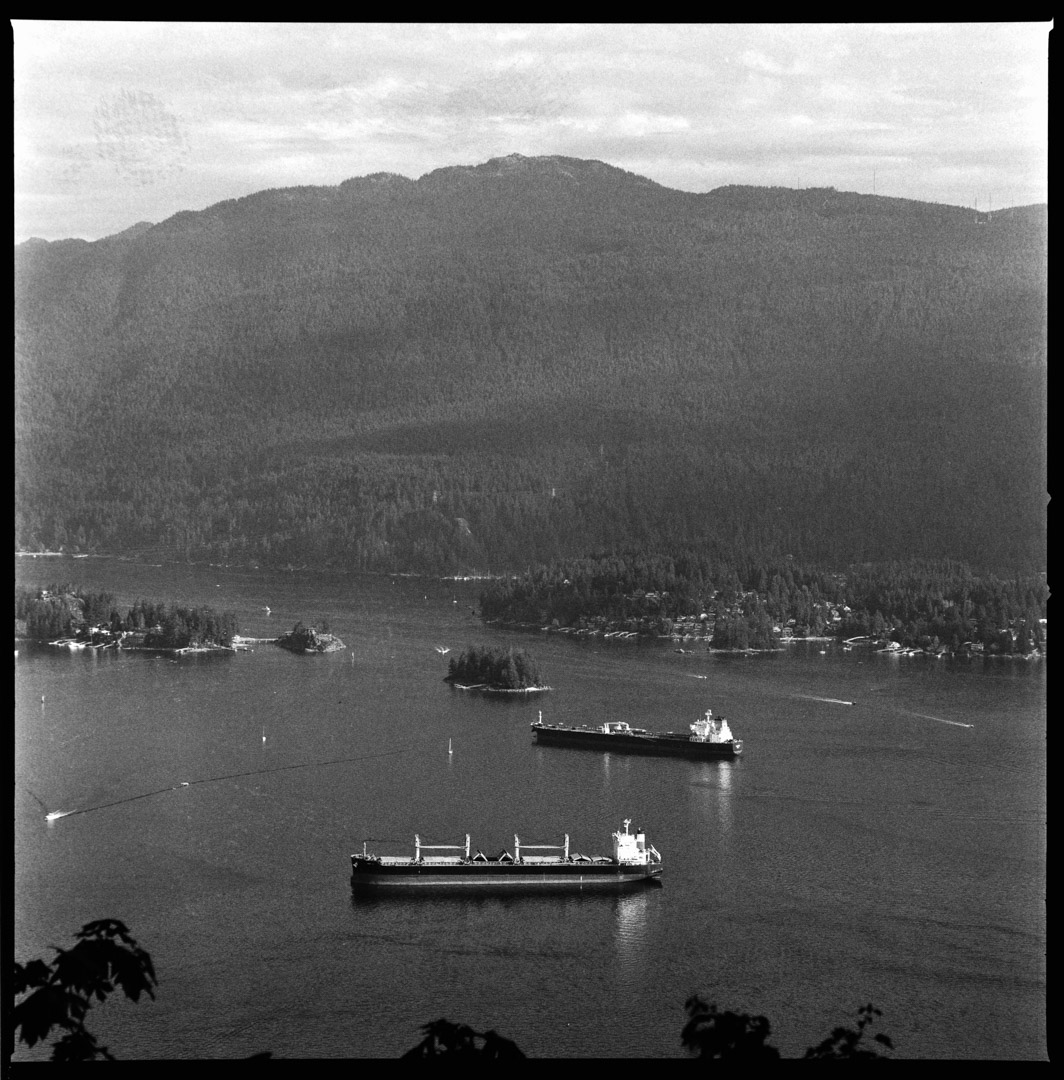
Bright edges on the sides of the negative
This is one that I’ve been coming across more recently since picking up a new medium format camera. What’s happening here is the film is curling, and my film holder is unable to keep the negative perfectly flat. So the sides of the film will scan denser than the middle of the negative, which appears brighter after conversion.
This problem can be fixed by finding a way to flatten the negative before scanning. Some photographers flatten their negatives by using a drying cabinet, or by archiving the negatives in sleeves and flattening them under a pile of books.

Dark shadow or vignette on one part of the frame
If you see a dark shadow on one section of the frame, it is usually caused by an obstruction in the frame. A shadow on the bottom of the frame (like in this case) means something was blocking the image from the top part of the camera.
Open the camera (without any film inside) and check to make sure everything is functioning normally. Sometimes the mirror or another piece may be getting in the way.
Point the camera towards a window with the aperture fully open and take a shot with a slow shutter speed. You can also hold the shutter open in bulb mode, and place a sheet of white paper behind the camera. If it leaves a shadow on the paper, then you know you have an obstruction that’s getting in the way of your image.
In this case, the shadow is being cast by the auxiliary shutter in a Hasselblad 500 series camera. It needs to be checked by a dedicated repairman to get this problem fixed.
Final thoughts
For the most part, if you can keep your temperatures reasonably stable, test your developing chemicals, and store film correctly, it’s unlikely that you’ll run into issues. Film photography is an extremely forgiving and fun art form.
There are so many film-developing issues that photographers will face throughout their journey — usually after purchasing a new piece of equipment. And because there are so many factors in the process, it can be extremely difficult to figure out exactly what went wrong.
This article is going to grow over time. If you’ve run into an issue that you don’t see on this list, I’d love to hear about it so we can feature the issue here and help out other film photographers who are running into these same problems every day.
And that’s it! If there are any problems you’ve come across that you’d like to see on this list, let me know down in the comments below! Or join plenty of like-minded film shooters on our official Facebook Group!

By Daren
Daren is a journalist and wedding photographer based in Vancouver, B.C. He’s been taking personal and professional photos on film since 2017 and began developing and printing his own photos after wanting more control than what local labs could offer. Discover his newest publications at Soft Grain Books, or check out the print shop.
Hi. I have ben developing for about 15 years. In the beginning of course made some of the usual errors. But apart from actual problems with the film I have rarely experienced anything dramatic.
Today though I developed a 35mm roll of TX in HC-110. Ina Paterson tank. As I often do. The front of the negatives, after developing look fine (hanging to dry now) however…:
The back side looks a lightish, sort of grayish brown opaque color. It will be interesting to first scan, and see if it even will scan. So in a nutshell, the front is “normal”, whereas; the back is an opaque grayish brown.
Thanks for any info,
Ronn Aldaman
Hi Ronn Aldaman,
Without seeing the negatives, this sounds like it could be an issue with under fixing. I’d say your best bet would be to dunk the negatives in a new fixer solutionto see if that makes them look normal again.
let me know how it goes,
Daren
Hello there
I have developed to roll one portra and lomography
And I noticed something similar happened to the both negative which is the film got a sky blue tent , cyan overlay
And is difficult to bring the colors in postproduction
Thanks
What were you scanning the images with? Do you notice that the whole roll of film looks more red than normal? It could be either due to the agitation of the film developer (if you notice its more red than normal), or it could be just an issue with the scanner not getting a good reading. Alternatively, if you’re using negative lab pro, did you white balance the images from the edge of the negative?
Hey Daren!
Just wanted to reach out and thank you so much for this amazing, comprehensive article. I’ve been developing film at home for about 3 years, 2 years doing C41. I’ve run into probably every problem you have posted on this page and I will always have to piecemeal research from Reddit forums and old websites. Thank you so much for sharing all this info and keeping film alive 🙂
If you see any errors in my processing please let me know! Always want to improve my work. Website is Jacob-King.com, but the newer work that I definitely developed can be seen on insta @jacobking.jpg
No worries at all! If you run into any issues that you can’t find on this list, feel free to send me a message about them! I’d love to make this resource as comprehensive as possible.
Hi,
Great article and very informative. I have some artefacts appearing on my scanned images and was wondering if you have any idea what might be causing them-I’ve put 2 examples here: https://blog.andyofarrell.com/?page_id=698
In the first image there is pot on the window but its got a blurry bit below it, in the image of the dog, same type of artefacts appear above dogs back.
Any help would really be appreciated.
Andy
Hey Andy,
Thanks for reaching out! My best guess with these images is that it’s a scanning artifact. I’ve seen artifacts like these when playing around with the curves in the the Epson Scan program or Lightroom. But I doubt that they’re visible on the negative, and could be easily edited out using a program like Photoshop.
Let me know if that helps!
Daren
A friend of mine that was a photographer in the indo china war has left me some old rolls that have become very brittle what can I do to make it viewable without breaking
Hi Tony,
That’s a really tough situation that starts to happen when the film’s acetate backing begins to break down. The best advice I could give is to reach out to your local community archive, or the archive in the next major center. They will have a lot of experience handling old film negatives and will be able to give you tips to keep the film safe (and may even take an interest in preserving these images further, if they’re of historical importance to the region).
Hi Tony,
thank you, I thought I had ruïned my film because it was very foggy but they happened to be under-fixed. After a bad with fresh fixer the negatives where perfectly clear (where it should be clear).
Bart
Hi Daren, I find your article very interesting … I am having a problem with my photos that I have developed in a laboratory and they are taken with a Leica m4. In many shots, and especially on color films, white streaks appear only on the right side of the frame; some are dense, others less like a beam of light that I find especially accentuated on slightly overexposed frames. Can I send you some scanned photos for you to view the problem? I hope for a little help to understand the problem, thank you in advance.
Hi Ciro,
Absolutely! I hope I can help with this. I’ll send you an email and see if we can solve this problem.
Regards,
Daren
Thank you very much Daren, I sent you the email with the photos attached to show you the problem
This is a fantastic and detailed guide to the most common film‑processing problems! I appreciate how each issue from blank negatives and light leaks to water spots reticulation and surge marks is clearly explained with practical solutions. The temperature and chemical testing tips are especially useful for anyone developing at home. A must read for film photographers who want to troubleshoot mistakes and get better results with every roll!