
Getting started with DSLR scanning can feel like a complicated process. Unlike using a scanner, there are many pieces that you need to put together to make it work properly. Unfortunately, there aren’t any one-size-fits-all solutions for scanning film with a DSLR or mirrorless digital camera
Since the film revitalization, there have been many new options that have become available on the market. With all of the options available, it can be hard to know which options are the best for you.
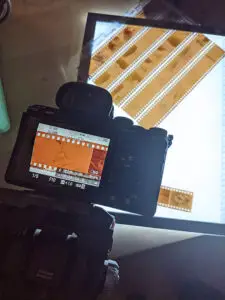
So here are the devices that I use every time I digitize my negatives. I’ve used this DSLR setup since the beginning of 2021 when I finally ditched my Epson V600 because of the amount of time it took to scan a set of negatives and the fact that I could never get two images to look the same even if they were shot side by side.
Since starting scanning with my DSLR, I have never once looked back. You can see the results for yourself here.

Camera: Sony A7III
I chose the Sony A7III primarily because it was the camera that I already have. I’m a wedding photographer by trade, so I already had my own camera. And this is the recommendation that I have for most photographers looking to get into DSLR scanning. Because the camera is usually the most expensive part of the process.
The A7III is a fantastic camera for DSLR scanning. It has a relatively high resolution for the price range, has a base ISO of 50, and an extremely high dynamic range. All of these factors combined, with the live preview, make scanning an absolute breeze.
The Sony A7III also has a 5-second shutter delay, which is the perfect amount of time to get away from the camera in time to remove any trace of shake when scanning.
Of course, nearly any mirrorless or DSLR camera will be much better than using a film scanner — even a cheap Canon 5DMKII or even a Canon Rebel would produce fantastic results. But the A7III is becoming a lot more affordable now that the A7IV is on the way.
Find the Sony A7III on Amazon for the best price here.
Do you need an expensive camera for DSLR scanning?
For scanning film, you don’t really need that expensive of a camera. While slow films have high resolution, films with an ISO speed of 400 and above have a post-development resolution of around 13 to 15 megapixels.
That means the majority of cameras on the market are going to be capable of capturing more detail than is available on the film negative. Nate, the creator of Negative Lab Pro still uses a Fujifilm X-T2, which although being an APS-C camera, is able to make fantastic scans. Nate suggests using higher resolution cameras will only result in making larger files — not resolving more detail.
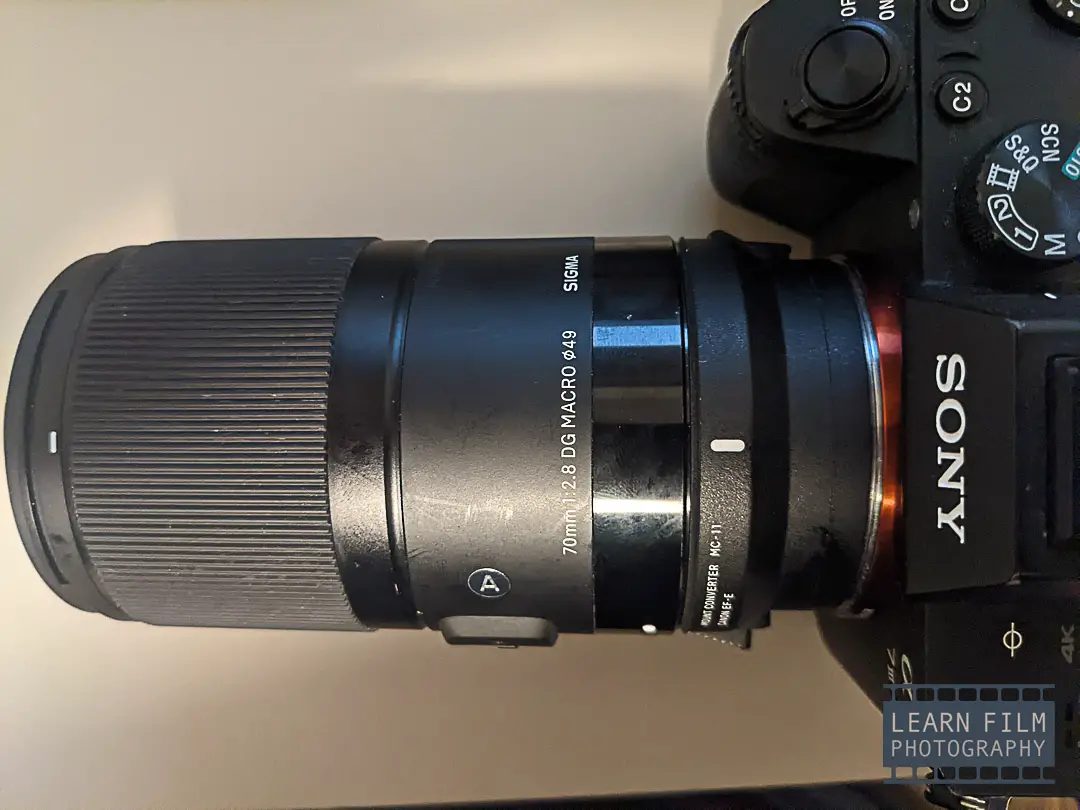
Lens: Sigma Art 70mm f/2.8 Macro
The second most expensive part of the DSLR scanning kit is the macro lens. Having a good macro lens is key to creating good scans because they are designed to create a perfectly flat focal plane even when focusing so close to the camera.
Most lenses produce a curved focal plane in the corners, producing images with unsharp corners and vignetting (see more below).
Modern macro lenses are also fantastic at controlling flares, which are common when shooting backlit subjects. Most film photographers solve flaring by masking off the sides of the film, but it’ll speed up your workflow significantly if you don’t have to perfectly mask out the light every time you set up.
The Sigma Art 70mm f/2.8 is an incredible macro lens for all of these reasons. It’s incredibly sharp corner to corner and handles flare extremely well — there’s no need to mask the film whatsoever. In fact, it’s one of the best performing modern macro lenses available. And for the price, Sigma Art 70mm Macro is an absolute steal.
The only downside about this lens is that it is made with a focus by wire system. The autofocus isn’t perfect (especially if you’re going to try to photograph moving insects) and often doesn’t work the best when the camera is off the tripod.
In fact, the auto focusing can be downright frustrating when getting closeups of shoes or rings at weddings.
But that same focus by wire system is actually extremely helpful for dialing in focus when scanning film. The slower that you move the focus ring, the smaller the jumps in focus will be. This feature makes it perfect for get tack-sharp scans where the grains are visible.
I set the camera on live view, zoom in to 10x, and use manual focus until I can see the grains on both sides of the negative. If the grains are sharp on one side and not the other, then I know that I have to better align the camera with the film.
Can I just use an enlarger lens, or other cheap macro options?
One of the solutions that I used to read about all the time was people reversing old enlarger lenses. These are typically very sharp and produce images with flat focal planes, but they aren’t anywhere close to being as good as a modern macro lens.
These lenses have problems with flare, and typically aren’t very sharp on the corners when they’re adapted to digital cameras. They also aren’t all that easy to focus
Can I use extension tubes?
The next cheapest way to get into digital camera scanning is to use extension tubes. These work by moving the lens further away from your camera, spreading the image further so that you can focus on objects closer to your camera.
Extension tube sets cost between $20 and $100, though the price doesn’t make a difference in quality since they’re just empty tubes with electronics to control aperture and focus.
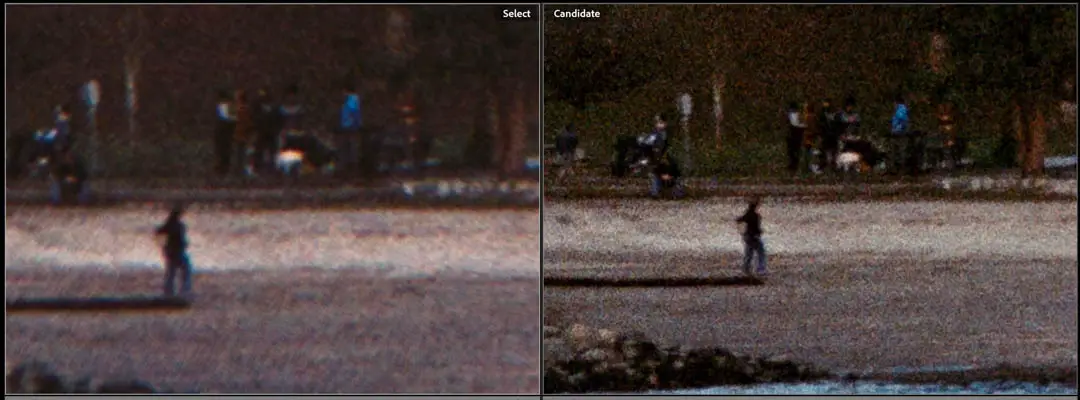
The problem with extension tubes is that they magnify any issues that your camera has. If your lens doesn’t produce a flat focus plane, then the images will not be sharp anywhere outside the center of the frame even when you stop down the lens.
And that will happen even if you have top-of-the-line, professional glass.
See a side-by-side comparison between a macro lens and using extension tubes here.
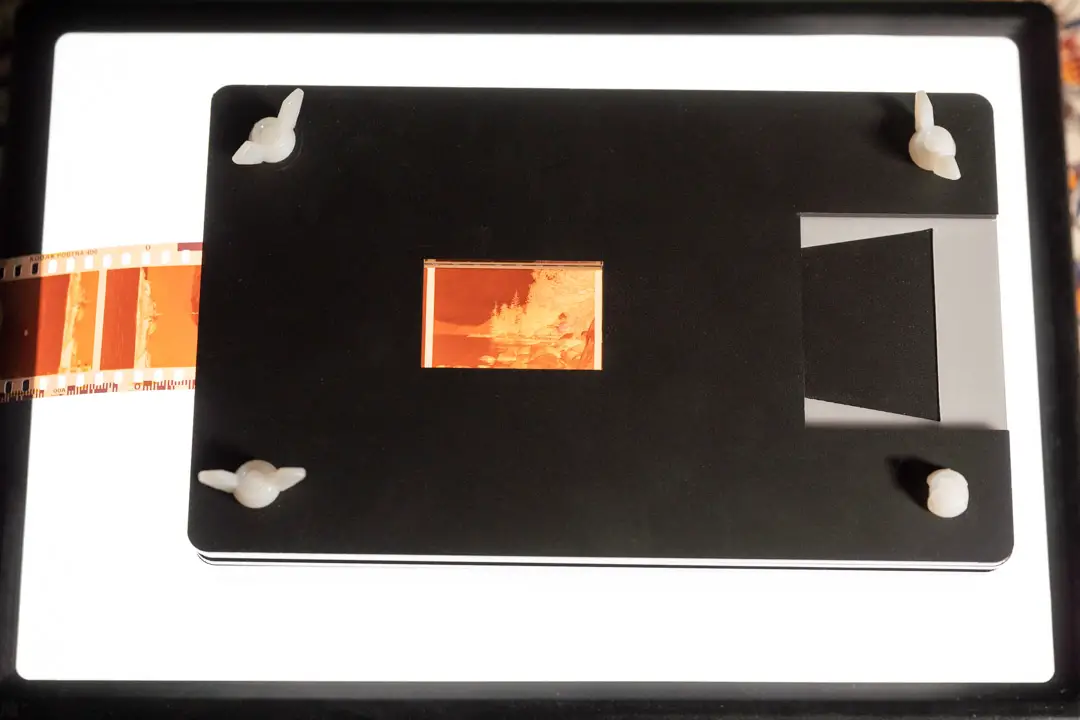
The easiest film holder to use
The film holder that I use to scan film is called the Essential Film Holder. It’s a simple, 3D-printed film holder with a built-in diffusion panel.
The Essential Film Holder (EFH) is the only one of its kind to rise the film high enough off of the light panel with a diffuser, making it perfect for use with anything from a cheap $20 light panel on Amazon, LED video lights, and iPads, all the way to the pro light panels made specifically for scanning.
The downside to this holder is that if the film isn’t perfectly flat, this holder will not make it flat enough to scan. That means thin-base films like Lomo 400 and Lomo 800 in medium format will be difficult to scan.
Read my full review of the Essential Film Holder here, or go to the EFH website.
My light source for scanning film
In my quest to save money, I tried a few different cheap light pads before settling on the Raleno video LED panel.
The Raleno LED pad has a high CRI, which means the light source itself won’t affect the colors on the negative. The Raleno also has a long-lasting built-in lithium ion battery, and a perfectly flat back, which makes it perfect for use with an enlarger or copy stand.
But after doing a side-by-side comparison of these light sources using the Essential Film Holder, the only real difference that I noticed was the shutter speed needed to make a good exposure.
The iPad was the least bright, with the LED light tracing table being just slightly brighter. Both of these light sources needed a 1-5 second exposure when using ISO 50 and f/7.1 to scan the negatives.
The Raleno pad, on the other hand, is far brighter. At the maximum brightness, the shutter speed will be anywhere between a half-second to 1/60th, depending on the density of the film negative.
The main benefit of having a faster shutter speed is that you don’t have to worry as much about camera shake while exposing the negative. In my apartment, even just taking a step or two around my setup can introduce camera shake that reduces the sharpness of the scan.
Here is the Raleno light pad that I use on Amazon. If you are comparing models, make sure you find one that has a perfectly flat back like the one in this link above. There are cheaper Raleno options available, but many of them have dials and switches that stick out and make it impossible to keep it flat on a surface for scanning.

What about using the Epson film holders?
If you’re reading this because you’re interested in making the switch from an Epson scanner, you likely are hoping to save some money by using the film holders you already have.
The Epson film holders are okay, but you are likely to run into a few issues when starting out.
For one, DSLR scanning with the Epson holder is not any faster than the Epson scanner itself when you take converting the photos into account.
The second issue is that the Epson film holders do not hold the film far enough above the light source. If you’re scanning with a cheap light source or an iPad, then you can expect to see pixels or light/dark spots from uneven lighting.
The last issue is that it is very difficult to mask off. If you’re using an older macro lens or extension tubes and a lens that tends to flare, you will have trouble blocking out the light around the edges of the frame to get a good-quality scan.
If you do need to mask off the sides, then you will have to re-set them for each individual frame.
All in all, it is possible to use the Epson holders. They do an okay job. But I’d only recommend them for users who are just trying DSLR film scanning as a proof of concept, rather than making this the default method.
In the end, the Epson film holders will get in the way at one point or another.
Do the cheap light tables on Amazon work?
If you want to save money, chances are you’ve seen the cheap LED sketching tables on Amazon. There are a number of rebranded versions of the same board, and they seem to be getting cheaper and cheaper every 6 months.
These boards are generally not advised by film scanning enthusiasts because they don’t have a stated CRI, and there is no way to know if it has hot spots.
However, I did a test where I compared my Raleno pad and an iPad screen with one of these tracing tables and I found next to no difference. The most likely reason for that lack of difference is because I used the Essential Film Holder, which raises the film off of the light source significantly and has a built-in diffusion panel to make the light more even.
If you want to use one of these cheaper light sources, be sure to use something like the EFH to make sure you’re getting good-quality scans.
Many film photographers do own these pads for viewing negatives because they can be a major help when cutting and organizing film.
What should I buy to hold the camera?
The last big expense is finding something to hold your camera steady. You could try doing this by hand, but you will need to use a high ISO and are unlikely to ever scan your negatives with a perfectly flat focus plane.
There are a few ways to hold your camera when scanning negatives. The first is to use a copy stand, which are designed for archiving or copying negatives back in the day, and the second is to use a tripod.
Copy Stands — the best choice
Copy stands, or enlarger stands if you have one with a 3/4-inch screw, are the most reliable solution for scanning film negatives with a DSLR camera.
Copy stands are purpose-built for taking photos of negatives with a macro lens, so you can be certain that you will create a perfectly flat focal plane every time. The copy stand will also allow you to move the camera up and down with a single motion making it easy to get as close to a 1:1 scan as possible with your macro lens.
And the last benefit of using a copy stand is that you can probably find one for free. Sure, there are some sellers making these on eBay for fairly cheap prices. But there are also millions of them to be found taking up space at garage sales, auctions, or in your grandparent’s basement.
With a little bit of searching, it will be easy to find a good quality copy stand for little or no money.
Tripods — finicky, but they will work
The next way to scan your negatives is to use a tripod. This is not the best solution, but it usually works well — so long as you have the right kind of tripod.
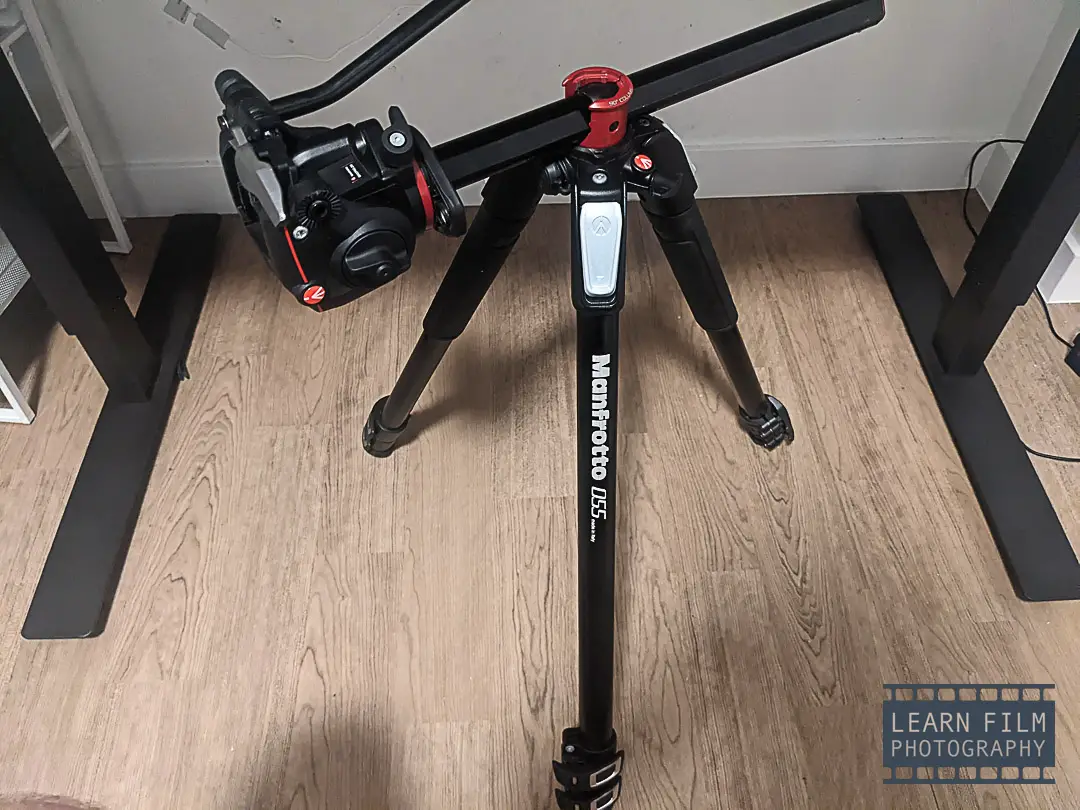
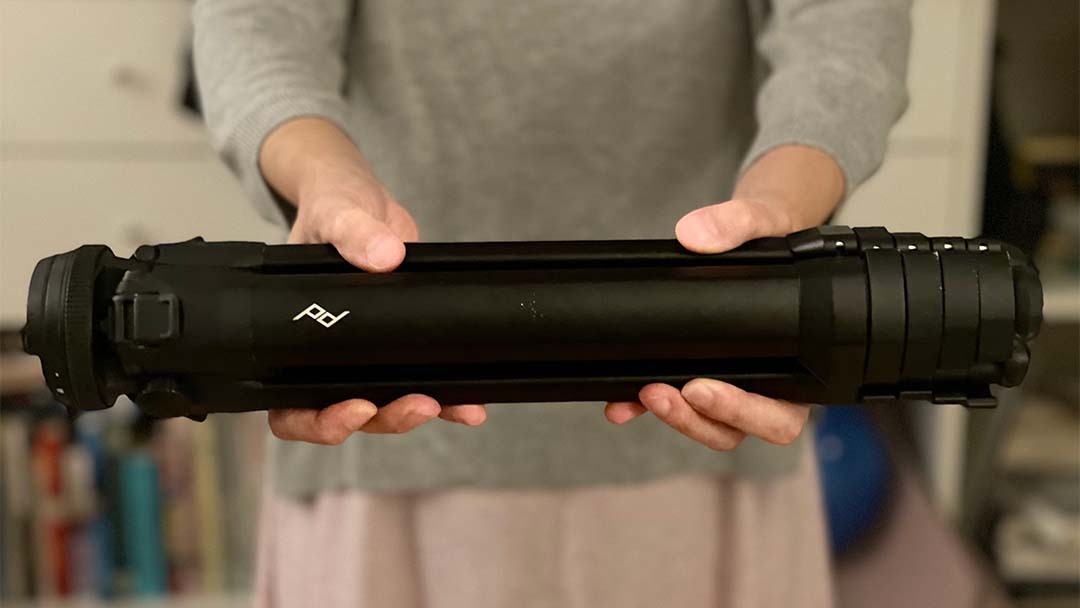
You’ll need a tripod that can either have a horizontal bar (like the Manfrotto MT055XPRO3) or one where you can reverse the head so that your tripod works upside down, like the Peak Design Travel Tripod.
The first problem with tripods is that you will have to make sure your camera is perfectly level with the negatives every time you use it.
I’ve been using the Manfrotto tripod for the past year, and use a bubble level application on my phone every single time to make sure that my camera is perfectly level. The process takes all of 2 minutes.
The next problem only applies to the Manfrotto. You cannot raise and lower the column when you’re using it in the horizontal position. That means you have to raise and lower three legs every time you want to make even the smallest adjustment.
I have made marks on the legs so that I get it fairly close to perfect upon setup, but there are almost always some extra adjustments to do before I give up and make the image smaller than the maximum it could be.
The last issue to know of when using a tripod is that you will need to use something other than a ball head when scanning film. There’s simply no way to make the micro-adjustments necessary to make the camera perfectly flat using a ball head on a tripod. I personally use the Manfrotto video head to make my job as easy as possible.
Final thoughts
Scanning with a DSLR camera gives me way more flexibility over my scans. I remember struggling with the outdated software and files when scanning with the Epson V600, just wishing for something like a Raw file that I could work within Lightroom instead.
Switching up my scanning method has been an absolute game-changer for my photography. It’s not only way faster, but in the end, I also have so much more control over how the final images come out — and can even make a cohesive batch of images that look like they were shot in the same light. Something that I could never do with Epson scan or Silverfast.
Have you had any problems with scanning film in the past? Or do you have any other questions about scanning with a DSLR camera? Let me know down in the comments below, or check out this article to learn how to solve the most common film processing issues.

By Daren
Daren is a journalist and wedding photographer based in Vancouver, B.C. He’s been taking personal and professional photos on film since 2017 and began developing and printing his own photos after wanting more control than what local labs could offer. Discover his newest publications at Soft Grain Books, or check out the print shop.
Thanks for the tips.
Daren, thanks for the article. Do you have an image of what the whole setup looks like?
Thanks for reaching out, Hugo! I’ll get one made here asap.
Regards,
Daren