
One of the best tools that exists for film photographers right now is Negative Lab Pro. This piece of software that works inside of Lightroom has been the key to making professional results on film accessible to photographers everywhere.
Before Negative Lab Pro, there wasn’t a way to create consistent results using the scanning software available at home. Scanning apps like the Epson Scan, and Silverfast make it practically impossible to create consistent results, even when two negatives were shot in the same light on the same roll. Negative Lab Pro changed that by integrating a method of converting negatives into positives using Lightroom Classic, which is the default editing and cataloging program used by photographers everywhere.
But even Negative Lab Pro has some quirks, and is notoriously difficult to understand off the start. Last week I was able to sit down with YouTube’s Ribsy and Nate from Negative Lab Pro to have a chat about how the program works, and what users can do to make the best scans possible. Here’s my 11 biggest takeaways from our chat.
1. The macro lens is the most important part of the DSLR film scanning setup
According to Nate, most bad results come down to the negative scanning setup. But if there’s one piece of equipment that is the most important, it’s the Macro lens. Lenses with extension tubes, or older macro lenses are all prone to flaring, which creates color casts and reduces image sharpness.
“Having a really good 1:1 macro lens with a modern UV coating, and good coating on it, is I think the first most important thing to get. If you don’t have that, it doesn’t matter what your resolution is, you’re just going to have very good resolution of a bad scan.”
My personal favorite lens for scanning negatives is the Sigma Art 70mm Macro lens. Despite being one of the cheapest macro lenses on the market, the Sigma Art 70mm Macro lens outperforms, or performs on par with other lenses that cost thousands of dollars. Get yours on Amazon for the best price here.
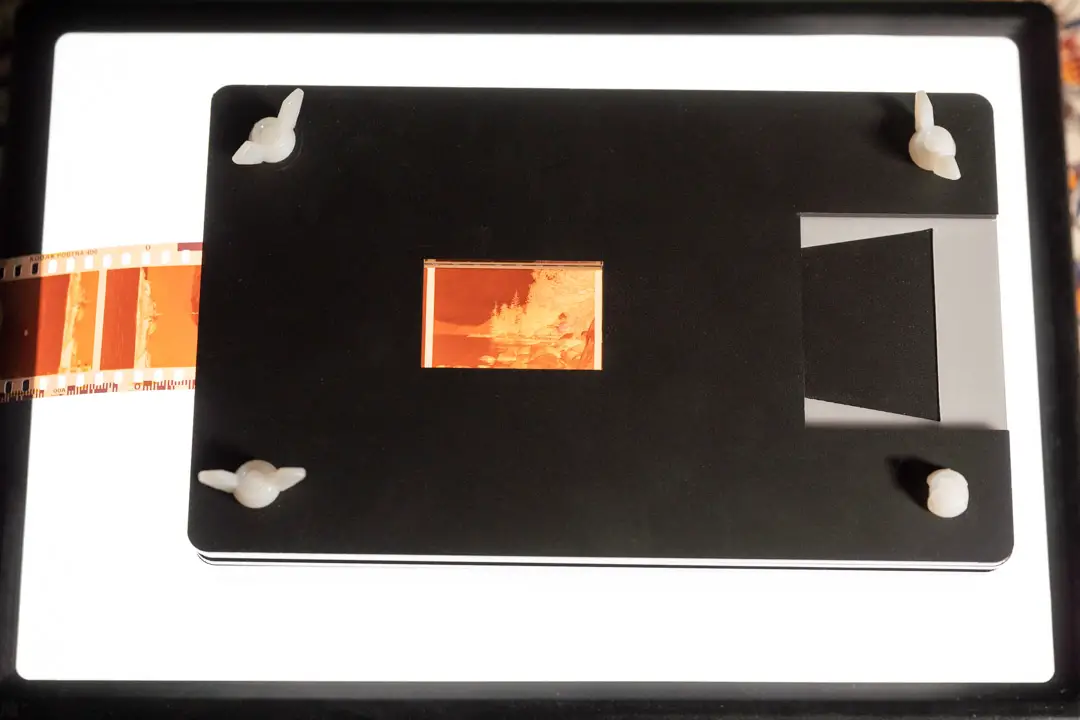
2. The second most important digital camera film scan piece is the light source
The second most critical piece of equipment is the light source used to scan the negatives. The cheap ones on Amazon have uneven lighting, which, of course, creates uneven exposures in your negatives.
The best light sources for scanning negatives are LED panels with CRI ratings above 95. CRI is a measure of how accurately a light source will reproduce colors — meaning a low CRI panel might create inaccurate color reproduction on your film scans.
I personally recommend using this Raleno Light Pad (note, there are cheaper options on Amazon, but they don’t have a flat back panel, which will make them very difficult to use), which has a CRI rating above 95, has a flat back for easy scanning, and Good results can be had using an iPad so long as the negatives are a couple inches above the light source.
3. Sync Settings to speed up your workflow
If you have an entire roll of film that was shot in a single location at a single time, you can apply the same adjustments to every image using the batch editing tools available in Negative Lab Pro.
Those tools include Sync Scene and Sync Settings.
To get a start on batch editing with Negative Lab Pro, crop the first image and set the white balance. Then, while that image is selected, hold shift and select the rest of the images that you’d like to synchronize.
Then, open Negative Lab Pro, and click convert negatives. The program will analyze all of the negatives in your set, but you’ll only be able to adjust the settings on the first image you selected.
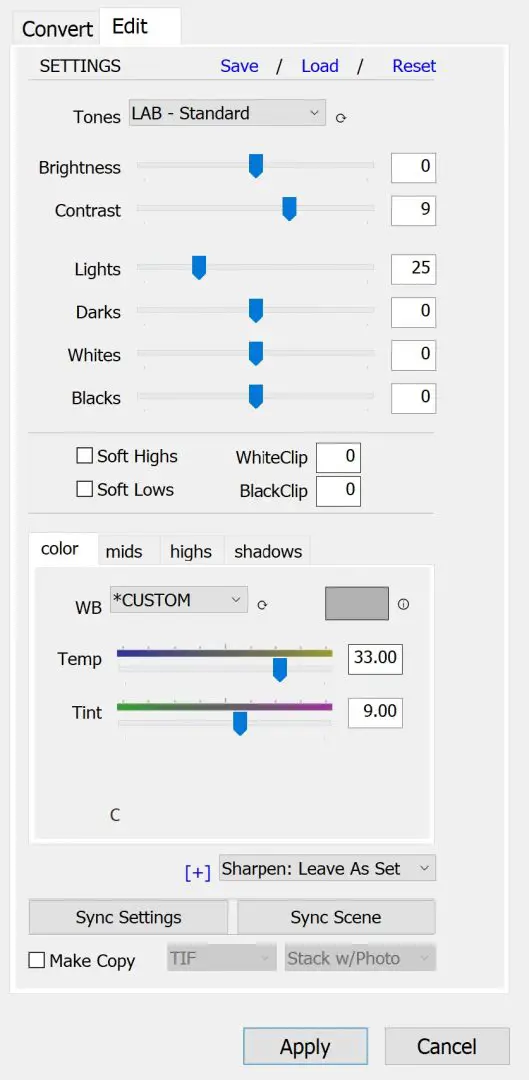
At the bottom of the window, there will be two options. Sync Scene, and Sync Settings.
Sync Settings will synchronize all of the settings adjustments you made to the images, where Sync Scene will copy over the Negative Lab Pro image analysis to all of the images.
Using these settings can dramatically increase the editing speed. But, if the scenes are different, then the Sync Scene function may create some bad conversions. For example, if you shot one image with a warm sunset glow, and then next at blue hour, the program isn’t going to make both of those images look good using the same conversion math.
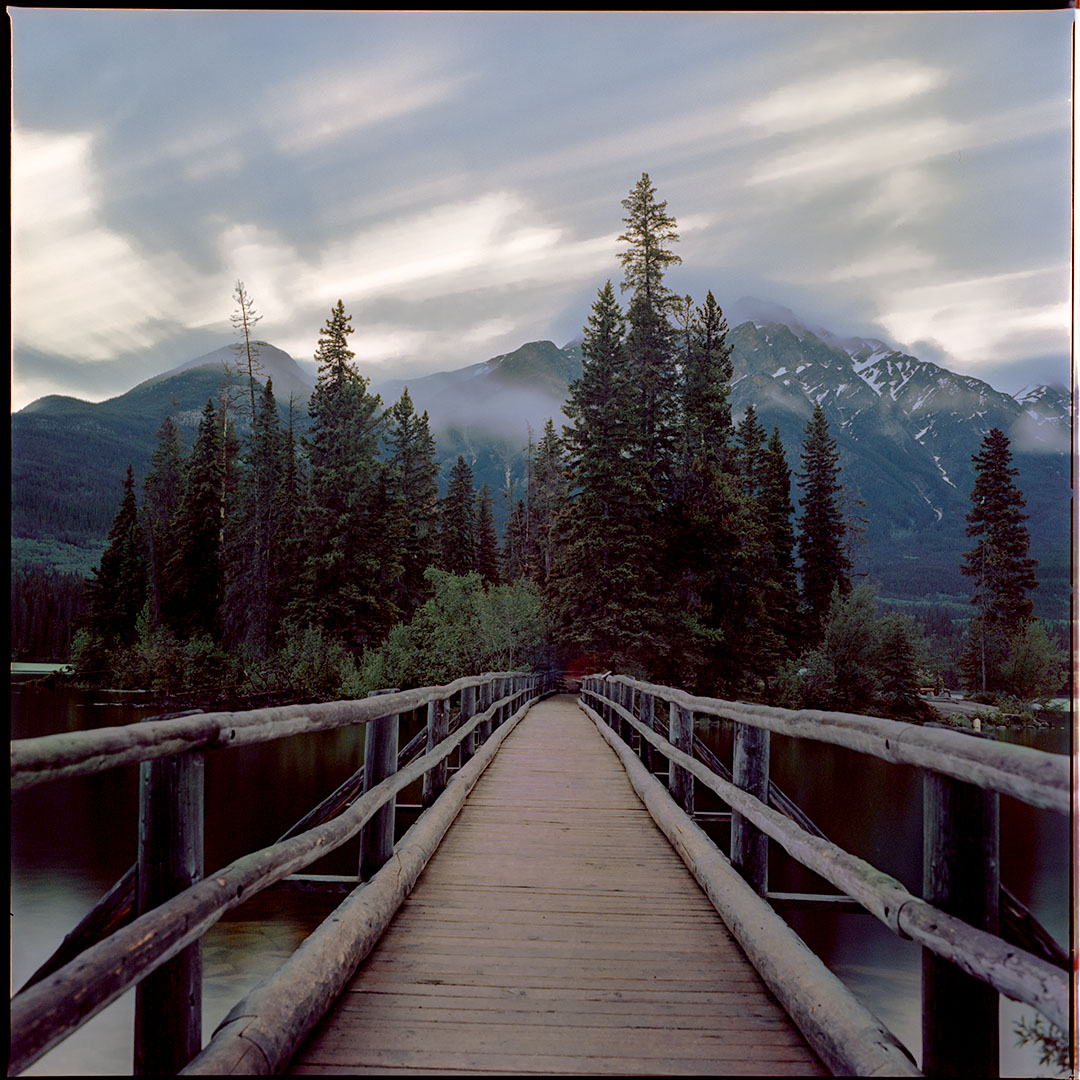
Where Sync Scene can be beneficial, Nate explained, is at sunsets.
“If you have a photo that you’ve taken of a sunset. Then you’re thinking, ‘how does Negative Lab Pro think about the correct color for that sunset?’ Negative Lab Pro doesn’t know that it’s a sunset. It just knows that there’s a ton of red in it, and thinks maybe there’s too much red. So it starts to pull it back a little bit.”
“If you take a neutral image from the roll, and sync the scene to it, you’ll see the colors of that sunset come through better.”
More information on Sync Settings and Sync Scene can be found on the Negative Lab Pro site here.

4. Wet mounted negatives can give results that are nearly identical to drum scanning
Drum scanning is used to get the absolute most quality out of film negatives, but the entire process is expensive and time consuming. A good drum scan of a single negative can take upwards of an hour to complete on machines that cost more than a kidney on the black market.
According to Nate, DSLR scanning with wet mounted negatives is able to almost perfectly replicate the quality of a good drum scan. The process of wet mounting requires the user to sandwich the negative between anti-newton-ring glass and museum glass with a layer of mineral oil or Kami Fluid around the negative.
The oil has the optical effect of perfectly removing dust and scratches from the negatives, making perfectly sharp and detailed images in a way dry scanning simply can’t compete with.
If you have some precious negatives that you want to scan in the best way possible, this method will be worth testing.
5. Enhance Details and Super Resolution in Lightroom Classic
Adobe recently released a few methods of enhancing raw images, which include the Enhance Details and Super Resolution. These two processes essentially put the raw images through another complex algorithm that brings out more detail, or makes them larger for print.
Nate said that he uses the enhance Details Function on every one of his scans using his Fuji X-T2. The Enhance Details doesn’t add as much to Canon, Nikon, or Sony images, but works wonders with the X-Trans sensors in Fuji cameras.
“Dealing with X-trans sensors is just way more complicated, and Fuji has got some of the secret sauce, and maybe they haven’t shared all of it [with Adobe]. But Lightroom with the Enhance Details tool, it makes the X-Trans sensor as good as straight out of Fuji. It’s really good. I have a Fuji X-T2, the first thing I do with everything, whether shooting digital or taking film scans, 100% of the time, I always put it through Enhance Details, and delete the originals.”
6. Negative Lab Pro has its own metadata to organize photos
If you’re a nerd who loves using metadata to organize your images, Nate built something in the Negative Lab Pro plugin just for you.
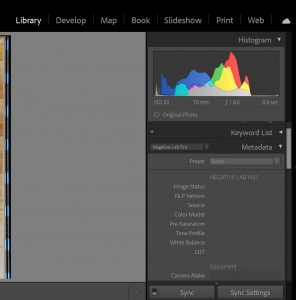
The metadata lives in the quick editing panel in the Library Module. Scroll down to the metadata section on the right side and choose Negative Lab Pro from the drop down list just to the left of the Metadata Panel.
Here you can enter all kinds of information, such as the camera, lens, film stock, ISO, developer, dilution, dev time, and even a box to add your own notes.
And if that’s not enough, there are even presets for this metadata that you can create yourself to make it easier next time you use the same combination.
Personally, I didn’t even know this existed in the past. But this is going to play heavily into my organizing game in the future.
7. The reason why editing in Lightroom’s basic panel doesn’t work after using Negative Lab Pro
If you’ve ever converted a negative using Negative Lab Pro, and then tried to make adjustments using the basic editing panel after the fact, you’ve probably learned that it’s tricky to get better results.
There is a ton of math going on behind the scenes in Negative Lab Pro. According to Nate, the program takes the scanned negative and precisely chooses the exact points on the inverted Lightroom curve needed for a neutral scan.
But curves reads the data that comes after the basic editing panel adjustments are applied.
“In Lightroom, everything that you see happening in the basic panel, like the contrast, exposure, all those are happening prior to what’s happening in the curves. So you adjust your curves, and then you go to change contrast, and now you’ve just thrown off everything else you’ve already done,” he said.
“So you have to know how to add the contrast and curves themselves.”
So the best way to make adjustments after the fact is to go back into the Negative Lab Pro interface, or to make the adjustments you want on the curves themselves.
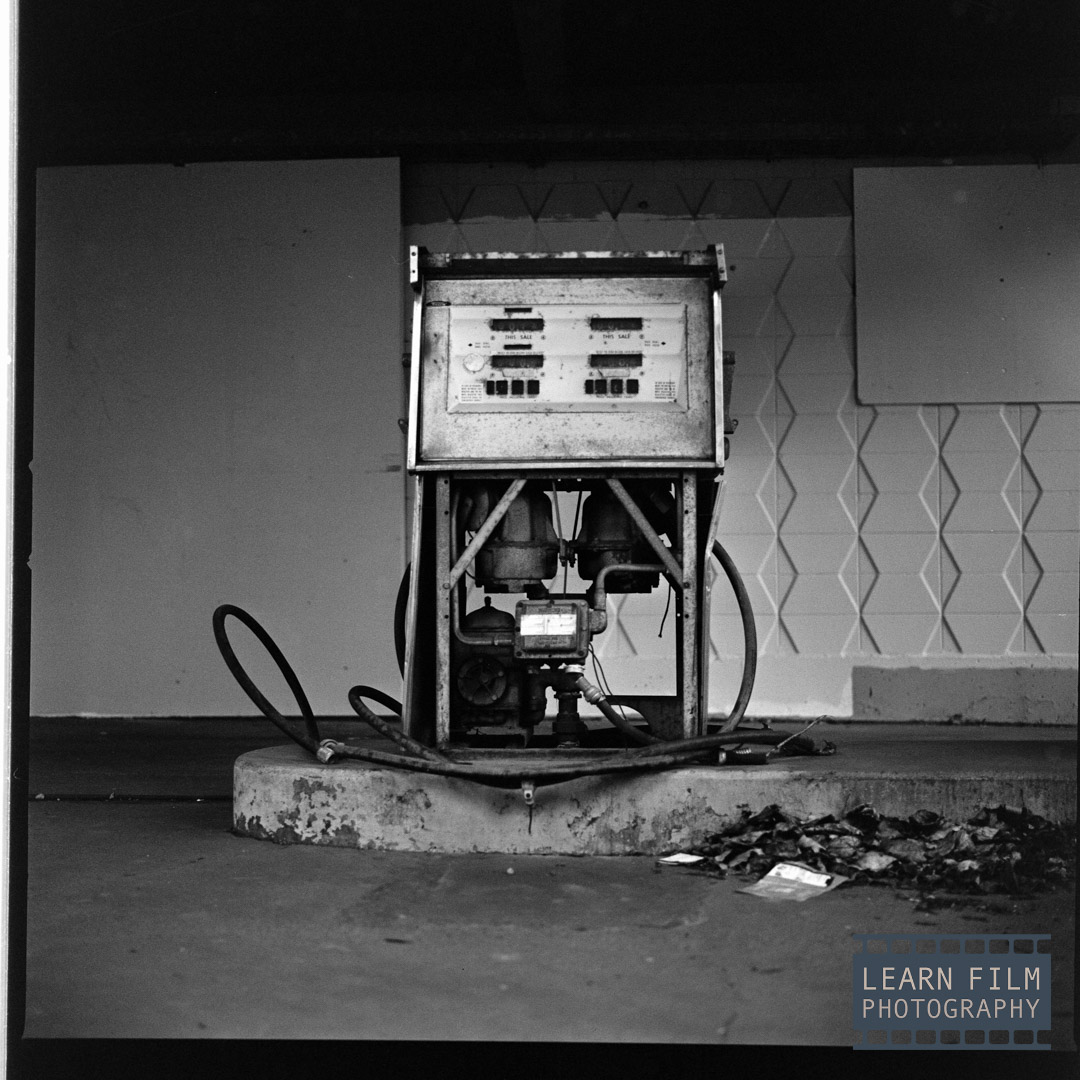
8. Film scanners can create better results for medium format film than DSLR scanning
Many film scanners work in a much different way than DSLR scanners. These scanners have the luxury of time to take precise measurements of each individual color, line by line, whereas a digital sensor has to capture an entire image as instantaneously as possible to reduce motion.
With 35mm film, scanners tend not to capture as much detail. But even scanners like the Epson V600 are able to capture very natural-looking detail with medium format negatives. But when speed is necessary, there’s still nothing better than DSLR scanning solutions.
“There is something nice about the way a good scanner looks. Especially on medium format and large format. I’ll take some of my medium format shots on my Epson V600, and they just look so so good,” Nate said.
“The detail looks very natural, and you don’t have to think about the demosaicing of the Bayer filter array or the x-trans filter for the Fuji’s. It’s just very natural. So I understand the people who still like to use a film scanner, and I still like to use a film scanner. But for most, my preferred method for the speed, has got to be a digital camera.”
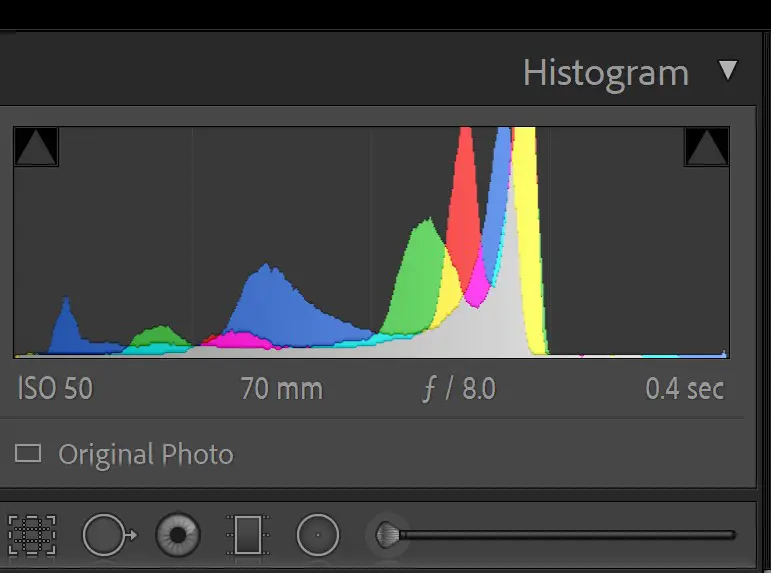
9. Expose to the right when scanning to get the most information out of your negatives
One of the biggest revelations for me (thanks to Ribsy for asking the question) was about how to expose your negatives. Digital cameras apparently capture more detail in the brighter parts of the image. So it’s best to always slightly over-expose your negatives when DSLR scanning.
The best way to tell is to make sure the Histogram is to the right of center by around 1 stop. The reason for this is debated, whether there’s more bits to the right, or there’s more signal to noise. But either way, the camera sensor will capture more detail if it’s exposed to the right rather than to the left.
10. Every part of the film scanning process will effect the outcome.
One of the big takeaways from the chat with Ribsy and Nate is that everything is designed to capture an image in a certain way. A DSLR scan will not look like a flatbed scan, just like Portra 400 will never look like Fuji Pro400H.
There are ways to make them look similar with a lot of editing and time, but if you’re willing to do that, why not use just your preferred scanning method in the first place?
“The second big mistake is that people can approach film with the wrong mental model,” Nate said, (the first big mistake is using a bad scanning setup).
“This mental model that film is only one thing and can only look one way, it should look this certain way completely automatically. Everyone comes to film with a different background. Some come from just using film scanners in the past, and if the immediate result doesn’t look like the film scanner, they think something’s wrong, or they think what the film scanner has done is a completely accurate rendition of the film. Which isn’t what a film scanner was ever meant to do.
“Everything is designed, I don’t think people understand that. Everything is designed. Film is designed, the lab scanners were designed, the software behind the lab scanners was designed, every piece of it has been designed in a certain way. The question isn’t ‘how do I get this to look like Portra should look,’ but more ‘what do I want this to look like, and how do I get that to happen.’”
See the film scanning setup that I currently use to create incredible scans here.
11. You can get good results with just an iPhone and iPad
If you get everything right, it’s entirely possible to get good negative scans using an iPad and an iPhone as the camera. That means placing a high-quality phone macro lens on top of the camera mount, using a camera holding to keep it steady, elevating the negative from the iPad, and finding a way to block off the light around the negative.
According to Nate the next most important factor when scanning with an iPhone is to use the Lightroom Mobile app to take the photo. This is because Negative Lab Pro actually has a profile built specifically for iPhones that’ll give the user much better results. And the reason to elevate the negatives off of the iPad is so that you don’t end up photographing the pixels in the screen, which will create cyan, magenta, and yellow colored dots throughout the image.
If you can find a setup that does all of that, then there’s no reason why you wouldn’t be able to get a high-quality image using an iPhone. That said, it still won’t be as detailed as a DSLR scan with a proper macro lens, but the results are close enough to pass on social media and other platforms. So long as you’re not pixel-peeping.
12. Lab scans are heavily edited before they’re given to you
This may not be a surprise for everyone, but labs editing negatives a fairly significant amount before they send them back to you. In fact, much of the interpretation happens by the technician running the scanner, who will individually apply color edits to make the scans relatively true to life.
But at the end of the day, If you shoot the same scene on two sets of negatives and give them to the lab on different days, chances are they’ll come back looking different. There are so many factors that can change how a negative looks, from the freshness of the chemicals, to the freshness of the scanning technician. Changes in even minor factors, like the weather or the lighting in the building can all have an effect on the final product.
And the same goes for you, too. If you’re scanning with Negative Lab Pro, you’ll interpret them differently if you go back and edit them on another day. It all comes down to human nature.
13. Negative Lab Pro started as an excel spreadsheet
Back before Nate built Negative Lab Pro, he’d actually written the mathematical formulas for plotting the curves into an excel spreadsheet. The process was time consuming, but still easier than using the Epson, Silverfast or Vuescan.
What’s your favorite tip from this conversation? Or do you have any questions about scanning with Negative Lab Pro? Let me know down in the comments below!

By Daren
Daren is a journalist and wedding photographer based in Vancouver, B.C. He’s been taking personal and professional photos on film since 2017 and began developing and printing his own photos after wanting more control than what local labs could offer. Discover his newest publications at Soft Grain Books, or check out the print shop.