There’s a constant, raging debate online about which medium has more dynamic range. By now, it’s pretty well settled that even entry-level digital cameras have more dynamic range at their base ISO than film.
So that should mean that when scanning with a DSLR, a single exposure will technically capture the full range of information in the negative. But in practice, there’s more to this story. Here’s what I found when I tested HDR scanning
HDR processing of scanned negatives captures the most detail present on film negatives. According to my testing, a single-image DSLR scan loses much of the exposed highlight and shadow details in the resulting image, despite having a camera with 2-stops more dynamic range than film at the base ISO.
This is in line with what any photographer can tell you about their images. When you’re shooting in a high-dynamic range scene, like sunsets, or blue hour, the shadows in a single exposure will carry significantly less detail than the properly exposed parts of the image. Brightening the shadows in Lightroom or Photoshop typically reveals more noise and artifacting.
When scanning negatives with a DSLR camera, the shadows on the raw image are the highlights in the negative. Since film captures far more detail in the highlights, that means scanning with a DSLR will lose much of that detail.
How I tested DSLR Scanning
For this test, I used my typical setup. A Sony A7III camera at base ISO 50 on a Manfrotto horizontal-column Tripod and a Sigma Art 70mm f/2.8 macro. At the lowest possible ISO, this camera has a maximum dynamic range of 14.7EV according to DxOmark. Even though it’s only 24.2 megapixels, that dynamic range performance makes this camera more than capable of creating detailed negative scans — especially when compared with flatbed scanners, like the Epson V600.
I also use a Gaomon light table, which provides excellent, and consistent color at an insanely cheap price, and the Essential Film Holder.
Using that combination, I set up the film in the film holder, and set the Sony Camera into HDR mode, where it’ll bracket 3 photos: one at the exposure I set, then one 2 stops over, and another 2 stops under. These three photos were then stacked and combined in Lightroom using the HDR merge feature, and converted into positives using the latest version of Negative Lab Pro.
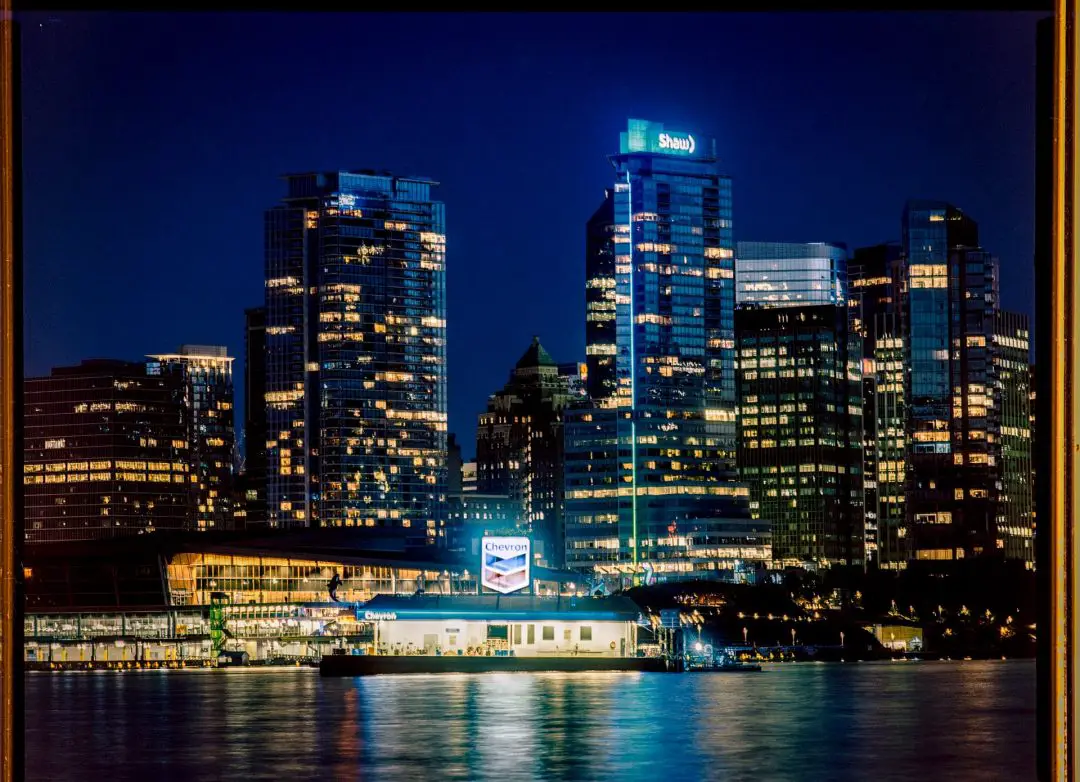
I converted the HDR image, and then pasted the same settings onto the middle exposure of the HDR set. There are some color changes, but that is to be expected.
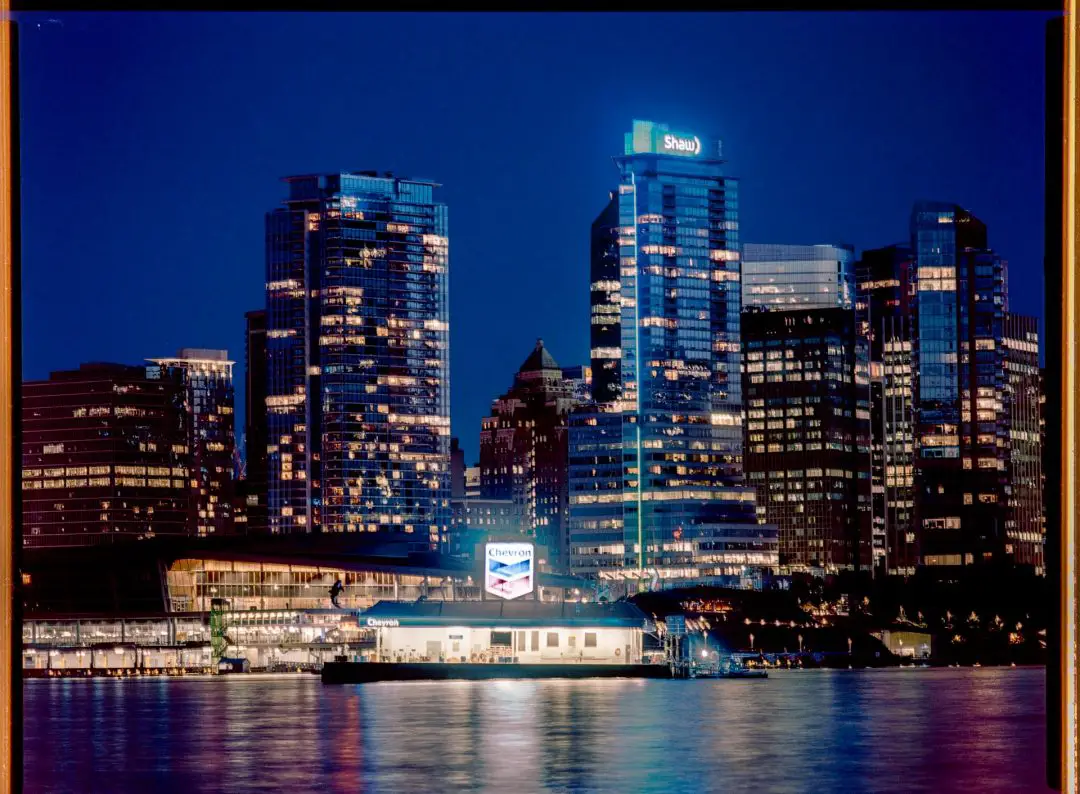
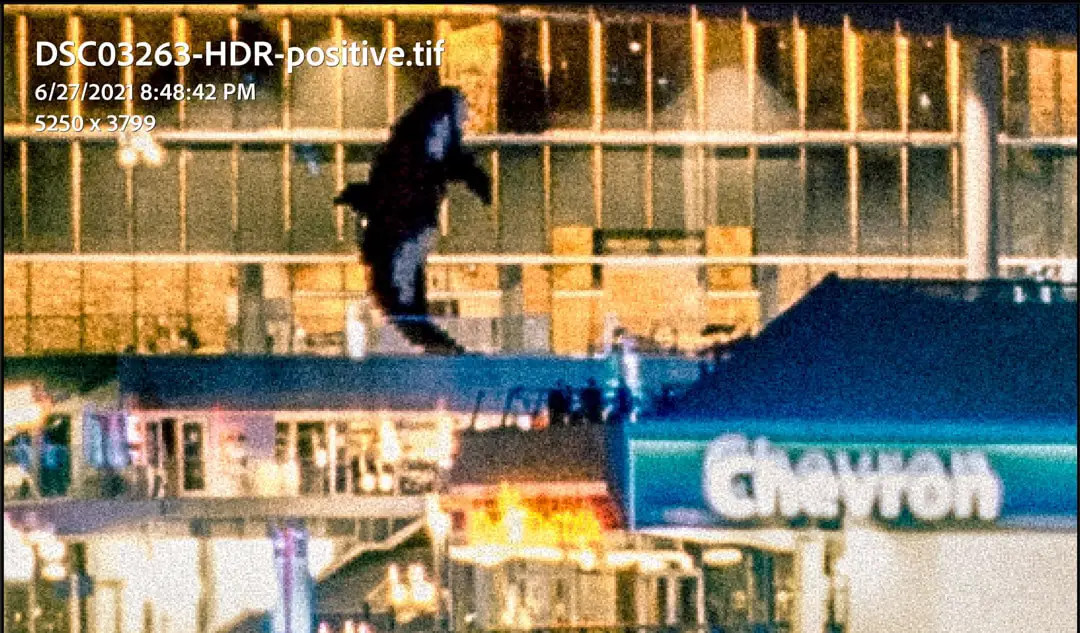
I chose the image above for the test because it has severely overexposed highlights, which show as a black block on the negative. From my own experience in the darkroom, and through other scanning applications, I’ve found it’s completely possible to resolve images from almost perfectly black negatives. So there is detail to be found in that image.
The image is also shot on Cinestill 800T in 120 format with my Bronica ETRS 645 camera with the 200mm f/4.5. It represents an exceptionally sharp 8s exposure, which I intentionally overexposed at blue hour to blur the water and capture some shadow detail. Knowing how much highlight detail film is able to capture, I believed this to be one of the best tests of film dynamic range as well as HDR scanning.
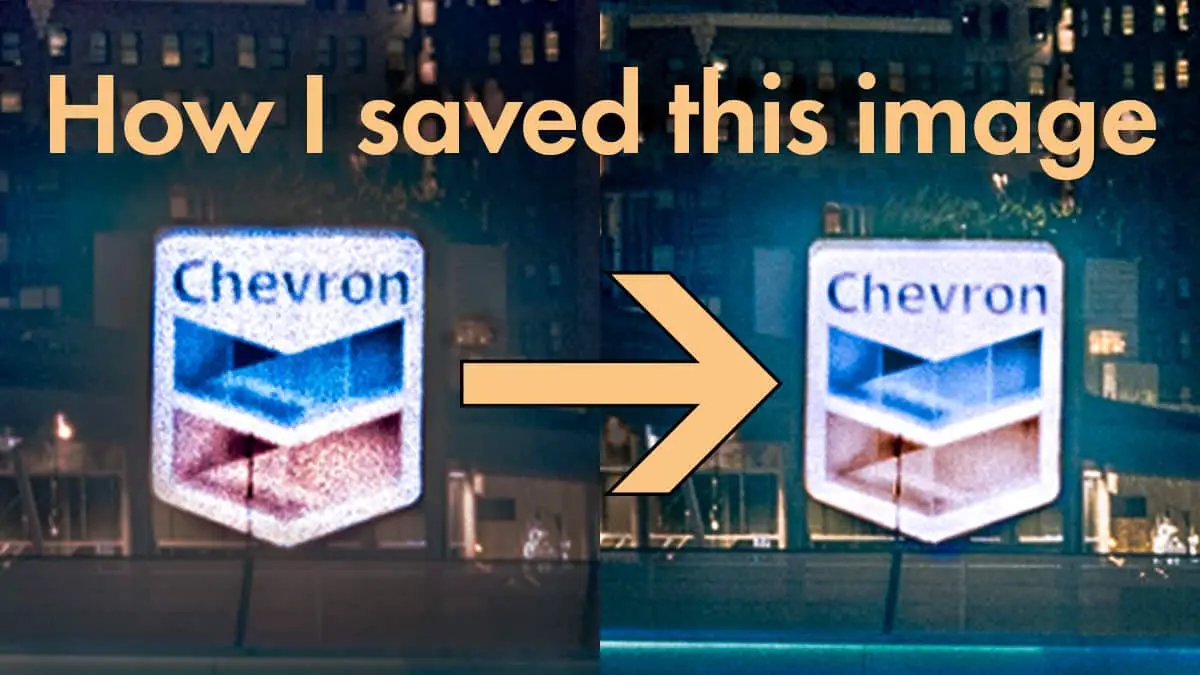
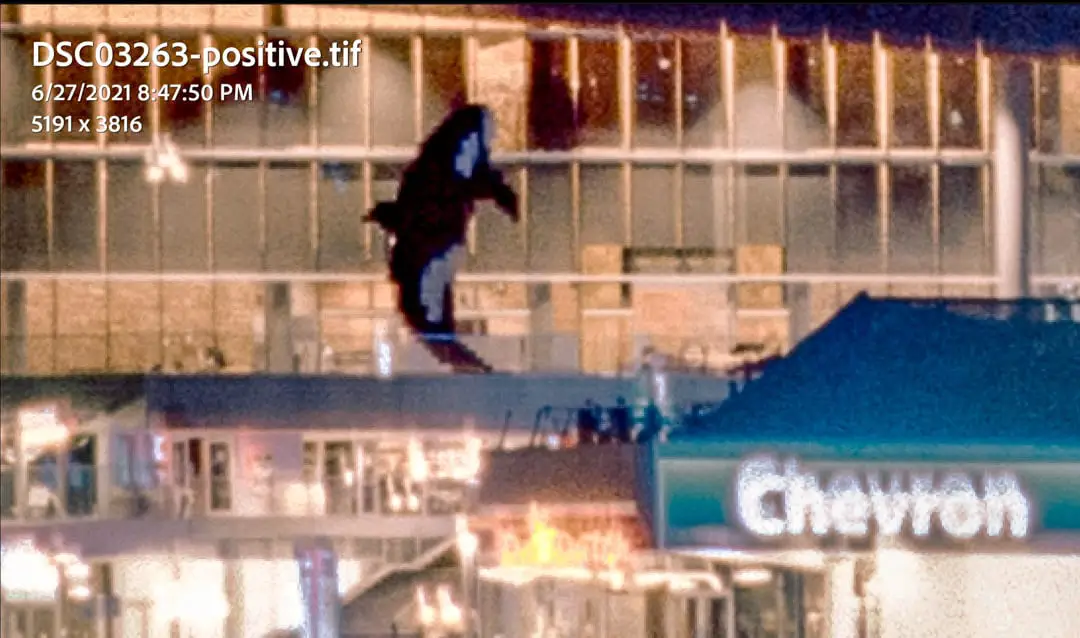
Section 1: The overexposed Chevron sign on the water zoomed in 200%
First, let’s start by looking at the bright Chevron sign in the middle of the image. This was almost completely black on the negative.
If I was shooting digitally, I’d have had to expose this image twice — once for that highlight alone, and a second shot just for the rest of the image. But film captures an incredible amount of recoverable highlight details — which is unaccounted for in most reviews of the film’s dynamic range.
As you can see in the Non-HDR image on the left, a lot of the details are essentially missing in the image. There is almost no grain structure present in sections of the image. There are parts that are pure white, and unrecoverable, where the HDR version on the right shows the grain structure present.
The lack of grains in the highlights shows throughout the image, where certain pieces appear washed out, murky, and just overall sad compared to the HDR image.
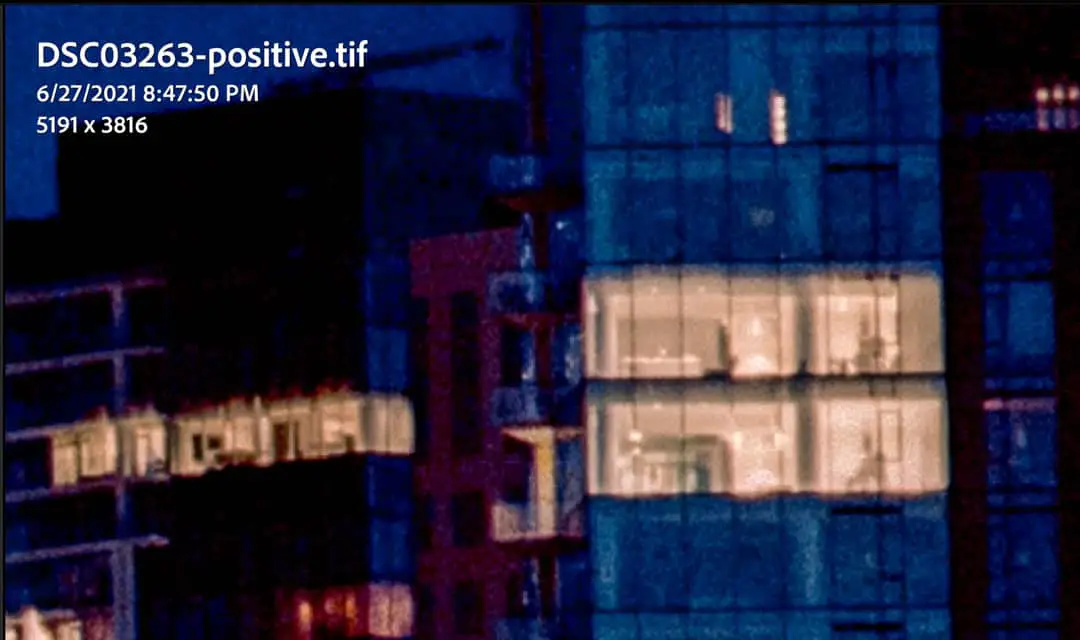
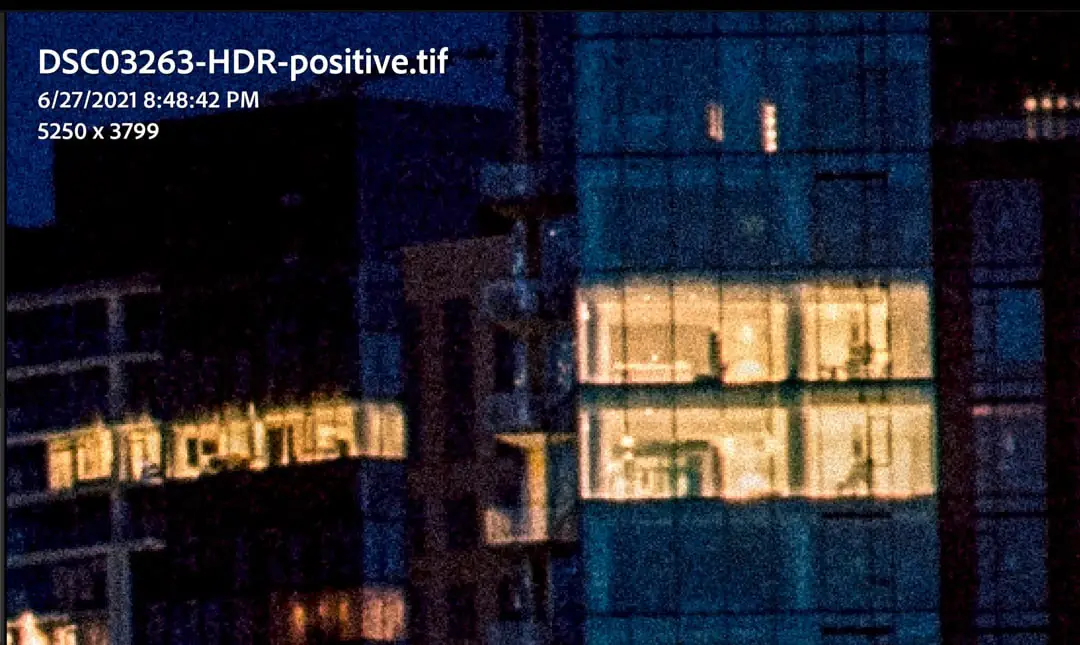
Image 2: the lit-up interior spaces zoomed in 400%
One of my favorite things about blue hour is how the interior lights perfectly contrast the plein air. So naturally, when I take an image like this, I want to see as much detail as possible. And shooting medium format with long telephoto lenses allows that to a great degree — it would not be possible to extract this much detail from 35mm, whether scanning HDR or not.
But either way, every image is going to break down when you zoom in this much. There’s no getting past that. But this section represents part of the scene that I metered properly for, meaning there should not be a considerable difference between an HDR scan and a regular, single-image DSLR scan.
And that’s exactly what I found. Here the HDR only shows moderately more detail than the non-HDR image. So all things considered, if your scene is evenly lite and metered properly, an HDR scan is not going to alter the outcome too drastically. Other than taking up 4x the space on your hard drive (3 images plus 1 large merged tif per scan).
Two more comparisons for fun
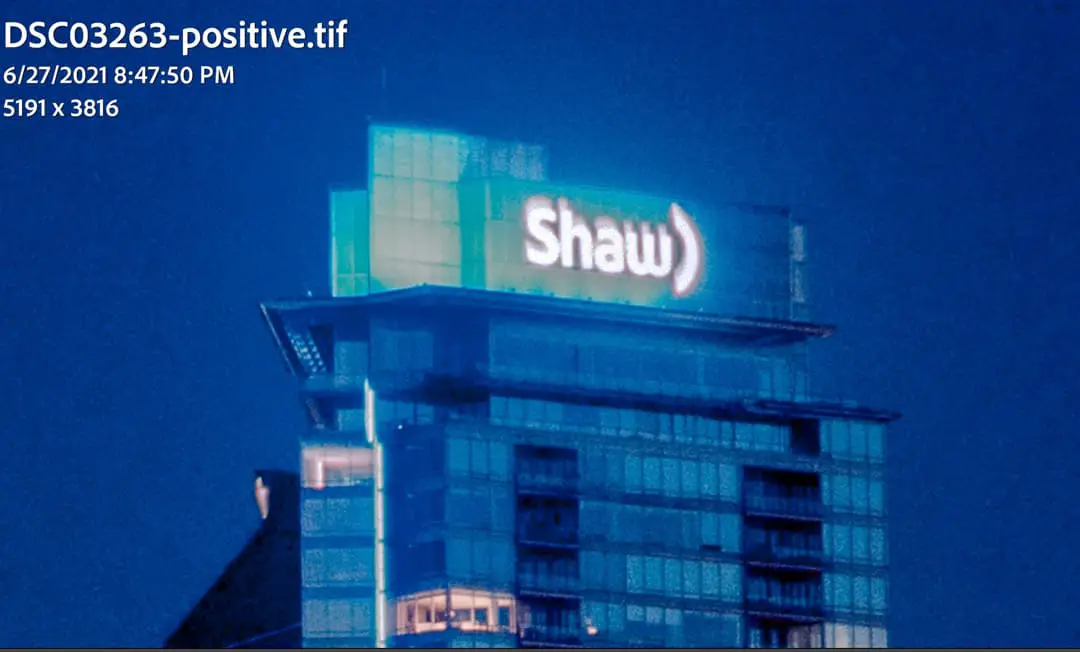
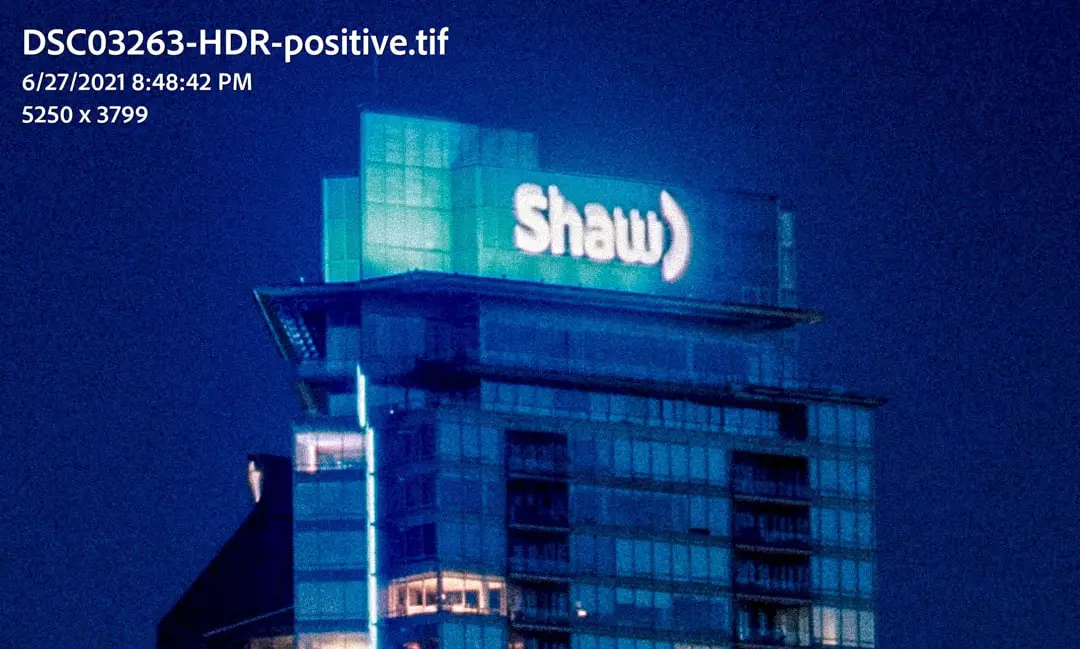
Here’s two other sections of the image I zoomed in on. As you can see, especially in the Shaw Tower shot, the halations from the Cinestill 800T do affect the readability of the wording. I can’t be certain why these halations both only happened on the top right corner of the word, instead of all around.
P.S., that killer whale statue is built to look like it’s made of Lego. Come to Vancouver, check it out. It’s pretty cool, tbh.
Color rendition in the HDR images
Film colors are a point of contention for film photographers. One of the biggest reasons people shoot film in the first place is to capture a photo using film’s unique look and feel.
Cinestill 800T is known for creating bright red halations, which are bright halos that surround highlights. This happens because the light bounces off the inside of the camera, back through the red base layer of color film. Usually film has an anti-halation filter on the back, which is what changes the color of the water when you’re developing film. But Cinestill is made using cinema film, which has a special anti-halation layer called Remjet. That layer is much harder to remove, so Cinestill removes it for you. And removing that layer is what creates halations on the lights.
But in this image, the big light-producing objects, like the Chevron and the Shaw sign do not have the characteristic red halos on the HDR version. The single-exposure scan, however, does contain more of a red halation in the image. That means that Lightroom could be automatically removing the red in the halations when combining the images.
The other difference is in the teal color that is more present on the HDR image than it is on the regular scan. This color difference I cannot explain because both images have been treated exactly the same.
At the end of the day, every photographer edits the colors in their photos just through the process of scanning itself. No photo can ever be a perfect representation of the scene. I could give this raw image to any photographer, and through the process of converting it into a positive in Negative Lab Pro, we’ll all come back with different-looking images.
Final verdict
A lot of people online take the amount of dynamic range in film for granted. There are some rolls of film that can be over-exposed by multiple stops without seeing much of a change in the final image. And sometimes even drastically overexposed images still have an incredible amount of detail. That means that if you’re just taking a single image, your final images could be missing a lot of those film grains and sharp lines.
Using HDR scans is absolutely worthwhile. Scanning film using this method will allow you to get the most out of every image you take. It’s a great way to pull the maximum amount of detail out of overexposed highlights.
And best of all, it’s extremely easy to do. The whole process of turning the scans into HDR images can be done in minutes on your computer, but it does take up 4x the hard drive space. If that’s too much for your computer, then it’s a good idea to try this only on the images that you know are going to turn out.
And that’s all for this quick article! Check out the next article for a rundown of how I scan my images using the HDR technique. Overall, I think this is a very valuable tool for every photographer who is scanning their film with a DSLR. This creates an incredible amount of range in the images, and it’s absolutely worth doing if you want to get the most out of your negatives.
Of course, there are some situations where it isn’t necessary. Like when you’re scanning contrasty or pushed B&W films, which will have a more limited tonal range in general. Have you tried this technique? If so, let me know in the comments below! I’d love to hear more about your thoughts. And if you appreciate content like this, you can help support the blog by donating on services like Ko-fi! Any donation goes a long way to help keeping this blog alive and thriving.

By Daren
Daren is a journalist and wedding photographer based in Vancouver, B.C. He’s been taking personal and professional photos on film since 2017 and began developing and printing his own photos after wanting more control than what local labs could offer. Discover his newest publications at Soft Grain Books, or check out the print shop.