Before computers and space travel, film photography was one of the greatest undertakings in human history. It was first discovered back in the early 1800s and has continued to captivate humanity since. Film photography itself is coming back in a major way because of its tactile nature.
The film grains are a fairly simple concept, and understanding how they work will help you to become a better photographer overall. If you’re finding that your images are overly grainy, or want to learn how to work with the grains for the best results, then this is the guide for you. First, let’s start with a general overview of how film grains work to create an image.
Photographic film is made up of silver halide grains suspended in gelatin on a clear plastic base. When light strikes film, it excites electrons in the film grains making them developable. Film developer then breaks apart the developable grains, absorbing the halide and leaving the silver behind on the base.
This is basically how film works. The stop bath then stops the developing action, and the fixer washes away the remaining undeveloped silver halide crystals without touching the silver molecules on the base.
So let’s get into how the grains work, what kind of grains are out there (because there are a couple of different kinds), and how we can get the most detail possible out of film. In the end, developing film is an easy process, and I promise that after reading this you will have better understanding of why film works the way that it does.
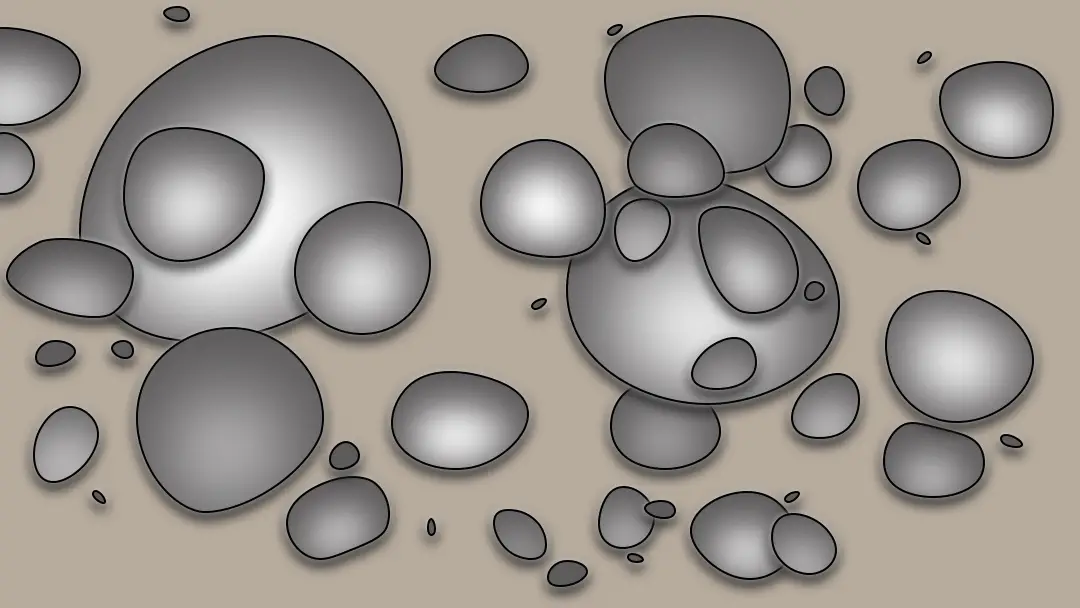
What do traditional film grains look like?
Back in 1986, Kodak published an article on how the newer T-Grains were making some major advances in film photography. In that article, they published some images taken on electron microscopes of different types of film emulsions (which you can find here). The Illustration above is approximately what traditional film grain emulsions look like.
In a traditional film grain emulsion, the silver halide grains are laid out randomly in all different sizes across the film base. Each of those grains is around 1 micron in size, or 0.001 millimeters (1/25400 inches for the one place on Earth that refuses to use metric).
The larger grains are, the more sensitive they will be to light. All films are coated with a range of grain sizes to achieve their dynamic range. Without that range of grain sizes, the film would appear more contrasty, with less fine gradation between the blacks and whites.
According to the above article from Kodak, a film grain needs three of its electrons to become excited to become developable. The larger grains are more likely to get struck by enough light to excite those electrons than smaller grains. That means a higher ISO film has to be made up of more of the larger grains than smaller grains. That means, based solely on the number of photo sites, large grain (high ISO) film will have less resolution than small grain (low ISO) films will have.
An ISO 100 film, like Ilford FP4+, will have a high concentration of smaller grains, which means that it takes more light to make the grains developable. An ISO 400 film, like HP5 or Tri-X will have a large distribution of different grain sizes, along with many more of the large grains.
The problem is that if only the larger grains become developable, there will be more spaces between them than there will be if the smaller grains also get struck. And it’s actually the spaces between the grains that makes high ISO (more sensitive) film appear grainier than low ISO film.
This is why film looks better when it is overexposed than underexposed. If those small grains are not struck with enough light, there will be more empty spaces between the large grains, making the film appear grainy and lacking shading — especially in the shadowy regions of the image.
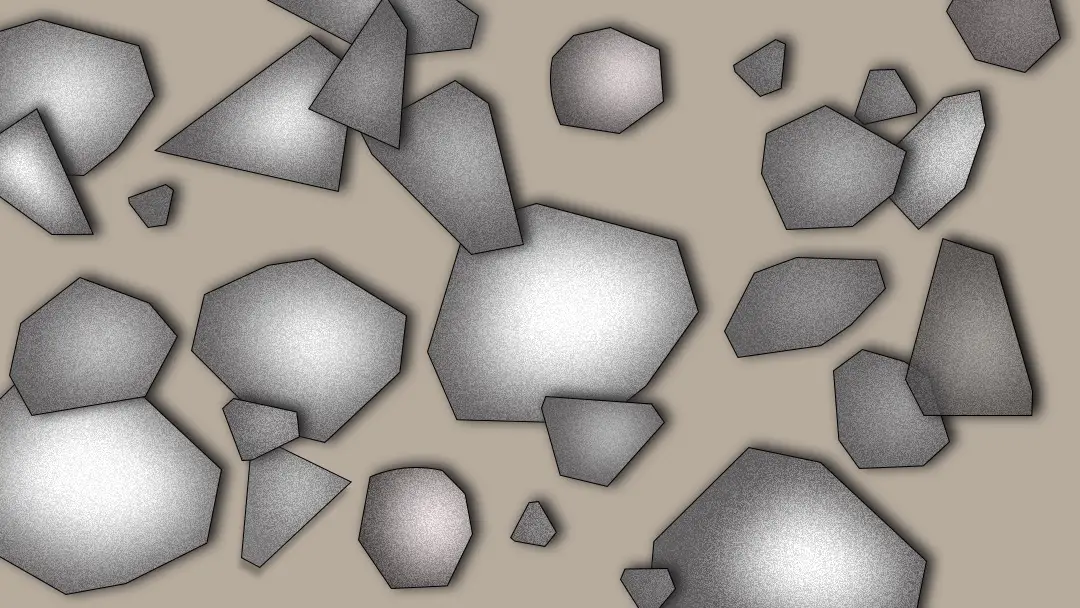
What do T-Grains look like?
This is approximately what T-Grains, also known as tabular grains, look like. Compared to traditional film grains, these are flatter, and much more uniform in size, shape, and distribution.
The T-Grain technology allowed film manufacturers like Kodak and Ilford to create films that were sharper and more sensitive to light while using less silver than in traditional grains. Manufacturers have better control over the T-Grain distribution on the photographic film, making them more even and far less chaotic than traditional emulsions.
But the tradeoff is that even though the emulsion is overall sharper and creates less grainy images, they suffer from having a lack of rich tonality that the classic film emulsions show. Since there are fewer actual grains, and their distribution is more evenly placed, the film will have less ability to create those smooth gradients between blacks and the whites.
And you can see this in a recent article I wrote comparing the differences between Ilford’s FP4+ (traditional grain) and Delta 100 (T-Grain). In that comparison, you can see first hand how T-Grains are different. The Delta 100 film, despite being 25 ISO slower, physically captured more light and created a brighter image than the FP4+.
That tradeoff is why professional color films, like Kodak Portra, and their cinema film, actually contain a mix of both grain types. In fact, there are few (if any) modern, high-performance films on the market that don’t use some amount of T-Grains in their emulsions because of the benefits they offer.
How do film grains become more noticeable on film?
There are five ways that film grains become more noticeable on film
- Underexposure
- Severe Overexposure
- When the film is developed using an acutance developer
- When using smaller film formats
- When the image is enlarged
The most obvious factor is the fourth one, where enlarging the film makes the grain more apparent. You can’t scan or enlarge an image without also enlarging the grains.
But the other three factors are a little bit more complicated, so we’ll go into them in-depth here.
How underexposure makes film grains more apparent
When you underexpose your negatives, only the largest grains are going to receive enough light to become developable. When that happens, the spaces between the film grains will become much more apparent, increasing the overall look of the grains.
The way most photographers deal with underexposure is to push their film. Pushing is a process where the developer leaves the film in the developer for a longer period of time, hoping that the developer will permeate between the cracks and find more developable grains than it would be able to under normal circumstances.
Pushing film does develop more grains. But it cannot recover the lost shadow detail. In cases of extreme overexposure, the shadows will just start to look mushy no matter what you try to do to recapture that detail.
Pushing film also increases the appearance of contrast on the negative. The highlight sections of the image will become more dense the longer they’re in the developer for, which reduces the amount of light that can pass through when printing or scanning the film. Many photographers love the look of contrasty negatives, and intentionally push their film 1 or more stops to achieve this look specifically.




How overexposure changes the look of film grains
Overexposure also increases the appearance of grain on a film negative. I have to admit, this one baffled me until I found it on a roll of film I had severely overexposed due to a faulty aperture ring.
Overexposure by several stops will increase the appearance of the grains in the highlights and the mid-tones of a negative — as you can see in the images above. But it also has the effect of reducing contrast and sharpness. Since most of the grains will have become developable, the edges of different features will not be as defined as they would be on a properly-exposed image.
Use a fine-grain developer to reduce the coarseness of grain in the highlights, or under-develop the roll by giving it less time in the developer (also known as pulling film: read more about it here) to bring back some of the contrast and sharpness.
Why does film tolerate overexposure better than a digital camera?
Film tolerates overexposure better than digital for one simple reason. the film grains are either developed, or they’re not, where with digital there can be up to 14 bits (or brightness states) per pixel depending on the camera. At the maximum state, that pixel is pure white and all of the extra data is lost.
On film, that grain only has two states — developed or not developed. No matter how much light strikes a particular film grain photo site, there will never be a change in its brightness state, only in the number of smaller grains around it that make up the shading.
The biggest change that happens when film is overexposed is that many more of the grains around the larger sites also become developed, which can significantly reduce the amount of contrast in the image since there is no gradation from the undeveloped spaces between the film grains.
That means digital cameras are less tolerant of overexposure, but they do still have some significant advantages over film. Each pixel on a film camera has many more possible states that allow it to create a far more accurate, and sharper rendition of life than is possible on film. Read more about when and where digital cameras outshine film here.
How does the film format affect the appearance of grain?
Larger film formats are less grainy than smaller film formats.
No matter what format you’re using, the film grains will remain the same physical size. The biggest difference is that the same image on a medium format negative will be spread over at least three times as many film grains as it would be in 35mm.
The effect of using medium and large format cameras is sharper, and almost grainless images with better tonal gradation. In some cases, medium and large format cameras are able to create sharper, higher-resolution images than even the top end digital cameras in 2021 can.
Of course, digital cameras are getting better every day, while film remains stagnant. So in time, digital cameras will surely win this battle completely, instead of just in the few circumstances where it’s already well outperforming film.
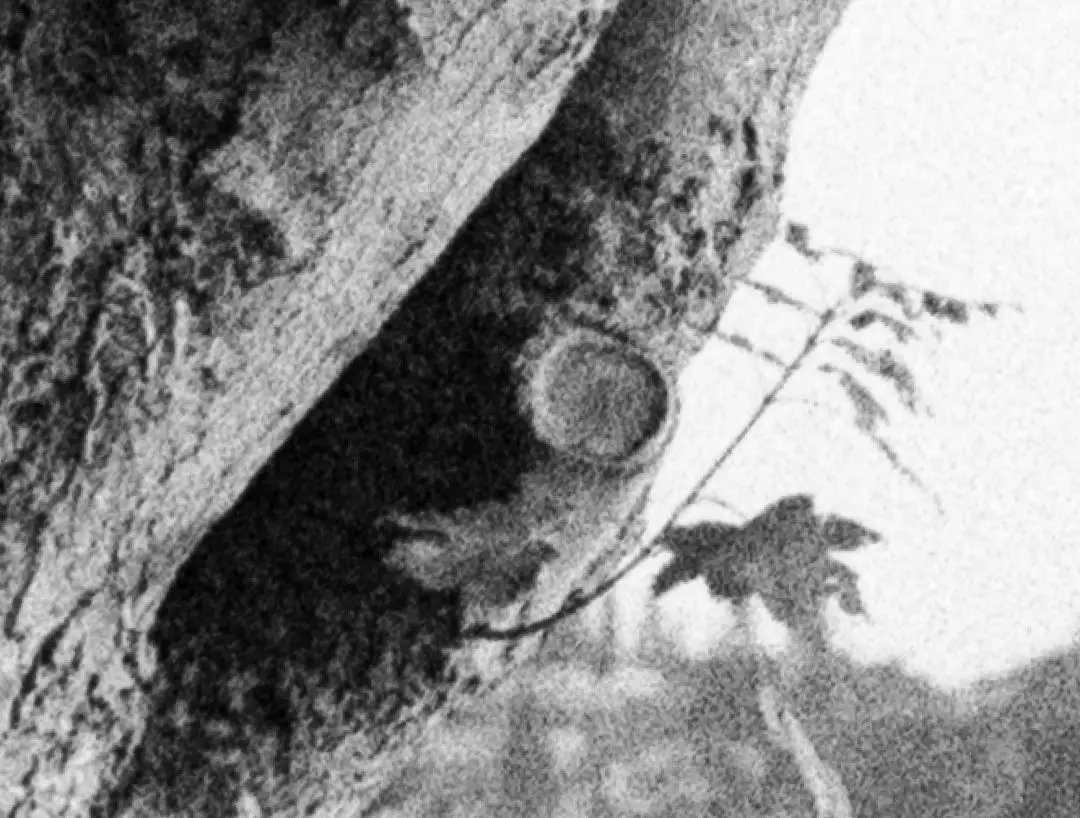
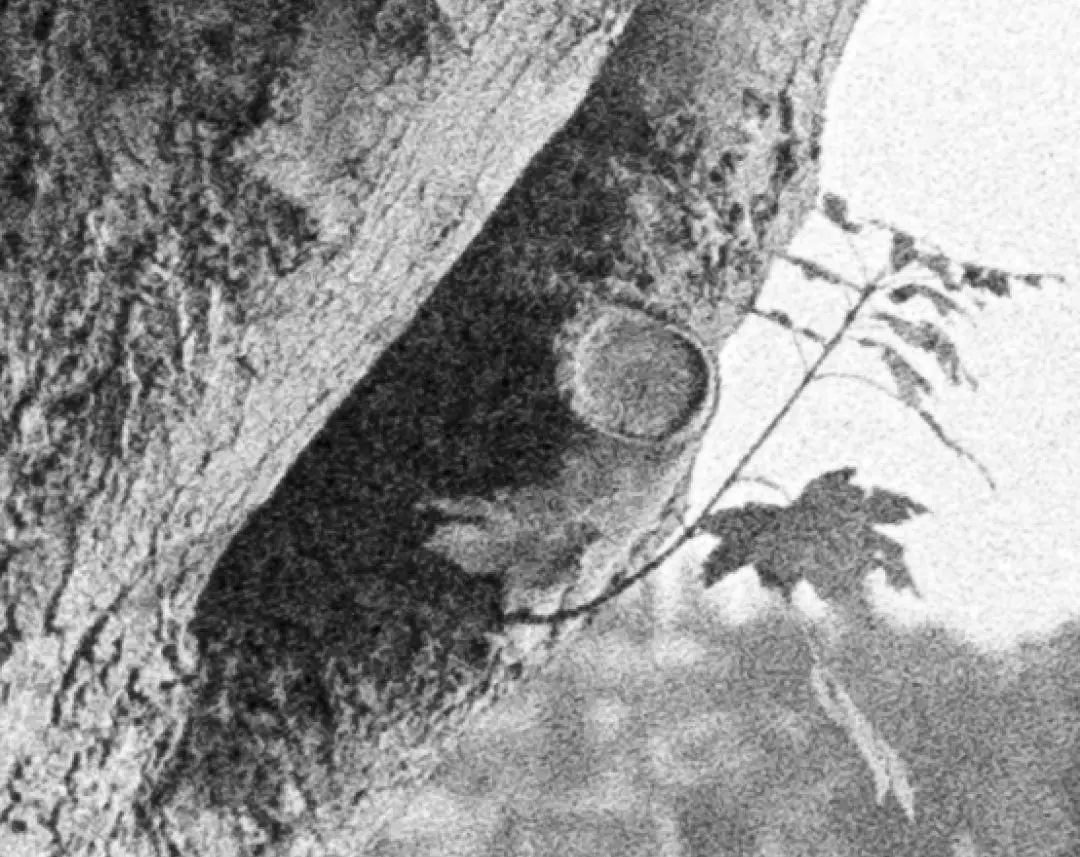

How do fine grain developers reduce the appearance of film grain?
The film developer that you use does have a major impact on the appearance of film grains, and hence, the entire outcome of the image. The images above were all taken at the same time on the same roll of film, then developed in a number of different film developers. You can see the results of the full film-developer test here.
There are two kinds of developers: acutance developers and fine-grain solvent developers.
Acutance developers keep film grains appearing sharp, while fine-grain solvent developers eat away at the edges of the film grain, giving them a softer, less-pronounced appearance.
The most common acutance film developer is Rodinal (or Blazinal in Canada). This is one of the oldest film developers on the market and is by far the cheapest developer available (making Rodinal an excellent option for film photographers who want to start developing their own film). Film photographers love this solution for how sharp and pronounced it makes the film grains appear — especially when developing classic grain emulsions like Tri-X and HP5+.
Most other common film developer solutions are fine-grain or solvent film developers. Common solvent developers include popular formulas like D-76, DD-X, HC-110, Perceptol, Xtol, Black, White, and Green, among a long list of others.
According to The Film Developing Cookbook (the most modern, up-to-date guide on developing film) fine-grain film developers break down and etch into the film grains, which makes the film grains notably smaller. Some fine-grain developers also re-plate the silver that it broke down onto the film base, which can reduce the overall image sharpness. Film developers that replace the etched silver are called Solution Physical Developers
Most film developers appreciate the effect. In fact, Kodak D-76 was an immediate hit when it was released in the 1920s because of how well it tamed the rough film grains of the time.
Many home film developers today tame the solvent action by increasing the developer dilution. For example, HC-110 dilution B exhibits, or diluting D-76 1+1 will reduce the solvent action. Dilution works partly by decreasing the amount of active solvent ingredients in solution, and partly by decreasing the overall alkalinity needed to facilitate solvent action.
Learn more about the differences between the most common B&W film developers — and how to choose the right one for you — in this article.
Final thoughts
That’s most everything there is to know about film grain. At the end of the day, film will perform its best when shot at box speed. But certain films, like HP5 or Tri-X, have such a large tolerance to over and underexposure, that they can be used at almost any ISO and still produce good images.
The best thing you can do to improve your photography is to experiment. Take notes on the settings you used on the films you shoot and develop them promptly so that you can really see and understand how different light and exposures affect the way images turn out.
Did you experience something different than in this blog post? Let me know on our growing Facebook group, or in the comments down below! I love hearing user feedback, and always try to answer it as soon as possible.
