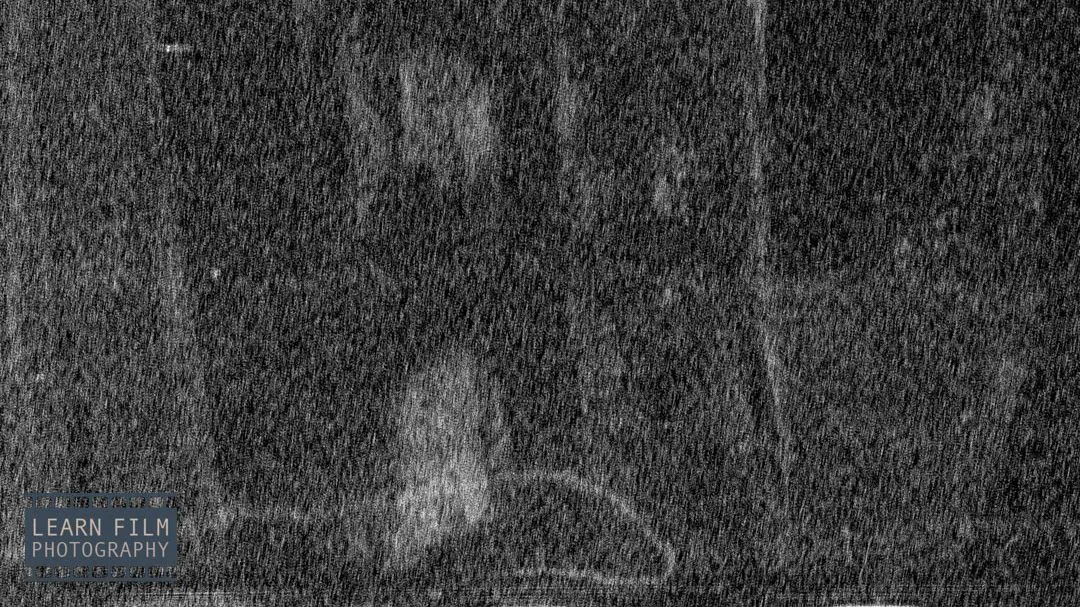
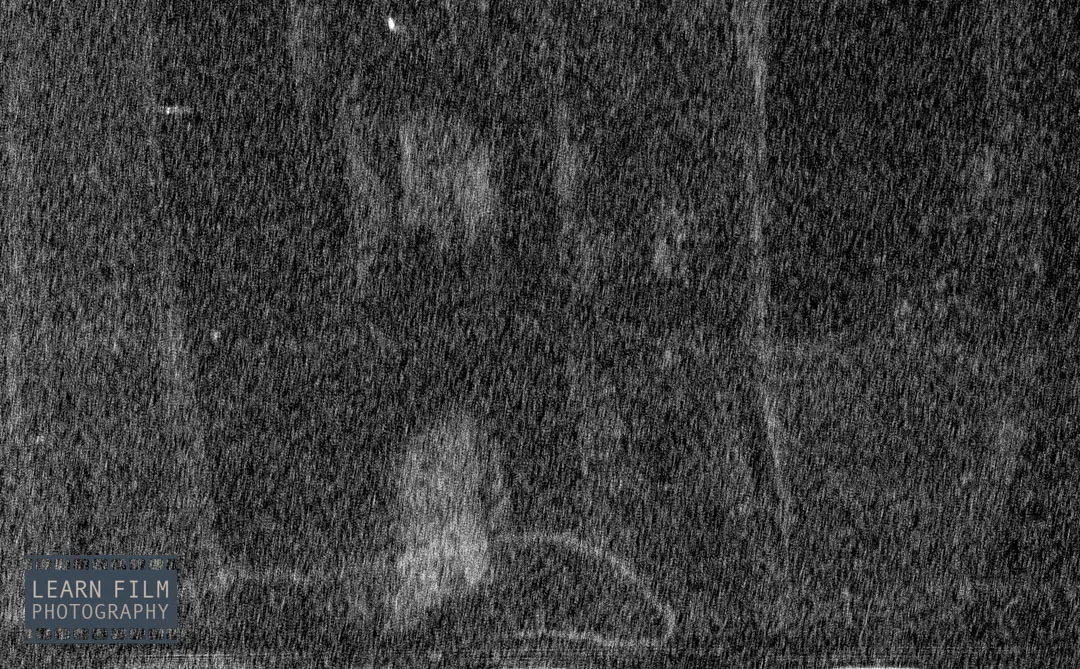
One of the most frustrating aspects of developing film at home is watermarks on your film. When you go to scan the images, you’ll find patches of white marks with defined edges around the image, which can be difficult to remove if they’re in a key part of the frame.
Luckily watermarks are fairly easy to treat.
There are three main ways to stop watermarks from forming on your film negatives or positives: 1. Use a wetting agent like Ilfotol, 2. Use a drying cabinet or hang film in a steamy bathroom, and 3. Clean the negatives using Pec Pads and Pec cleaning formula.
The first two methods will stop the formation of water spots on your film, while the third option will remove them if it happens after the fact.
Why do water spots appear on film?
Understanding how watermarks happen is half the battle. These watermarks happen when the water dries unevenly across the film.
The way to stop watermarks from forming is to ensure they dry faster, that there are no minerals in that water (that hold it there longer), or to use soap to break surface tension so that the droplets don’t form or stick to the film.
Using a squeegee to remove water
The easiest way to stop water droplets from forming is to remove it off the start. An Ilford Squeegee can get most of the water off the film safely, but it cannot get all of it.
Using the squeegee more than once over a roll is a guaranteed way to permanently scratch the film — which can only be fixed with an expensive (and messy) wet-mounting process when scanning or printing. An Ilford squeegee is a part of living the water-droplet free life, but it’s not the only tool you’ll need.
Find a film squeegee on Amazon here.
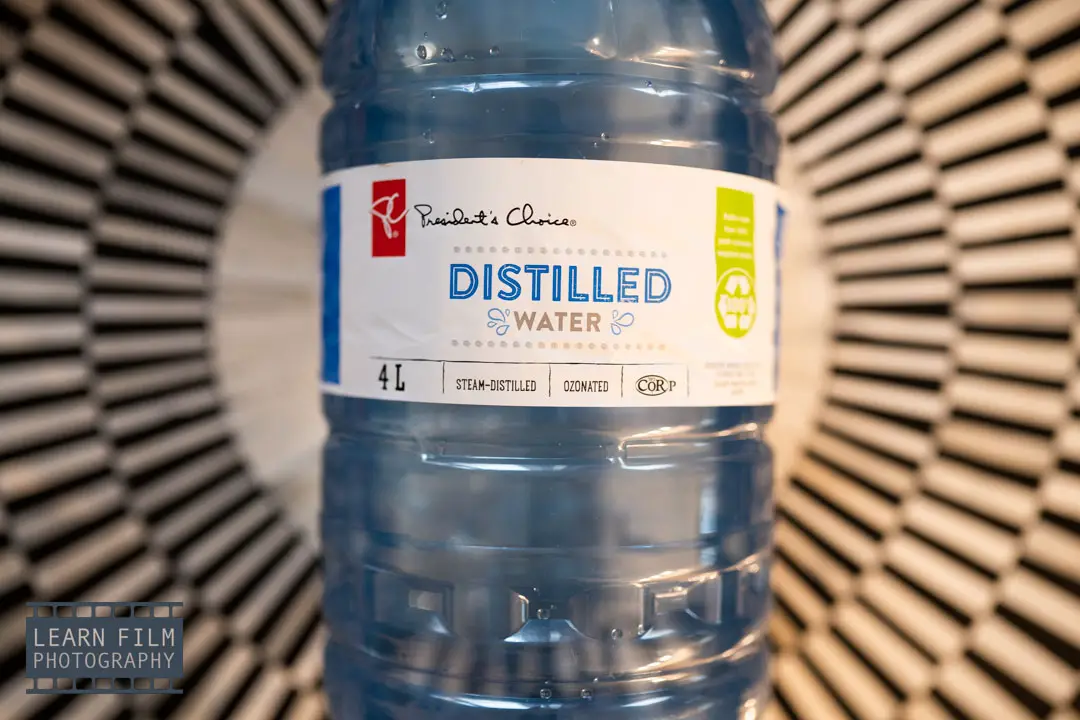
De-mineralized or distilled water
Using de-mineralized or distilled water is another big help in reducing water spots on film.
The reason you see water spots on the film after it has dried is because the water left minerals behind when it evaporated off the film.
That said, even though distilled water is a fairly cheap addition to your grocery cart, to get the full effect, you’d have to do the entire mixing and washing process with distilled water. Which, even if you’re using the Ilford Rinse Method, can still be a lot of water.
It’s recommended to use distilled water when mixing chemicals that will be reused, like color film kits, or fixer solutions, as well as during the final rinse. But more than that may just be a waste of money.
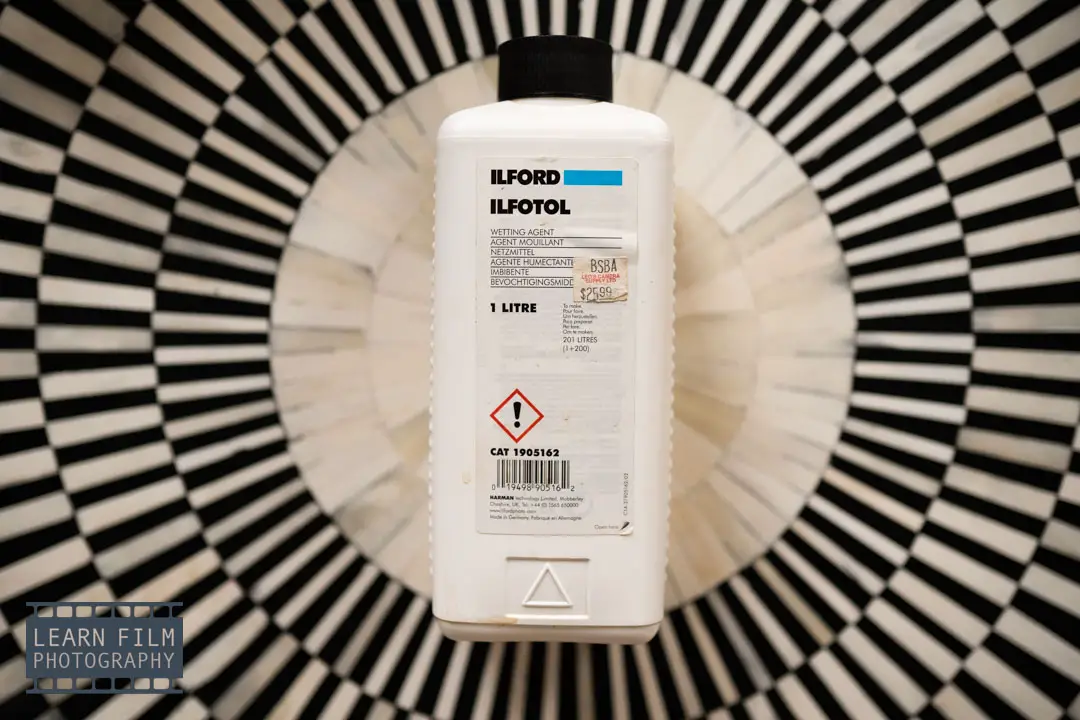
1. Using a wetting agent
The next solution is to use a wetting agent after the film has been washed and fixed. A wetting agent is simply a film-safe soap solution that breaks the surface tension of water so it doesn’t form large droplets.
Ilford sells a lifetime supply of their wetting agent Ilfotol in a 1L bottle, which you can find on Amazon here. You only need about 2ml of solution per 2 reel Paterson tank. Adding Ilfotol to your developing routine will significantly reduce the amount of water spots on your film, especially when combined with using the squeegee and the other methods below.
2. Dry your film in a steamy bathroom
Dishwashers have a steam cycle at the end for a reason: hot dishes get dry faster than cold dishes. The same is true for film.
After you finish your cycle run your shower on the hottest setting until the room gets a little steamy. Then, close the door and hang the film to dry.
The steam should not only settle any dust in the room, but it will also help the film dry faster and with fewer water spots.
3. If possible, use a drying cabinet
If you’ve got space, a drying cabinet can be a game changer for keeping water spots off film.
A drying cabinet can be anything tall enough to store film. Old highschool lockers, or thin aluminum cabinets make fantastic drying cabinets that don’t take much space, and do double duty for keeping water spots and dust away.
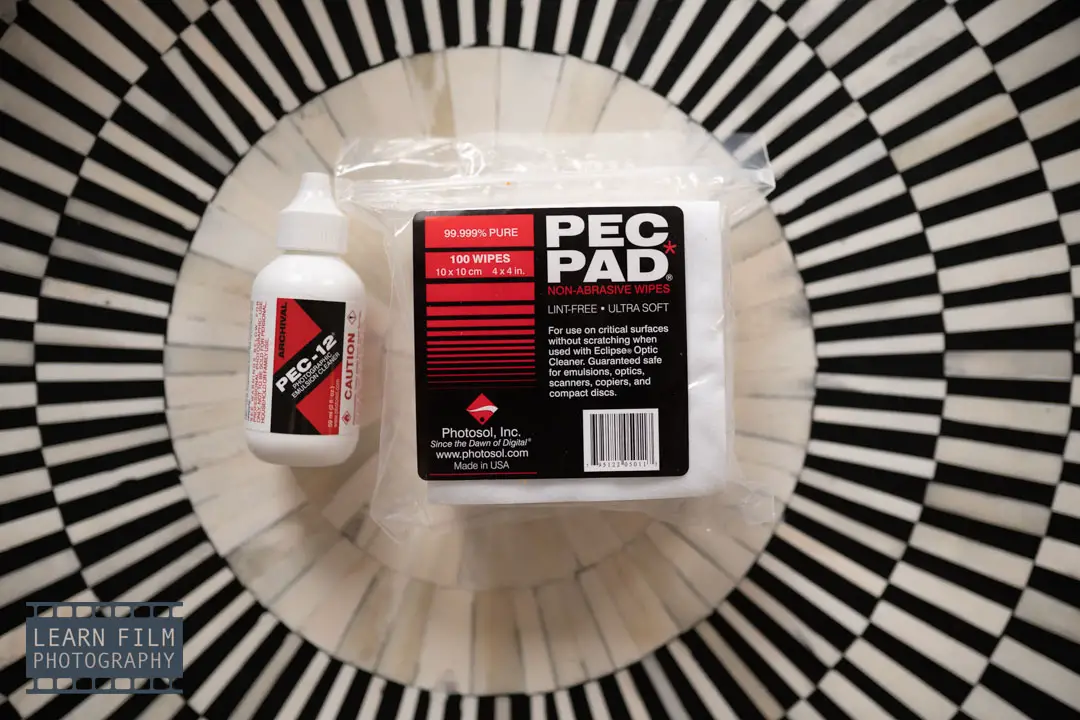
4. Clean negatives with Pec Pads and Pec cleaning fluid
Even in the best circumstances, water spots can happen. My process has come a long ways over the years, which has allowed me to create cleaner negatives, but I still suffer from the occasional water spot on my film.
But that doesn’t have to damage the important images on a roll of film. Pec Pads and Pec 12 cleaning formula are designed for cleaning film.
They’re safe for the emulsion, and will remove any surface stains without needing to use too much pressure. The pads are also extremely soft, and don’t leave any fibres behind on the film.
Find Pec Pads and Pec 12 film negative cleaning fluid on Amazon here.
Do you have your own techniques for removing dust and water spots on your film? Let me know down in the comments below!

By Daren
Daren is a journalist and wedding photographer based in Vancouver, B.C. He’s been taking personal and professional photos on film since 2017 and began developing and printing his own photos after wanting more control than what local labs could offer. Discover his newest publications at Soft Grain Books, or check out the print shop.