If you’ve been lucky enough to see the magic of an image developing right in front of your eyes, it’s likely something that you want to pass on to your kids. I vividly remember the first time that I saw the clear emulsion turn black. That excitement of seeing one of my images form under red light was unlike anything I’d previously experienced through digital photography.
Digital images feel like throw-aways in our modern world. The magic of film is that it’s a tangible medium. It’s something inspirational that you take and build with your hands and a bit of knowledge. Once your kid reaches 8 or 9 years old, you can teach them to develop film or a sheet of darkroom paper with just water, instant coffee, baking soda, and some crushed vitamin C. This simple technique is an inspirational lesson that’ll teach kids about what’s possible in the world of analog photography.
I initially learned film photography when I was in highschool, and it was a lesson that I haven’t ever forgotten. After completing a bachelor degree, moving across the country and starting a career, I found there was something missing and decided to try it out again. Luckily, back in 2017 the equipment was cheaper. You could get an enlarger for free if you were able to pick it up in person. These days, there are still plenty of possibilities to get a complete darkroom setup for free.
And there are some really easy ways to make analog photography work for kids who are old enough to learn.
What’s the benefit of teaching kids film instead of digital photography?
Film photography is the most fun photographic medium out there. It has a unique blend of art and science that is inspirational, fun, safe, and family-friendly.
The most beautiful thing about film photography is making an image with your hands. It’s a practical way to learn, and it helps kids to learn more about how the world works. You don’t have to teach them the intricacies of how reducing agents in the film developer turn the exposed silver halides black. But you can show them how common foods and medicines can be used in different ways, and how chemical reactions make our world work.
The fact that you don’t need to buy a caustic developer from a dedicated photography store makes this project simple, safe, and extremely fun. I’ve used this to teach friends of all ages how film photography works, and it’s always a really cool experience.
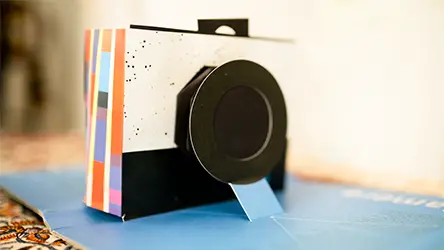
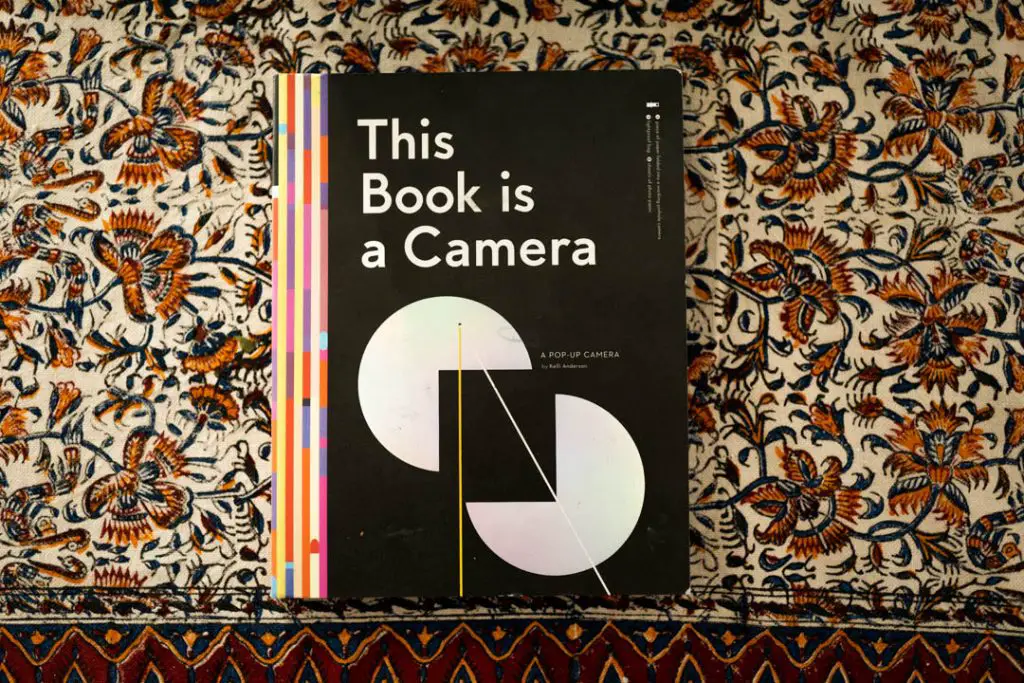
There’s nothing like seeing the images on your first roll of film. For young kids especially, you can set them up with a single-shot pinhole camera, and do this entire process in under an hour in your own backyard. The easiest way to get started is with This Book is a Camera by Kelli Anderson, which comes with 5 sheets of photo paper, and instructions on how to get started. It’s a really cool and fun tool that was produced by the Museum of Modern Art in New York.

Is developing film safe for kids?
If you’ve spent anytime in a darkroom, you probably distinctly remember the pungent smell of the developer and fixer solution. If you’ve developed a roll yourself with even a Paterson tank, you’ll know that smell can linger on your hands even if you wore gloves throughout the process. All of those chemicals found in a typical darkroom are not safe for children without supervision. But there is actually a method that’s totally safe for your kids, and you most likely even have all of these things at home anyways.
The safest way to teach kids about film photography is to develop the photographs using Caffenol. Here’s how to make enough for one sheet of film:
3 tsp baking soda, baked in an oven at 400°f for one hour
6 tsp instant coffee (any)
8 oz tap water
A tsp crushed vitamin C
Mix the solution in a casserole dish, and submerge the negative (or photo paper) in total darkness for 2.5-4 minutes. Rock the dish back and forth every 30 seconds to ensure even development. Then wash the negative in water for 30 seconds before taking into the light.
This process will produce a negative with good image quality and moderate contrast without needing any dangerous chemicals. But it will not be an archival process. The image will fog over time and eventually disappear. If you want to show your kids the magic of film photography in the simplest way possible, this will be okay. You can always take a photo of the negative before it’s gone for good.
But if you want it to have more permanence, you can fix the negative using by dissolving 6.25 grams of sodium thiosulfate crystals in 300ml of water. Sodium Thiosulfate is a common, multipurpose chemical for reducing the amount of chlorine in pools, and even as a medical treatment for cyanide poisoning and other ailments. However it can still cause skin, eye, lung, and stomach irritation — especially after drying on surfaces, so be sure to clean it up with household sprays after any spills. More information on what safety precautions to take, and what to do if it gets spilled can be found in this Materials Safety Data Sheet distributed by Fisher Science Education.
| Camera Type | Age | Benefits |
| Pinhole Camera (This Book is a Camera by Kelli Anderson) | 8-10 | The cheapest option, makes one image at a time so you can shoot and process the negative within a single hour. Great for getting young kids to learn about photography. |
| 35mm Point and Shoot | 10+ | Cheap, fun to use, and still produce high-quality images. |
| 35mm SLR | 12+ | Some cheap options, gives users more room to grow and learn composition |
| Holga/Diana | 12+ | Inexpensive, cute, simple, and very fun to use. These toy cameras use expensive 120 films. They shoot 12-15 photos per roll, but image quality isn’t necessarily better than a 35mm SLR. |
| Medium Format SLR | 16+ | Produces high-quality results, but expensive, heavy, and must be maintained to keep them operating well. Uses expensive, but high-quality 120 film. These are for advanced users that want good image quality and are already dedicated to film photography. |
What is the best film camera for kids?
The best film camera for kids is the simplest, cheapest one available. If you, your parents, or neighbors have an old film camera laying around, it’ll do the trick. But more manual cameras are not going to be as fun as automatic cameras, like the extremely simple Harman Reusable Camera. This camera will properly expose any shot outdoors using ISO 400 film, and has a built-in flash that works indoors and at night.
But the best way to teach children in the short term is to use a pinhole camera. These are simple cameras you can make at home, or find online. My favorite pinhole camera option for teaching kids about photography is made by Kelli Anderson and the MoMa, called This book is a camera. It has a beautiful design, comes with 5 sheets of Ilford photo paper, and all of the instructions you need to shoot and develop the photographs.
It’s the perfect design for kids. And because it’s only a single shot, you can take the photo and develop it at the same time to keep their attention. This is an especially fun project with young kids, around the ages of 8 or 9. It’s a great way to get them away from screens for a little while, and to show them a simple, safe, scientific experiment.
Once they grow older, you can start showing them the magic of other 35mm cameras, or simple toy cameras like the Holga/Diana+, which use 120 film.

Should I use photo paper or film negatives in a pinhole camera?
This is a very common question, because there are benefits and tradeoffs to both materials. They also come in a range of costs, look different, and have different lifespans.
Photo paper is great for teaching young kids film photography because you can immediately see the images develop under red light, whereas film negatives must be developed in total darkness. Film negatives are more expensive, but they create better images and can be used to make paper positives by making a contact sheet, or by enlarging in a professional darkroom.
Both film and paper negatives will need to be fixed to keep their images permanent. So if you want it to be a quick experiment, paper negatives can give you the chance to show your children the beauty of making film images cheaply, in a more disposable manner, as they’ll fog up over time. If it’s your first time, the cheaper option is to use photo paper. And then if your kid enjoys the process and wants to continue with it, you can start to determine if making the images permanent using the sodium thiosulfate recipe above, or switching to film negatives is the right for you.
What do I do with the negatives?
Whether you used photo paper or film to make the images, you’ll create a negative image. These are interesting to look at, but they’re hard to comprehend because our brains don’t work that way.
So once you’ve created an image, you’ll need a way to make it positive to show your kinds. The easiest way to do that is to use the free Kodak Scanner App on iPhone and Android. You can take a picture of the image, and it’ll instantly make it into a positive.
If you have access to photoshop, you can invert the image using Ctrl+I (Cmd+I on Mac) to easily turn it into a positive, and then do some of your own editing. If you don’t have Photoshop, free editing apps like GIMP can also invert negatives into positives. From there, you can print the image on your home printer, or get it printed professionally at your local print shop.
How to create a makeshift darkroom in your bathroom
When you’re first starting to teach your children about film photography, the first thing that you’ll need is a dark room to load and unload your film. If your kids are shooting 35mm, or 120 film, they’ll be able to load and unload in daylight. But, you’ll still need completely dark space to load the film into a developing tank.
The best place to load and unload your film with a pinhole camera is your bathroom. As long as it doesn’t have a window, it’ll be dark enough — just be sure to lay a towel at the bottom of the door to make sure there aren’t any light leaks. The best way to be certain there aren’t any leaks is to stay in the bathroom for a minute in total darkness. As your eyes get used to the dark, you’ll start seeing little beams of light creeping through.
A small amount of light creeping in won’t affect your film when loading or unloading your pinhole camera or developing tank. But if you can make out the details of your bathroom, like the edge of the sink, drawer handles, or the shower curtain rod, then it’s likely too much light. If you can make out the details of objects in the bathroom, your best bet is to purchase a changing bag. These can be found on Amazon for cheap, and will allow you to change your film in the light without any problems. I’ve been using this one for the past year with no problems, even when directly in the sun.
And that’s it! If you decide to try this out with your kids, I’d love to hear the results! Leave a comment, tag me, or send me a DM on Instagram! Or post about it on our growing Facebook group to get quick answers to your questions!

By Daren
Daren is a journalist and wedding photographer based in Vancouver, B.C. He’s been taking personal and professional photos on film since 2017 and began developing and printing his own photos after wanting more control than what local labs could offer. Discover his newest publications at Soft Grain Books, or check out the print shop.
Excellent article!
Thank you very much!