Black and white film is fun to use, but difficult to master. If you shoot black and white film the same way as color, you’re bound to create forgettable images.
We rely on color for so much of our daily lives, that it’s difficult to imagine the world in black and white. And especially with film, we won’t know if the images are interesting until they are developed.
As a wedding photographer, there’s a common joke that we only turn images black and white when the lighting is too harsh for color. But good photographers and editors know that there are many other places where black and white will make an image unforgettable.
With a few tips, it is easy to take incredible black and white images. Here are my strategies for taking black and white photos. This blog is designed for film photographers, but all of these tips work equally well for digital photographers, too.
1.Fill the frame
This is the most important tip for black and white photography. Filling the frame means getting as close as possible to your subject and ensuring that they are the dominant thing in the frame.
Get up close, or use a zoom lens to focus attention on the subject’s face, or an interesting element in the frame.
Isolate that subject, and you’ll create an image that is more powerful than it would be in color.
2. Look for compositions at night
At night, most human vision is essentially black and white.
By wandering around at night, you can see the world the same way your camera does when using black and white film. Then, you can start to visualize what makes a good composition without having to pay to shoot and develop test rolls of film, just guessing if the image works or not.
This is one of my favorite tips for new photographers because it’s really the easiest way to see an image, and to learn what to look for when shooting black and white film, or just black and white photos in general.
And if you’re going out shooting at night, ensure you’re exposing your film correctly at night by reading this article. 
3. Don’t photograph the sunset — but use sunset light
One of the hardest lessons to learn is that sunsets don’t look good in black and white because you can’t feel the warmth of the glowing sunlight. Yet, many of the best images are still taken in sunset or sunrise light.
The reason is because sunset and sunrise light casts long shadows and creates a pleasing contrast in your images.
Use the long shadows cast by the sun to create leading lines and contrast in your images. The contrast and soft light at sunset also make it easy to create images where your subject is bright and the background is dark — which is the easiest way to create a memorable image.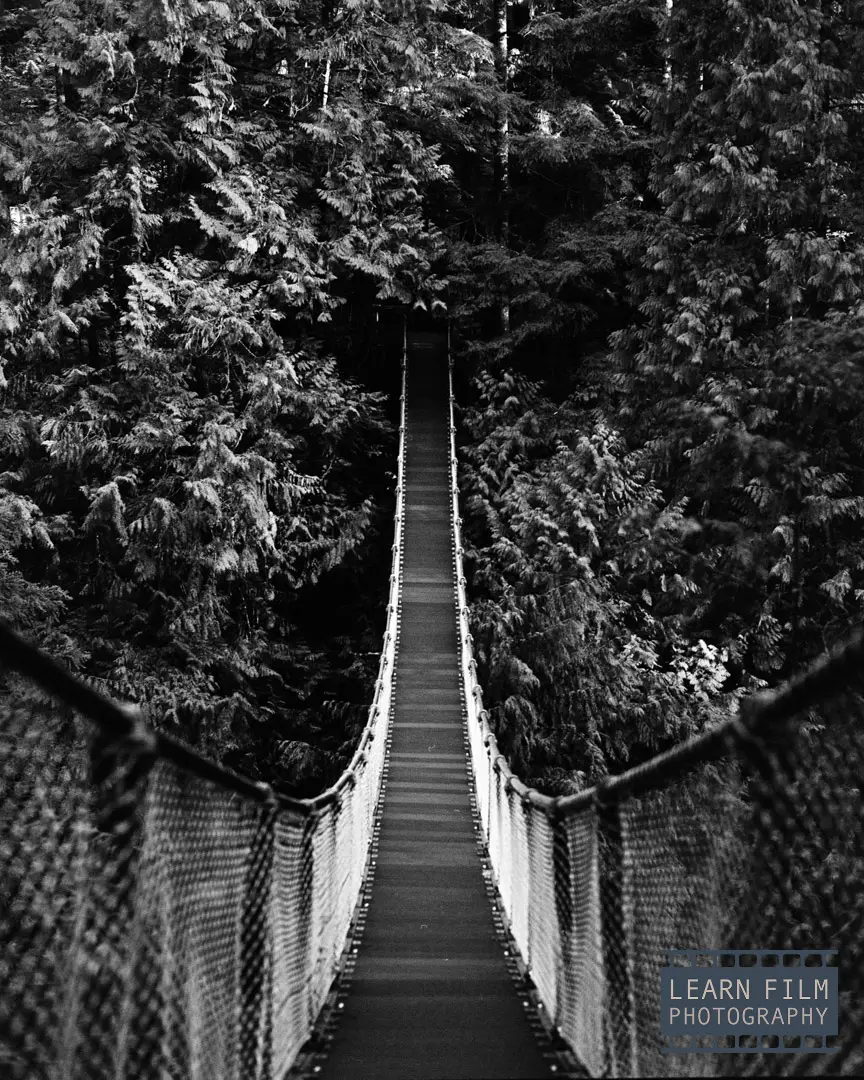
4. Lean into contrast
Without color, photographers have to lean into contrast to make dramatic images. Black and white photography is one time where it makes sense to crush the blacks, bring the whites slider to +100 in Lightroom Classic, and lean into heavy curves.
Street photography especially does its best with high contrast images, since this form of photography is more about capturing reality than making people look pretty.
Landscape photographers also benefit from contrast to bring out textures in rocks and foreground elements around them. These textures will be especially prevalent at sunset and sunrise when the angled light extends the shadows. 
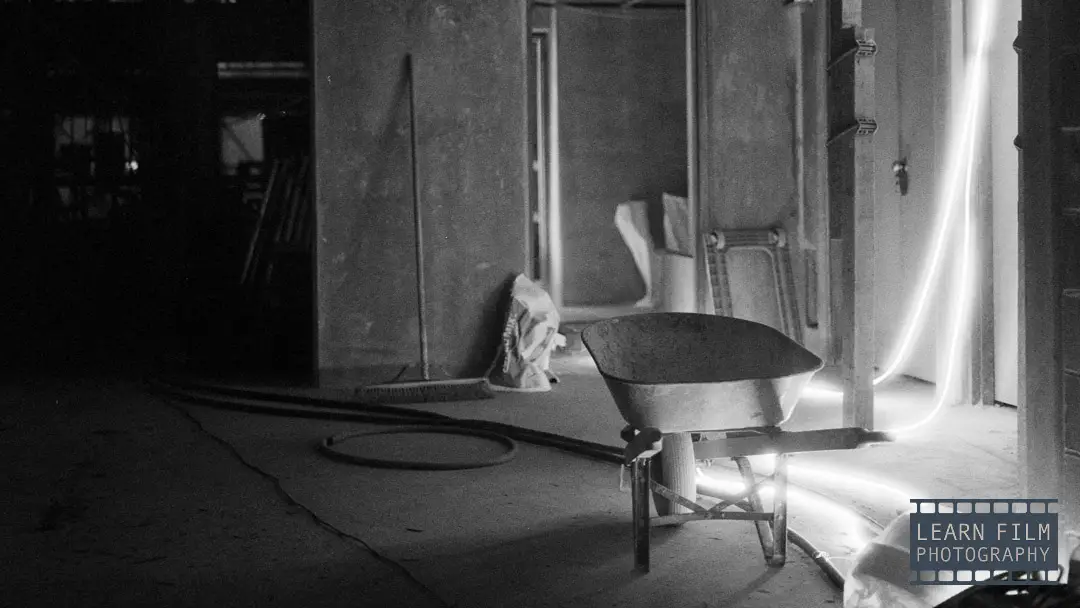
5. Brighten the subject, darken the background
Ansel Adams once said Dodging and Burning are tools used to fix the mistakes god made when establishing tonal relationships. Adams was a master printer in the darkroom and firmly believed in the power of editing to make better photographs.
One of the best ways to make a powerful image is to make your subject brighter than the rest of the image. Our eyes are attracted to the brightest parts of the image and don’t tend to linger too long if the subject is as bright as everything else in the image.
Have you ever tried to take a photo of a flower in black and white? If you go out in nature, it’s hard to take a stunning black and white photo of a flower, because flowers are adapted to use color (and scent) to stand out from their background.
If they were the same color as the branches and leaves, nothing would ever find them — and that’s exactly what happens when you take flower photos in the bush on black and white film.
Powerful b&w flower photos are usually taken in a studio, using either window light or controlled studio strobes to make the flowers bright and the background dark. 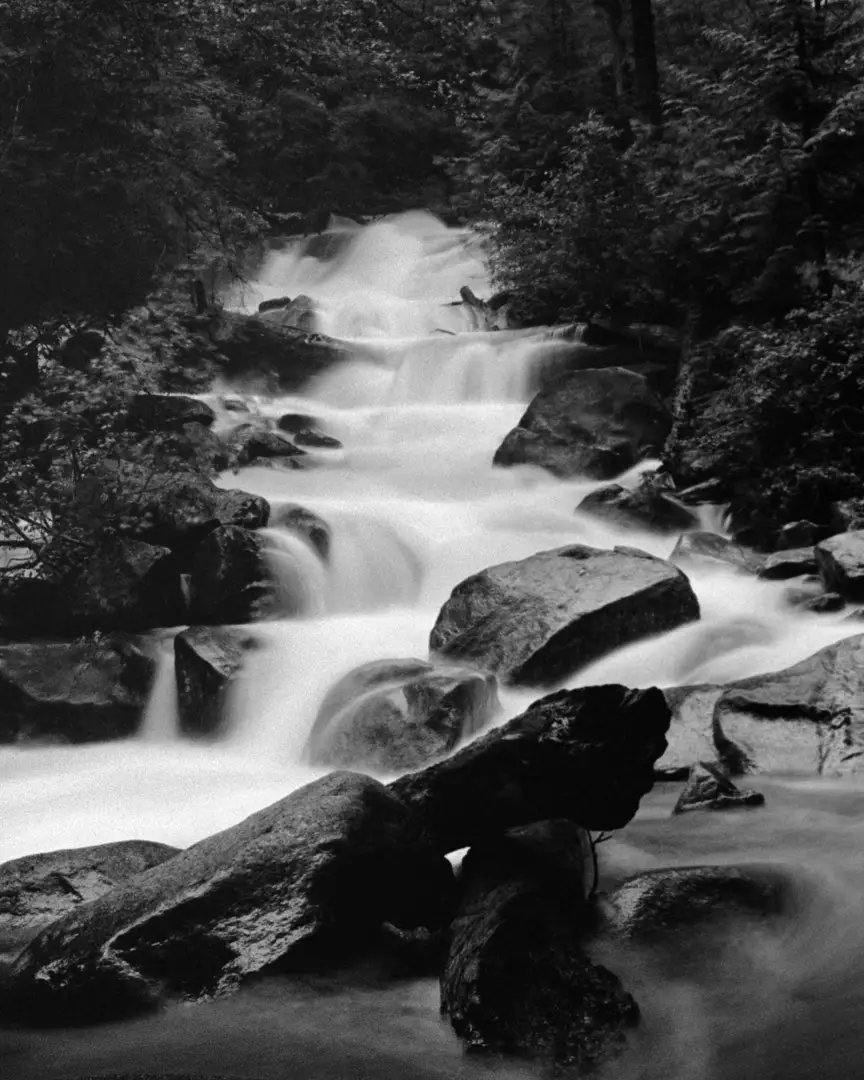
6. Create negative space using long exposures or focus blur
If you can’t make the background darker, like when shooting landscapes, the next best technique is to use negative space.
The human eye also likes to focus on sharp details. Anything that’s blurry, like soft ocean water, or fog will force our eyes to the sharper parts of the image. Use long exposures to blur anything that’s moving in your image to direct the attention straight to your subject, like in the image above at Whytecliff Park in BC.
To take long exposures in the middle of the day, you’ll need to use a tripod with a set of neutral density filters. If you’re shooting film, you’ll need to make an exposure adjustment to account for reciprocity failure in low light. Learn all about using neutral density filters with film cameras using the proper exposure settings here. 
7. Use a red filter or polarizing filter to add contrast to the sky
With film, using a red filter or a polarizing filter will create drama in the sky. Red and polarizing filters both block out the blue light (though in much different ways) and make a blue sky look black against the white clouds.
This effect adds significant drama to your images. And with films like Ilford SFX 200, Rollei Retro, or Japan Camera Hunter StreetPan 400, you can use a deep red filter with the extended infrared sensitivity to create almost infrared-tyle images, where foliage is white against a dark sky.
Just be aware that every filter will cut out a certain amount of light. If you have a TTL (through the lens) light meter built into your camera, then you’ll be able to shoot normally. Otherwise, with an off-camera light meter (or an app on your phone), you will need to make exposure adjustments to ensure you’re creating usable negatives.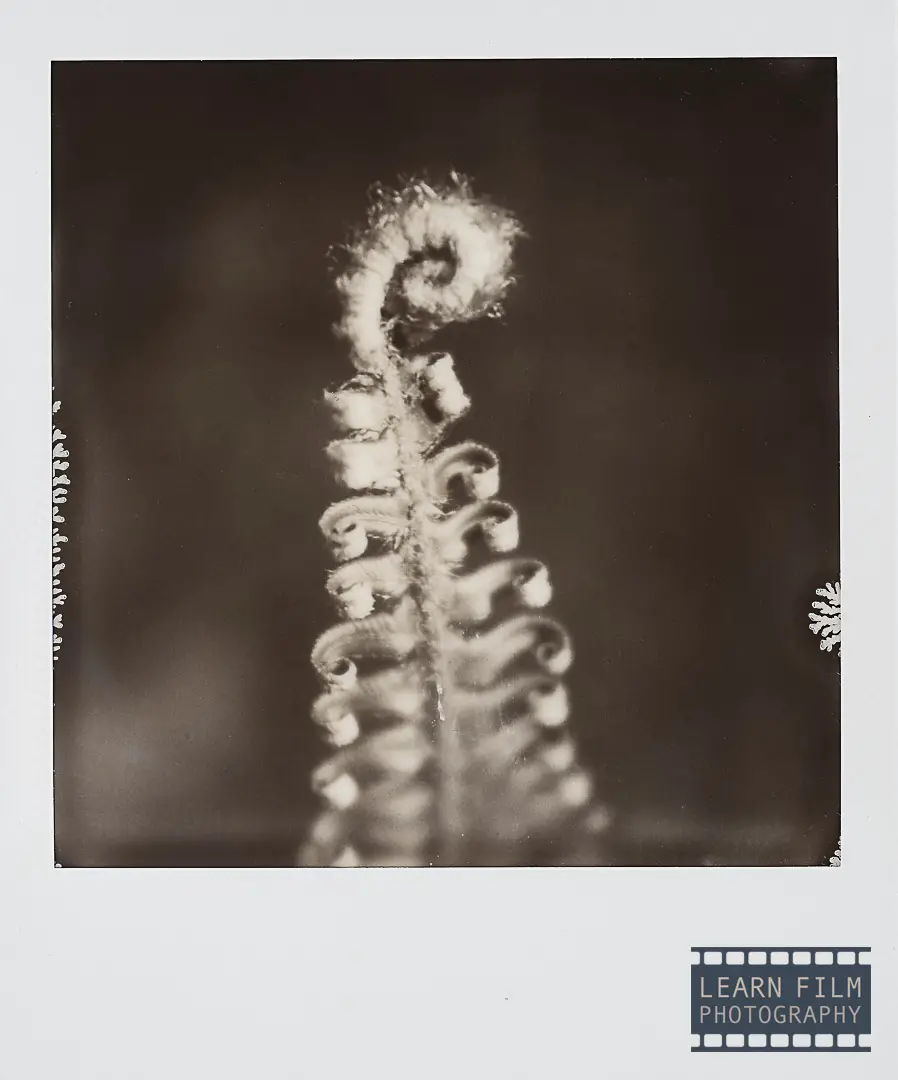
8. Choose the right Black and White film for your situation
In 2022, there is still an astounding variety of black and white film on the marketplace. Each one offers something different for photographers, whether it’s creating a fine-grain, high-resolution experience, or having extended infrared sensitivity for use with filters.
In most cases, a roll of HP5 or Tri-X will be all you need to make incredible black and white film images. These two film stocks are the most versatile, with HP5 being an exceptional film stock for pushing and pulling.
Street photographers will get incredible results with films like Japan Camera Hunter StreetPan 400 Learn Film, which has some built-in contrast with an exceptional ability to cut through fog and haze to create incredibly detailed images.
Landscape photographers who use a tripod invariably prefer the look of low-iso films like Ilford Delta 100, or Pan-X. Slower films have extremely fine grain and greater resolution than faster films.
And portrait photographers will love using Ilford Delta 3200. This is the fastest film on the market available in both 35mm and 120 varieties. Ilford Delta 3200’s film speed is actually closer to ISO 1000, meaning it can create beautiful results when used anywhere from ISO 600 to 3200. Though images will be less dense beyond those values.
And there are still plenty of other black and white film options out there for photographers. See a list of black and white films and their best uses in this article.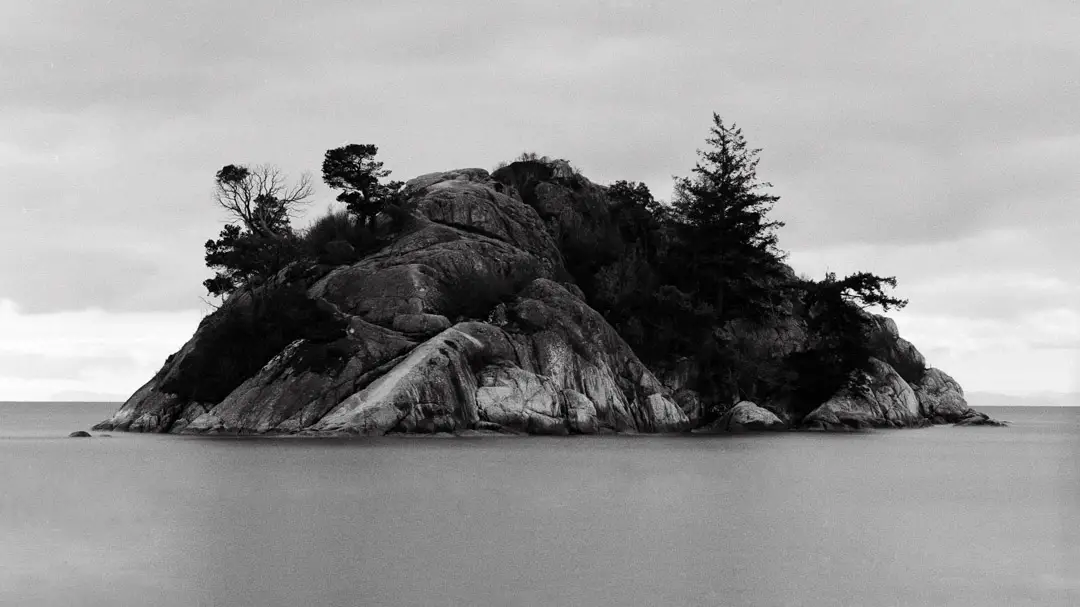
9. Using the right B&W film developer for your photos
There are almost as many varieties of film developers on the market as there are film varieties themselves. All of them have their own benefits and drawbacks — there is no such thing as a perfect film developer.
The developer I recommend the most is Black, White, and Green by Flic Film. This developer uses Phenidone and vitamin c to develop film, making it one of the more environmentally friendly film developers. BW&G gives film a relatively fine-grain appearance and boosts shadow detail, making it fantastic for pushing film.
Black, White, and Green also comes in a long-lasting, concentrated liquid format, making it easier to use than most other developers on the market, which may only have a 6-month shelf life after opening.
The only downside is that Black, White, and Green isn’t available everywhere. When you don’t have access to that incredible developer, the next best solution is Rodinal. Rodinal is another liquid developer that will last nearly a lifetime on your shelf. This developer will give your images the maximum sharpness possible by accentuating the grain making it a perfect developer for street and landscape photographers.
See the real-life difference between some of the most common film developers here.
Final thoughts
Thinking in black and white isn’t easy, because we don’t naturally see the world that way. Bu you will create memorable images if you follow a couple of techniques, like finding images with a defined subject in the highlights, and negative space or a dark background.
Getting the hang of black and white is so powerful, because there aren’t nearly as many photographers doing it well. If you can be one of them, it’s easy to make this your style and stand out among the crowds of photographers around the world.
Most of my favorite images in my portfolio are taken in black and white, because I find it the most interesting and challenging way to compose images. As well, it’s more fun to develop and print at home in black and white.
Do you have any tips for shooting in black and white that I missed here? Let me know down in the comments below!

By Daren
Daren is a journalist and wedding photographer based in Vancouver, B.C. He’s been taking personal and professional photos on film since 2017 and began developing and printing his own photos after wanting more control than what local labs could offer. Discover his newest publications at Soft Grain Books, or check out the print shop.
Hi Darren just came across your tips for black and white photography I’ve been a keen amateur since last January and I find it challenging so thank you for the tips
Thanks so much for that, Sean! Hope this article helps you take some awesome black and white images!